In this document, we are not going to explain what Embeddings or Vector DB is; we will do that in a different document page or a dedicated post.
In this page, you learn how to set up a new Embedding environment in the KimaAI plugin and how to sync your posts/pages or any other custom types in the vector DB.
Configure the embed environment
To configure your first embed environment, go to the WordPress dashboard → KimaAI Settings → Embedding → Embed Envs.
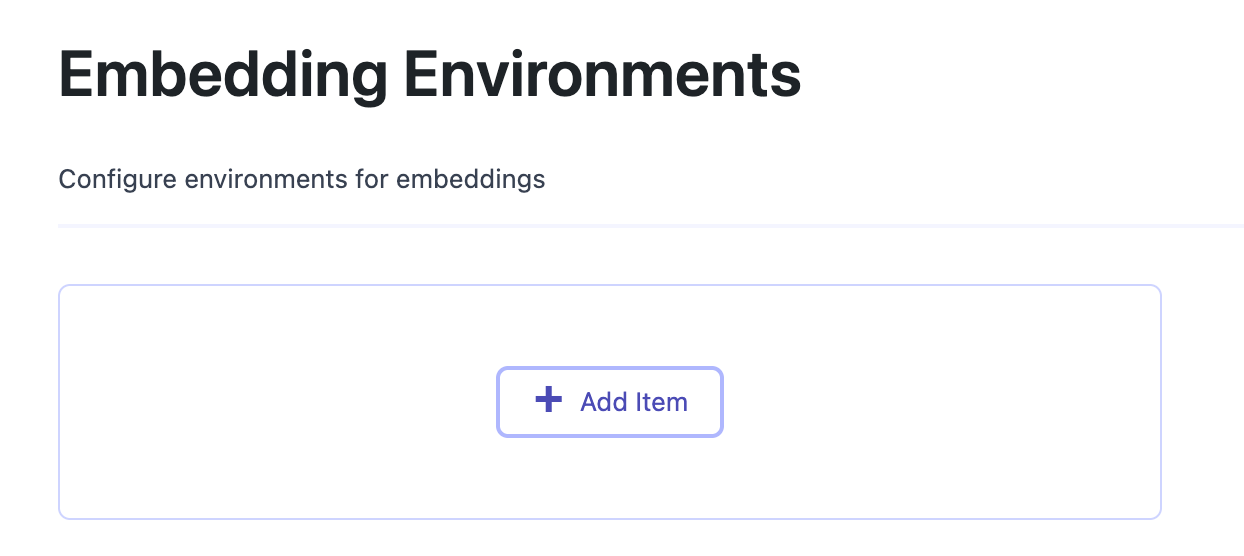
Click on “Add Item” to see the following settings:
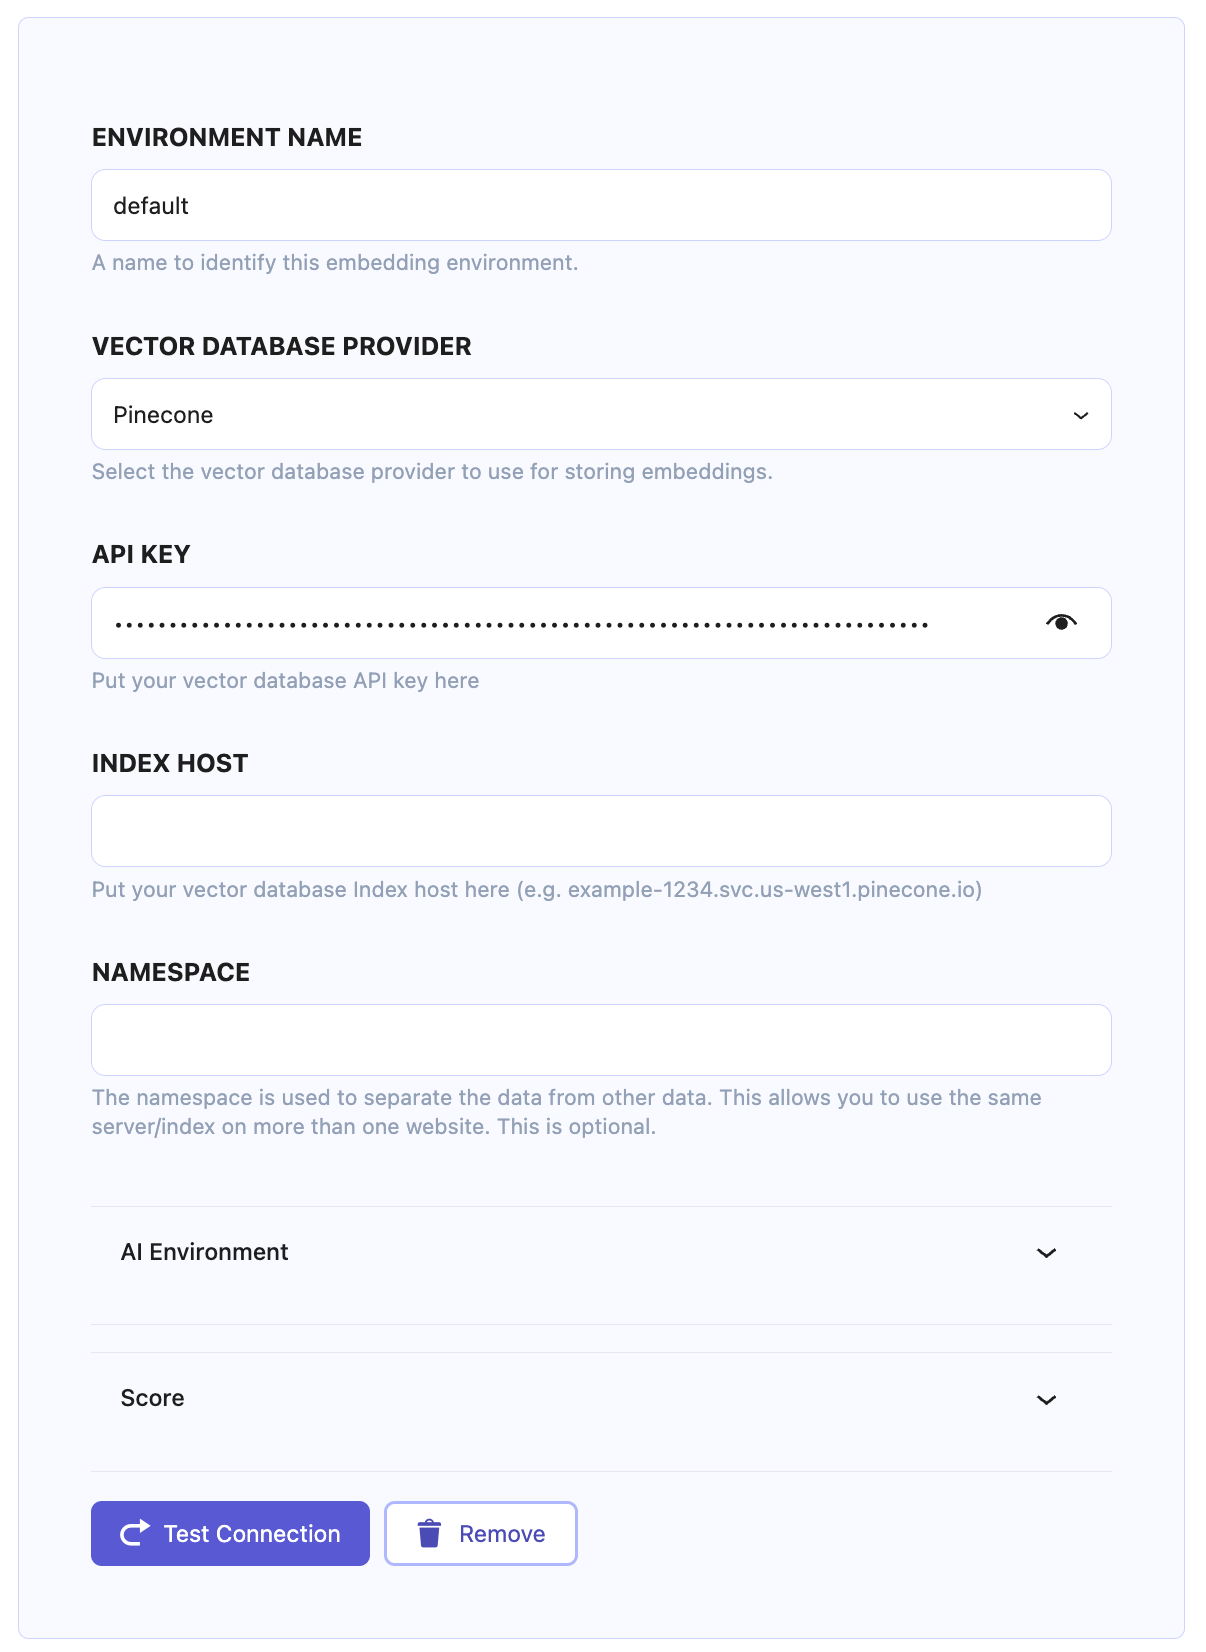
Embedding Environment configuration fields
- Environment Name: A name to identify this embedding environment.
- Important: Only add id like name here (only letters and underline are allowed)
- Vector Database Provider: Select the vector database provider to use for storing embeddings.
- Providers we currently support:
- Pinecone (It is highly recommended to use this provider)
- Qdrant
- Providers we currently support:
- API Key: Put your vector database API key here
- Index Host: Put your vector database Index host here (e.g. example-1234.svc.us-west1.pinecone.io)
- Important: For now, keep this field empty
- Namespace/Collection: The namespace or collection is used to separate the data from other data. This allows you to use the same server/index on more than one website.
- Important: For now, keep this field empty
After configuring these 3 options, now hit the “Test Connection” button at the bottom. After doing so, if your API key is fine, you will see the green “Connection Successful!” message.

Choose the AI environment
For this step, you should first configure an AI Service; if you didn’t do so, check out this document → Configure AI Services.
After you have configured the AI Service, it’s time to choose the AI Environment to use for generating embeddings in this embedding environment. Open up the AI Environment tab in the Embedding Environment settings, like the following:
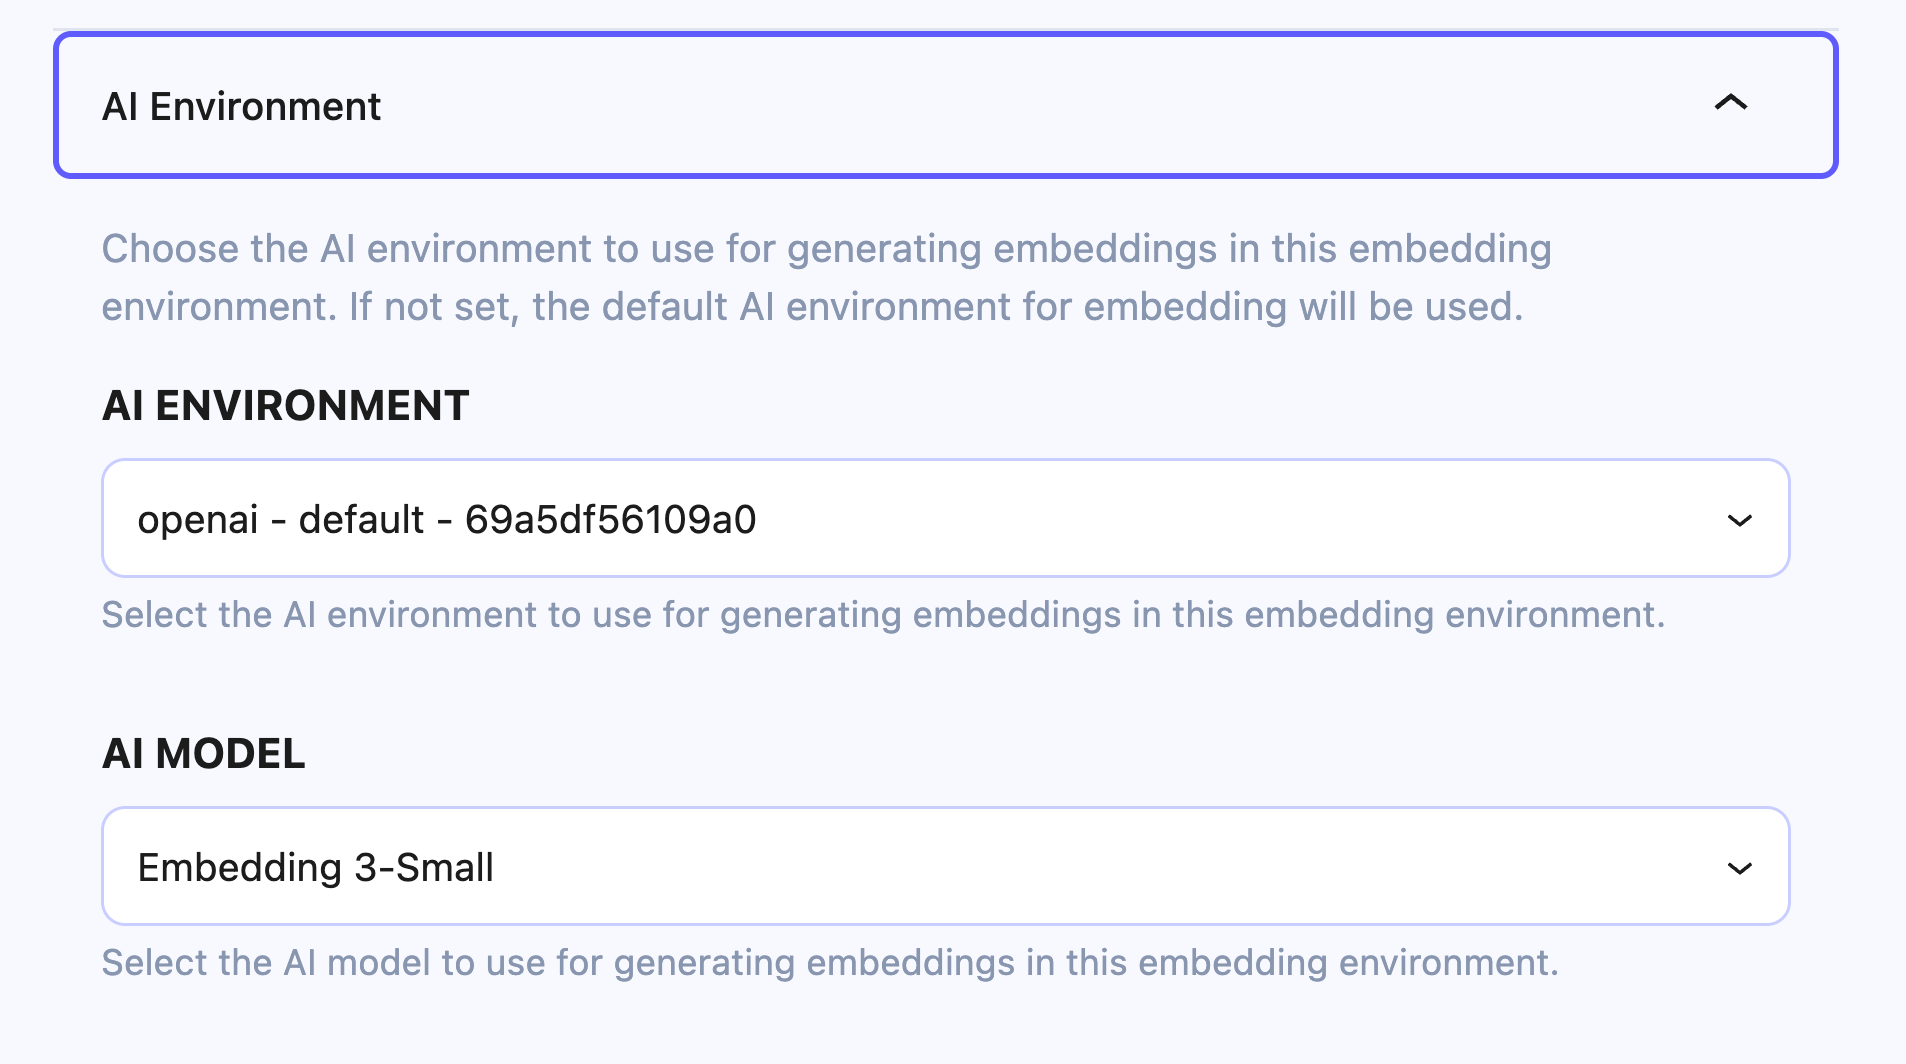
- AI Environment: In this select field, you will see all the AI environments that you created here → AI Services, Choose one. (OpenAI is recommended)
- AI Model: Choose an embedding model from the list. The Embedding 3-Small model is a good choice (Good price and acceptable quality)
Now hit the save button and continue to the next step.
Check the automatically created collection
Now, navigate to WordPress dashboard → KimaAI Settings → Embedding → Sync → Collections.
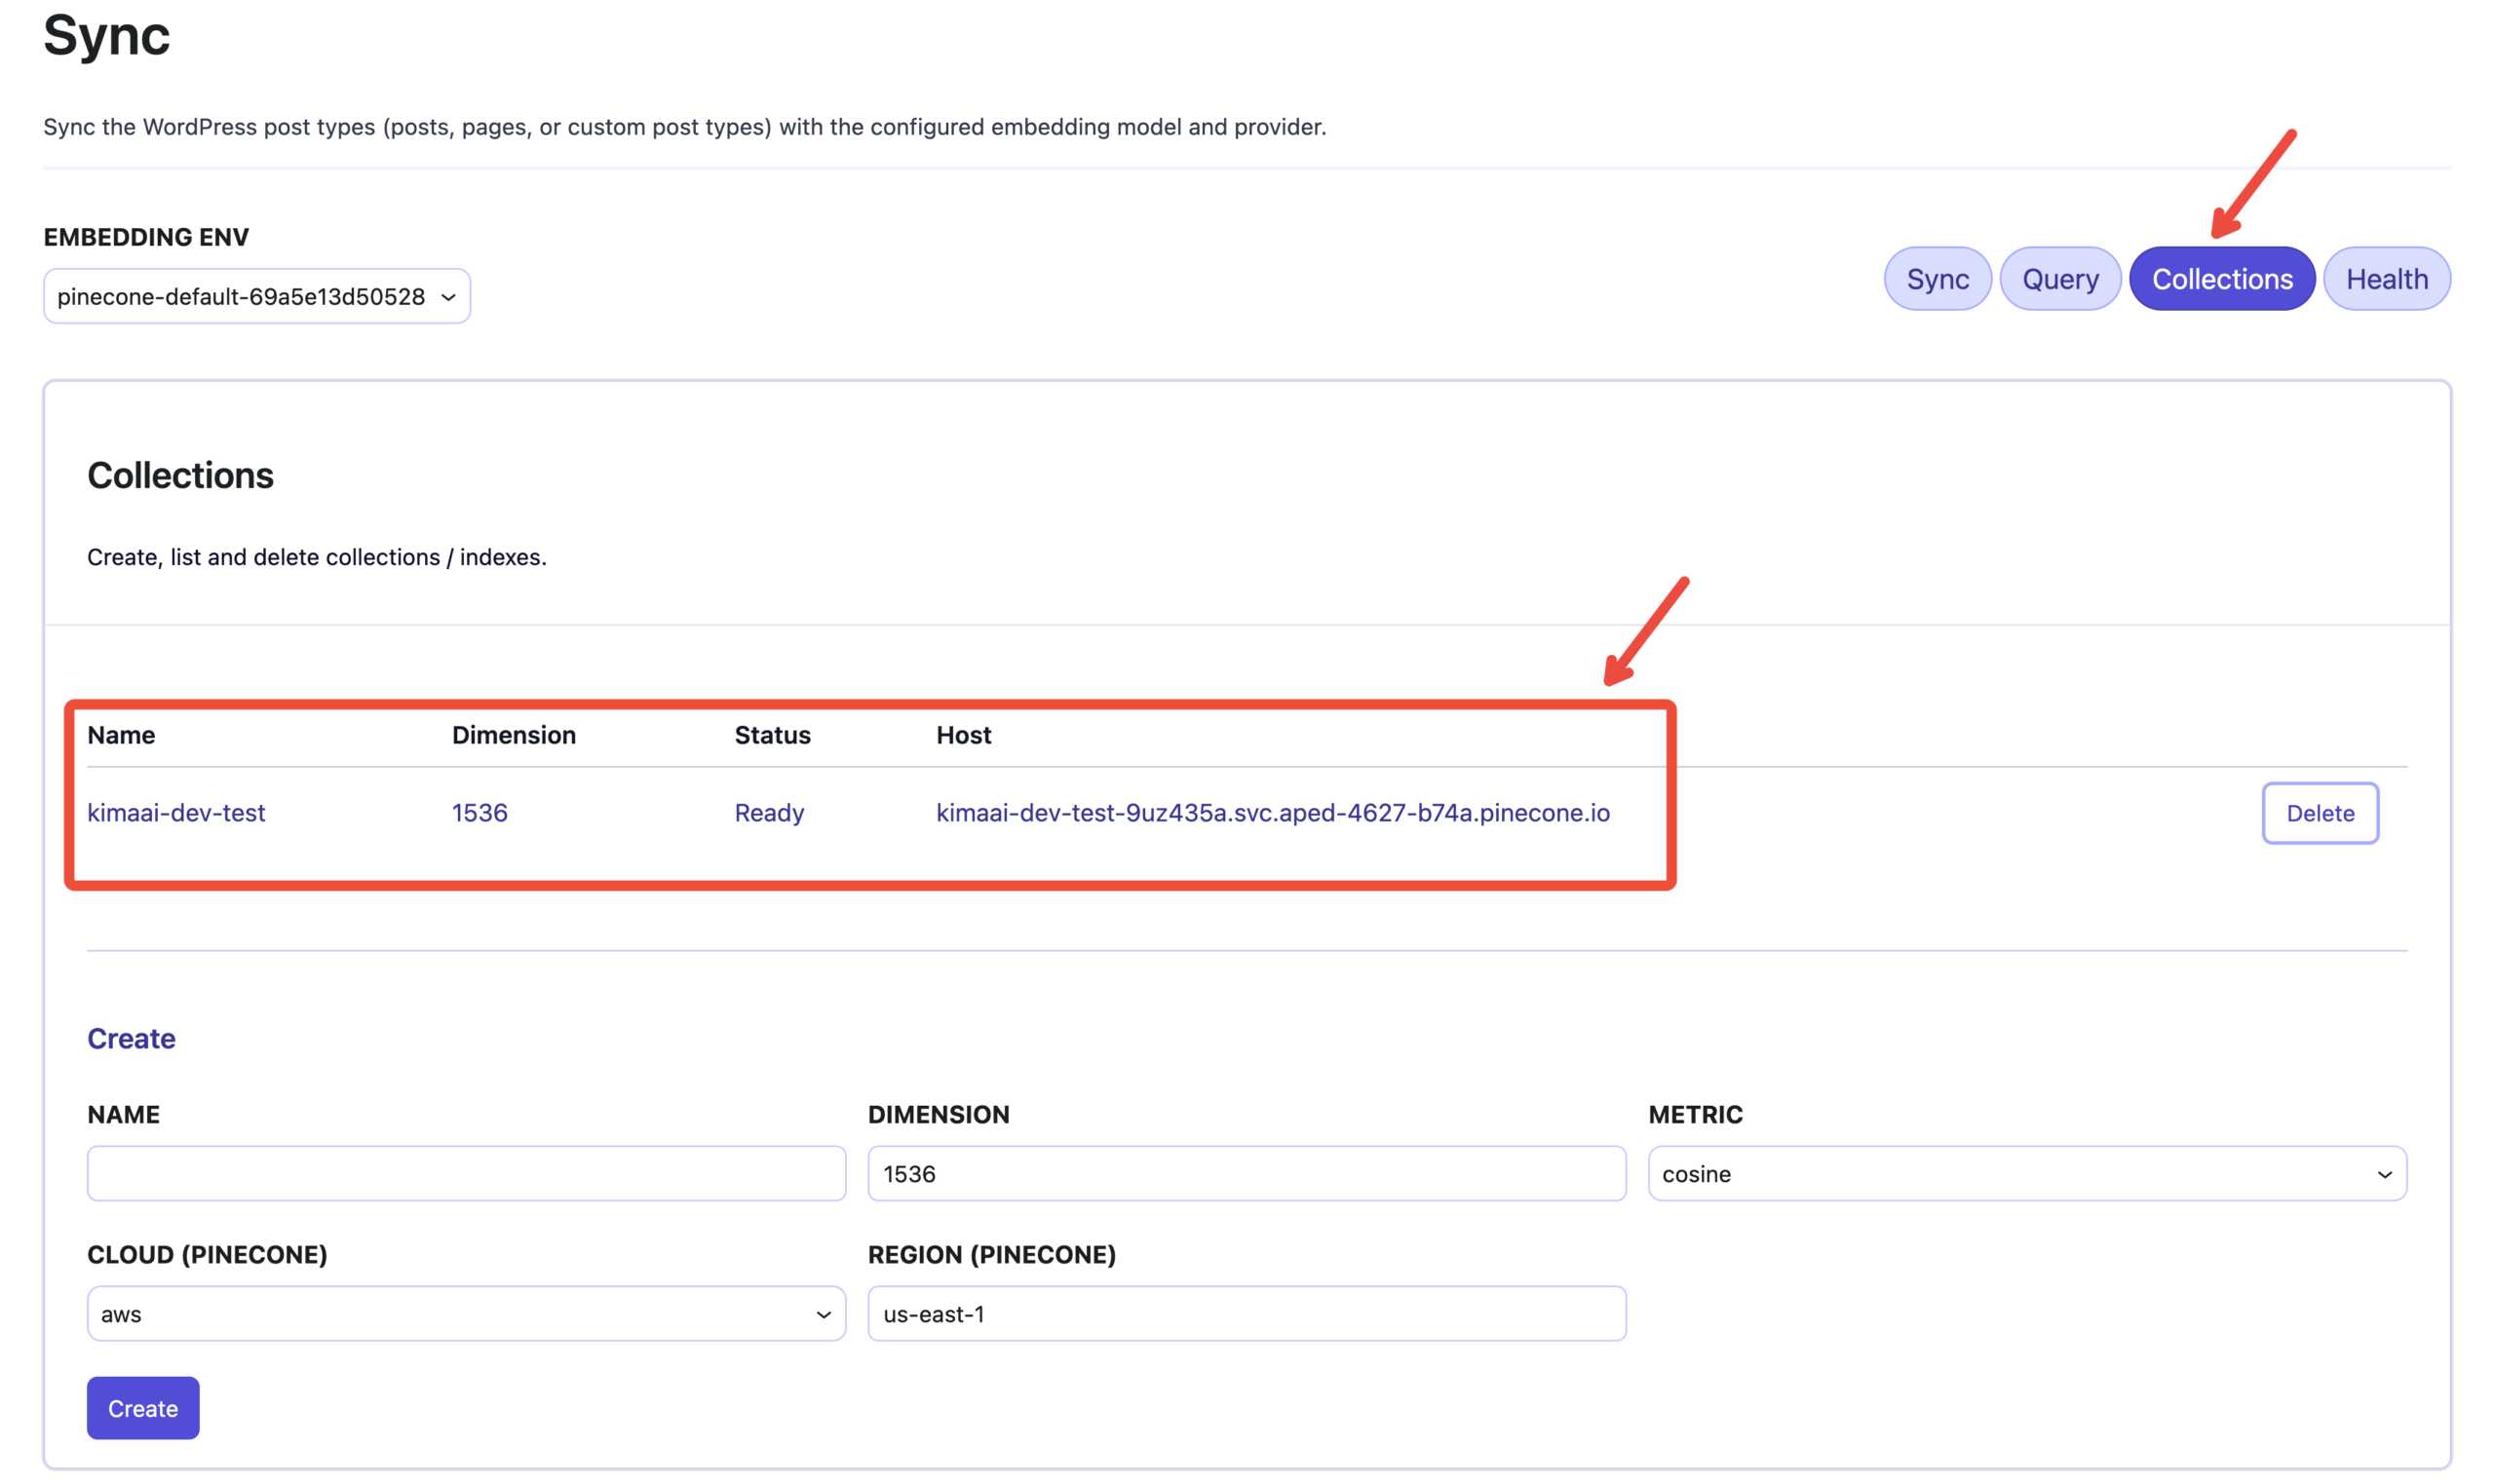
As you can see in the above screenshot, you should see an index/collection that has been created automatically during the “Test Connection” action with the following details:
- Name: The name will be generated based on your website domain, for instance:
yoursitedomain-com.- In our case, we have a local dev with the domain: https://kimaai-dev.test, and as you can see, the index name is
kimaai-dev-test
- In our case, we have a local dev with the domain: https://kimaai-dev.test, and as you can see, the index name is
- Dimension: The recommended dimension for our use case is 1536.
- If you want to create an index with a different dimension, you can use the “Create” section, which we will get to later.
- Status: Ready
- This information comes from the Vector DB provider
- Host: This will also be generated automatically by the Vector DB provider
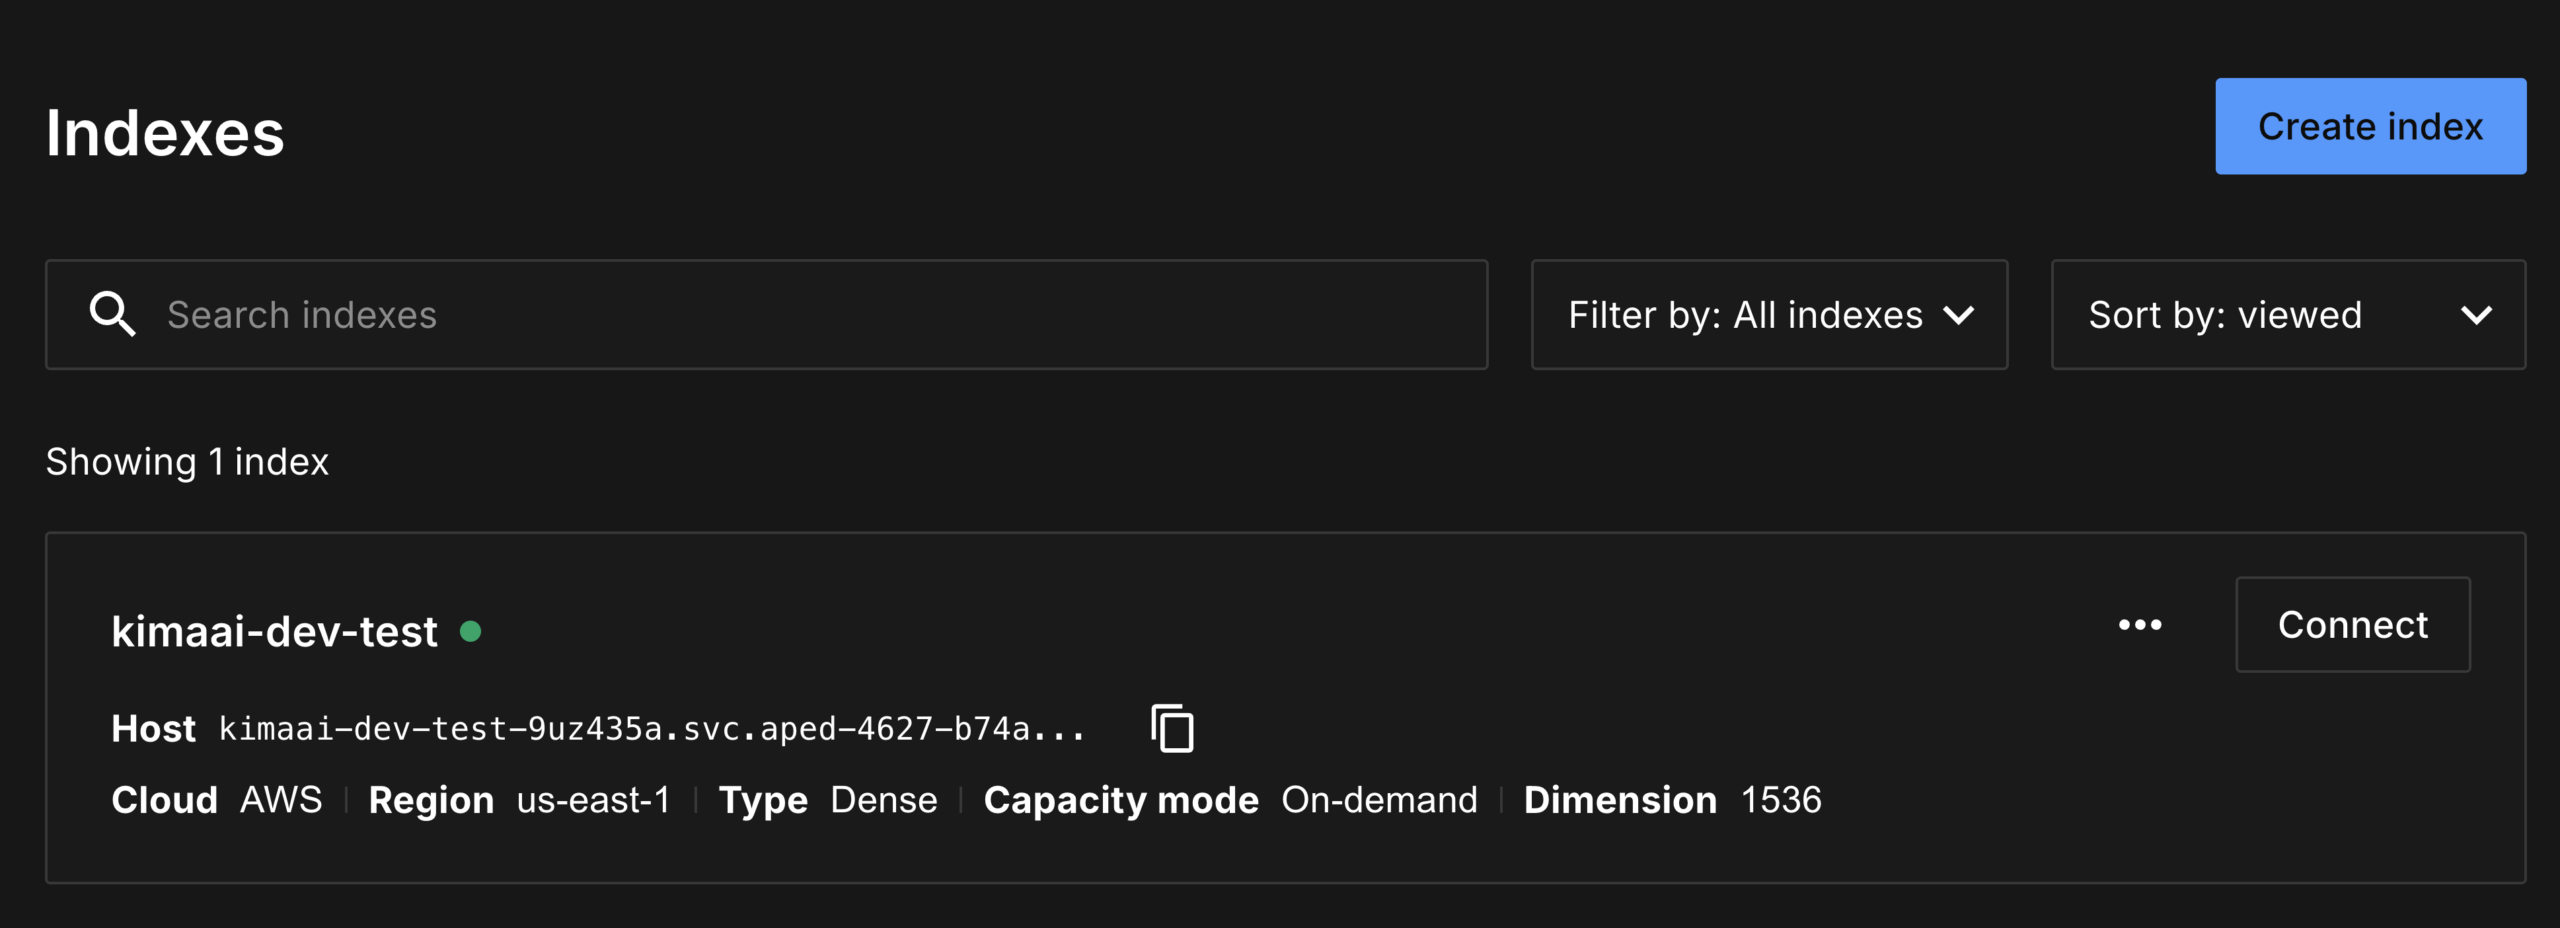
Let’s also check this in the Pinecone dashboard
If you log in to the Pinecone dashboard, you can see the created index.
Sync the website content
Now, click the “Sync” tab to open the embedding sync panel and start syncing data with the Vector DB.
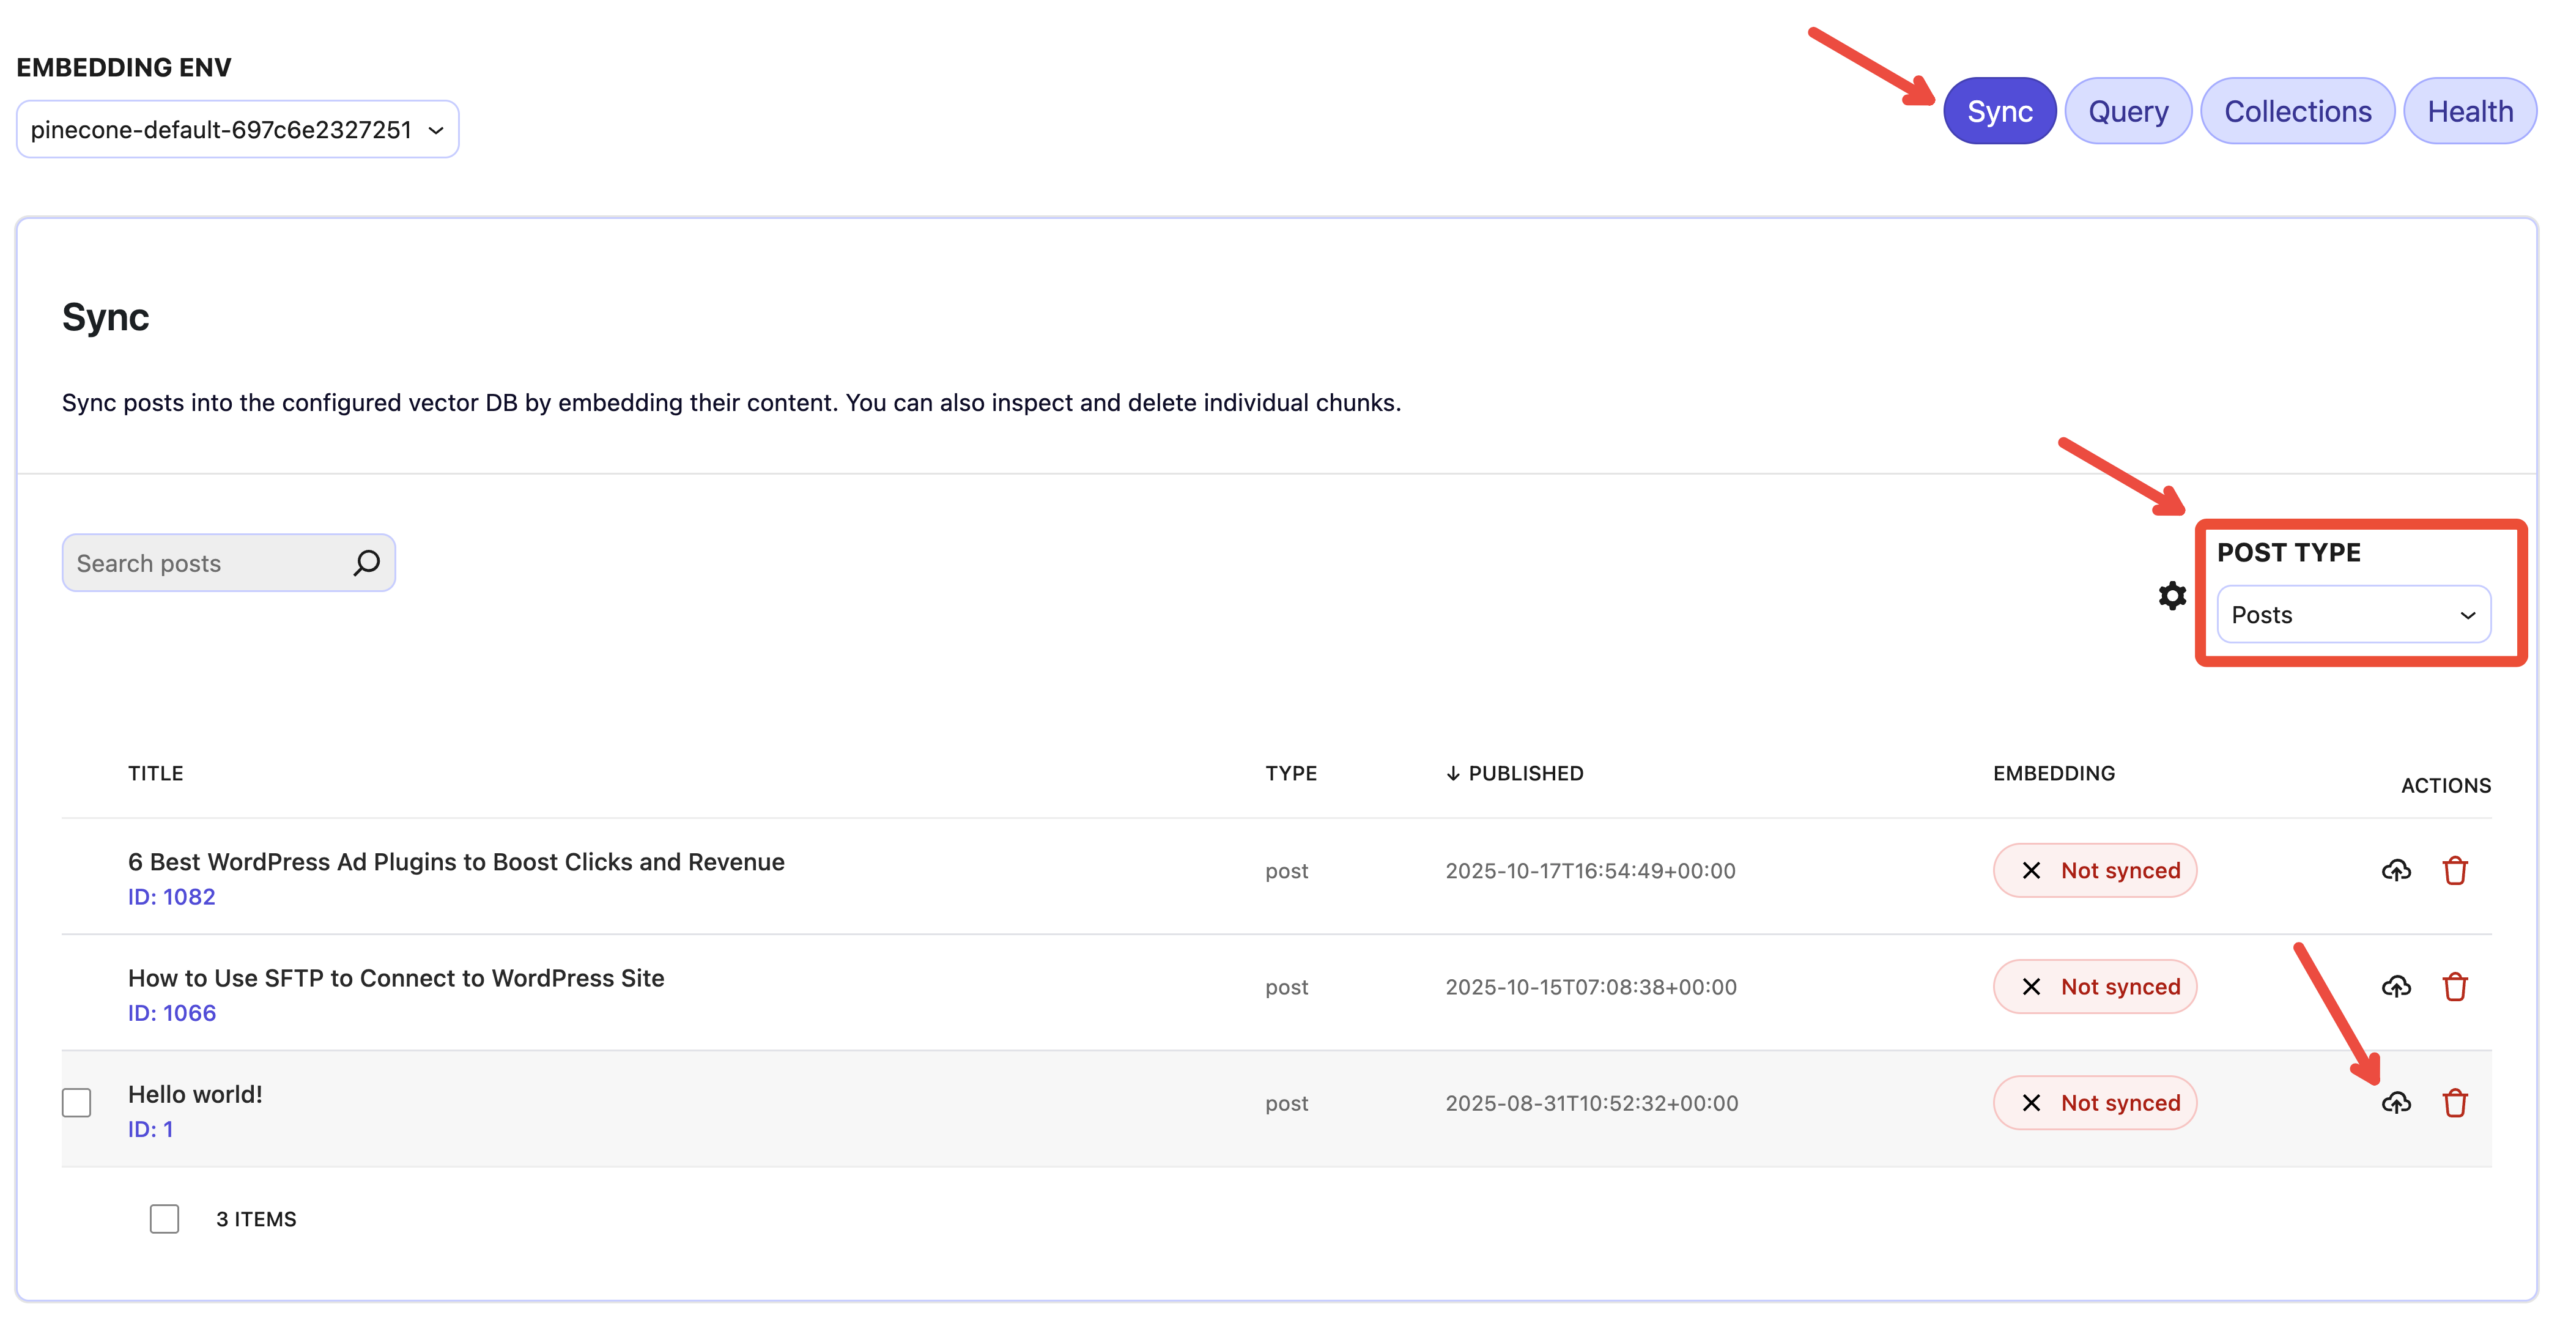
- Post Type: Choose the post type that you want to sync
- Sync button per post: Click on the sync button for the post that you want to sync.
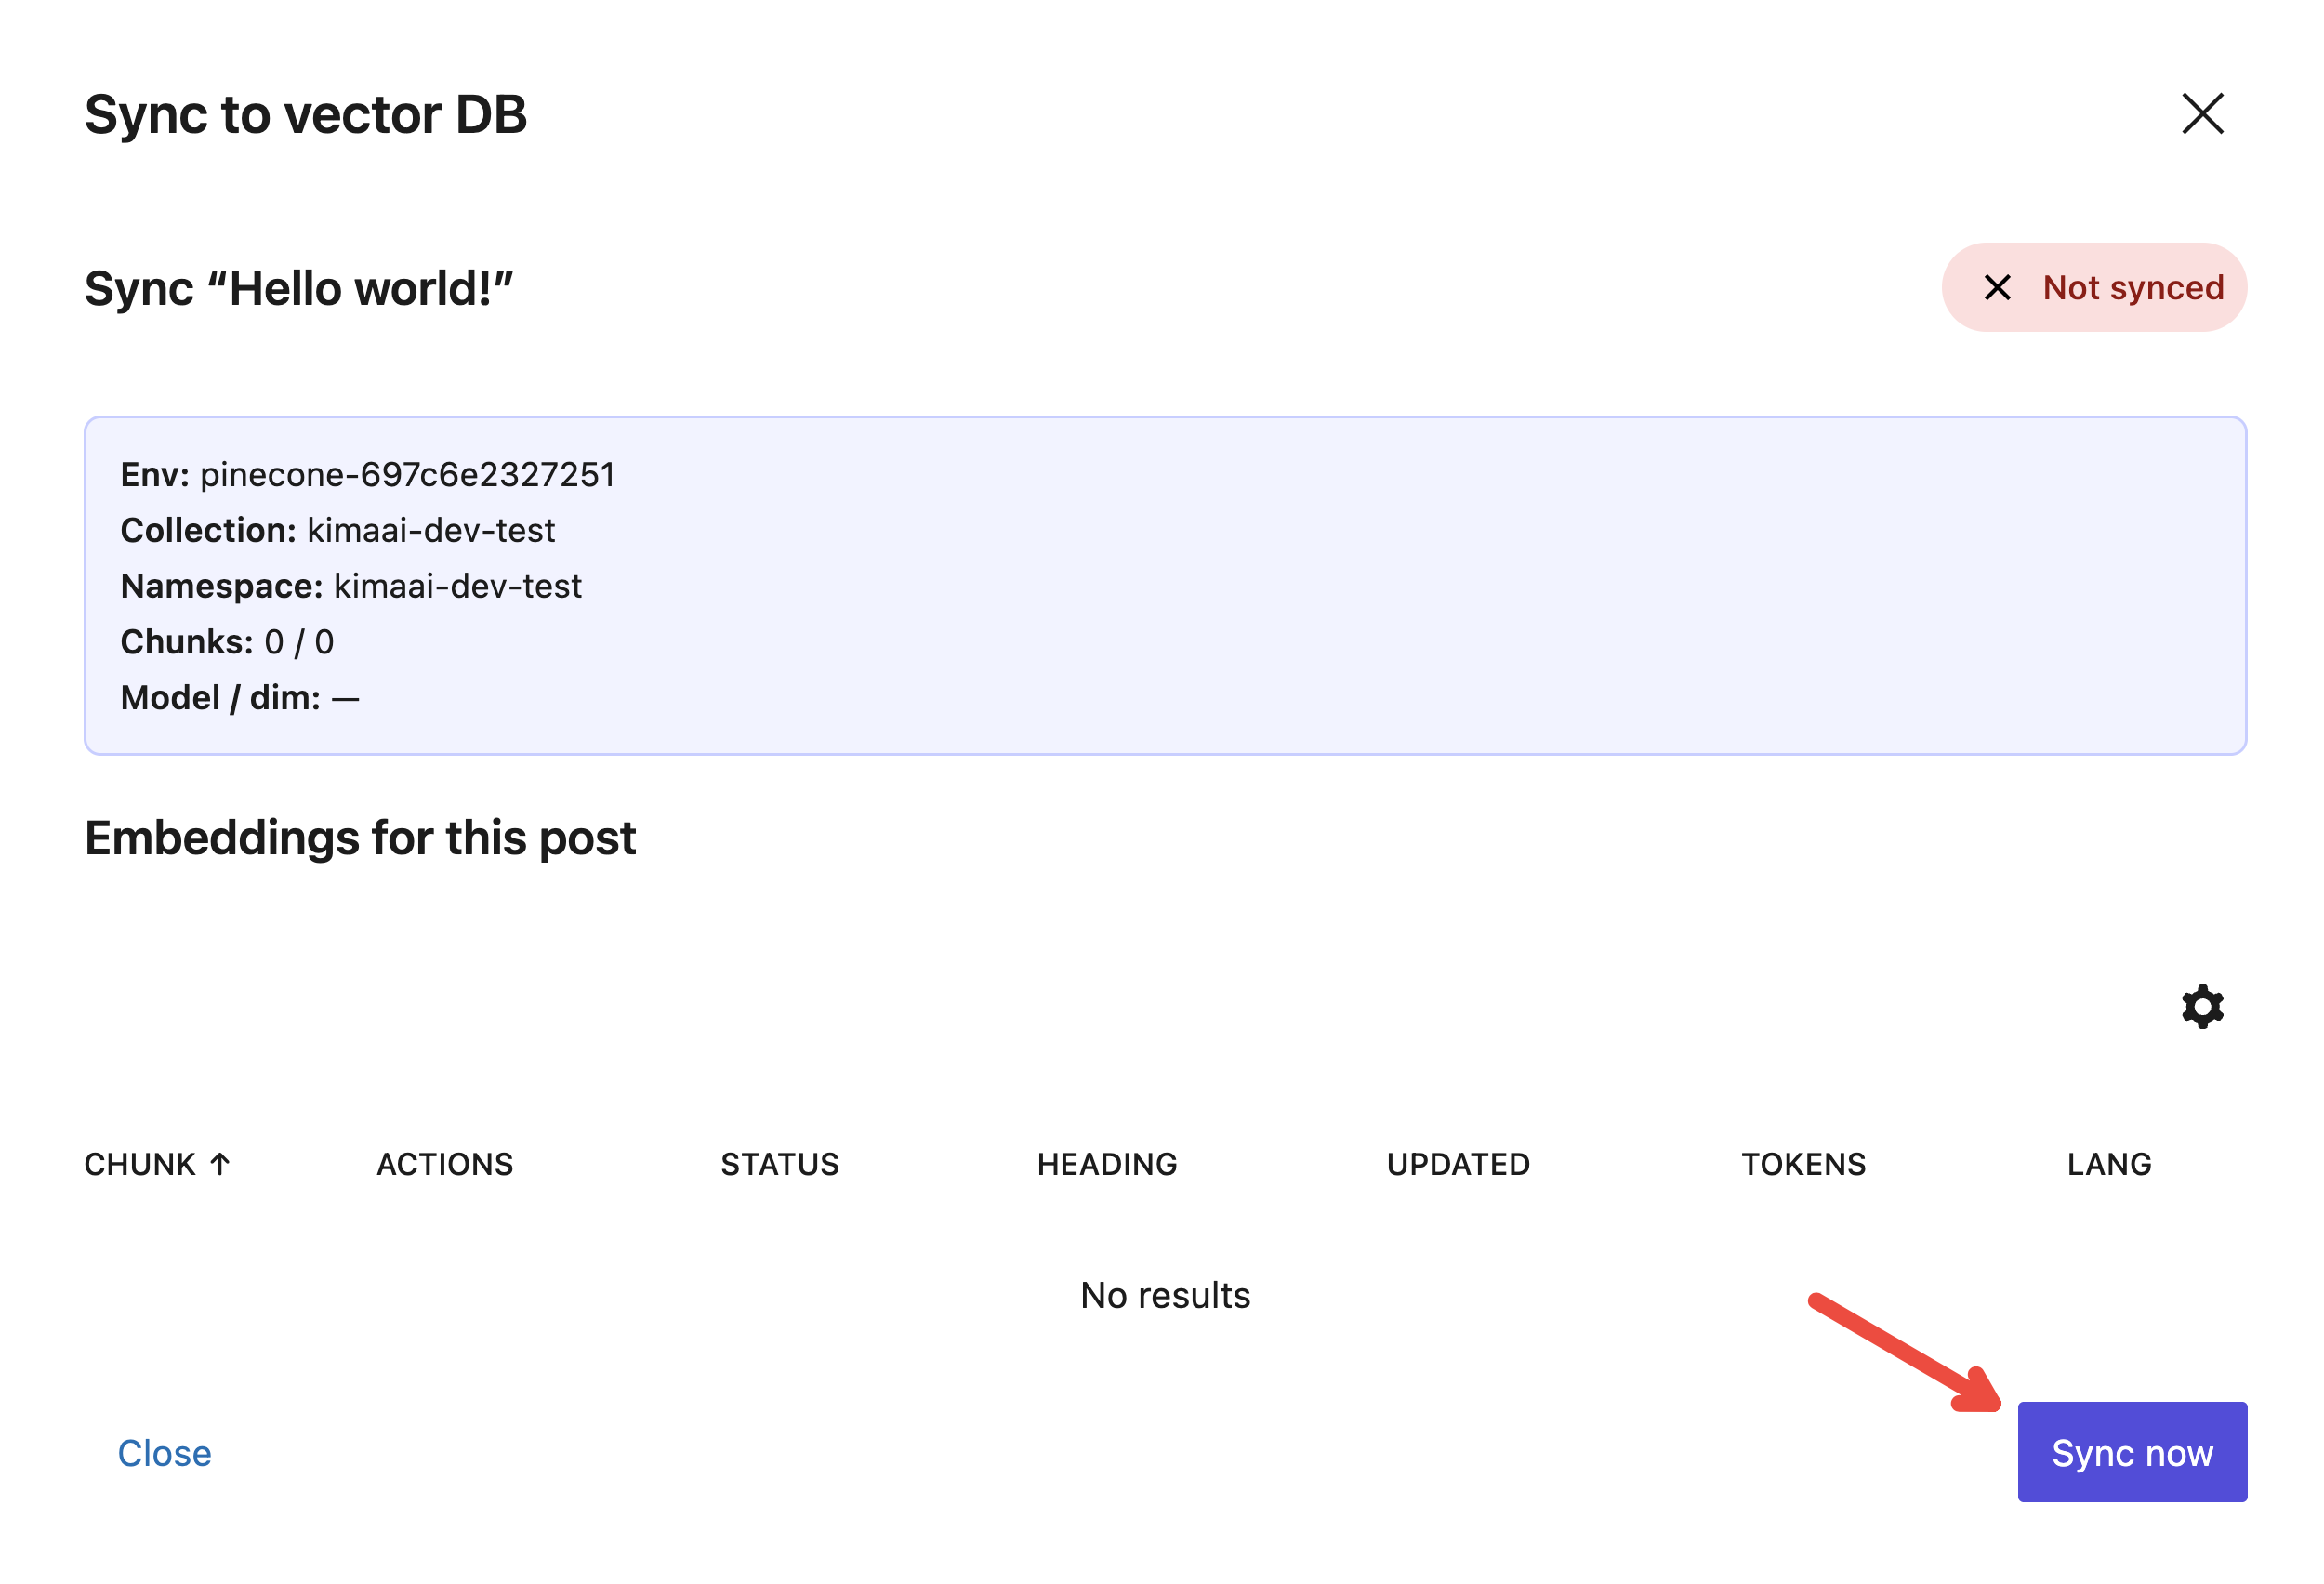
After doing so, you should see a popup opens like the following. Click on the Sync now button.
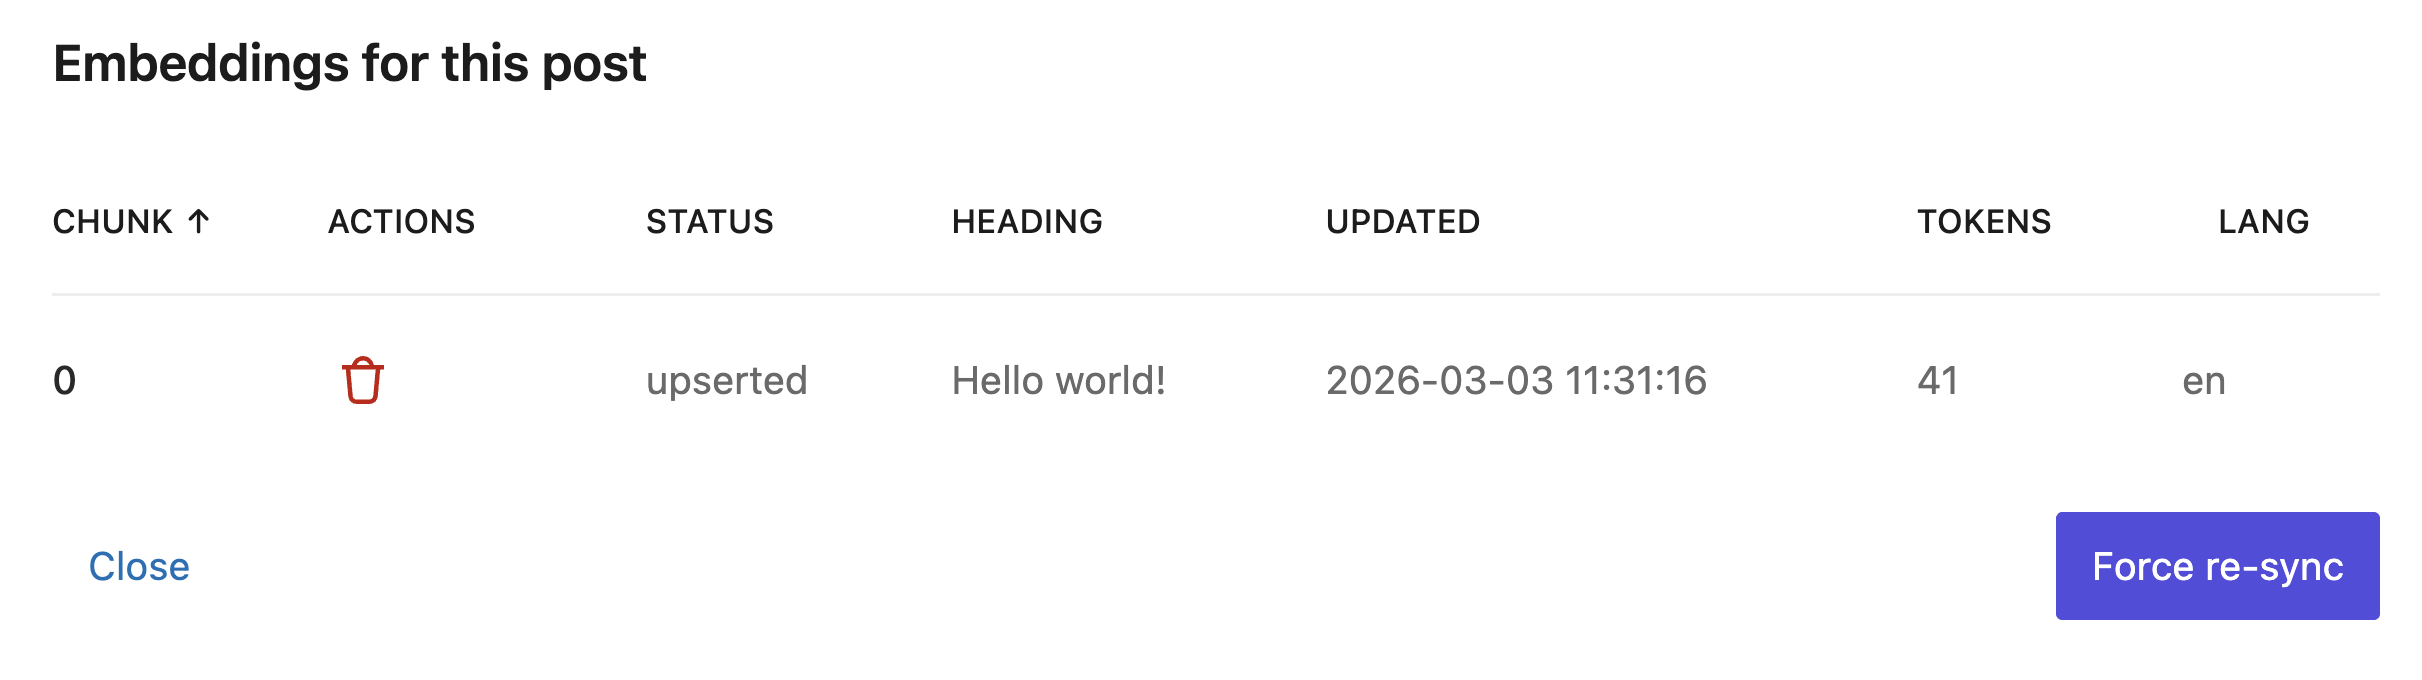
After doing so, based on the post content length, you should wait a bit, but eventually, in the pop-up bottom, you will see the post chunks being upserted into the Vector DB.
Let’s also see this embedding inside the Pinecone dashboard
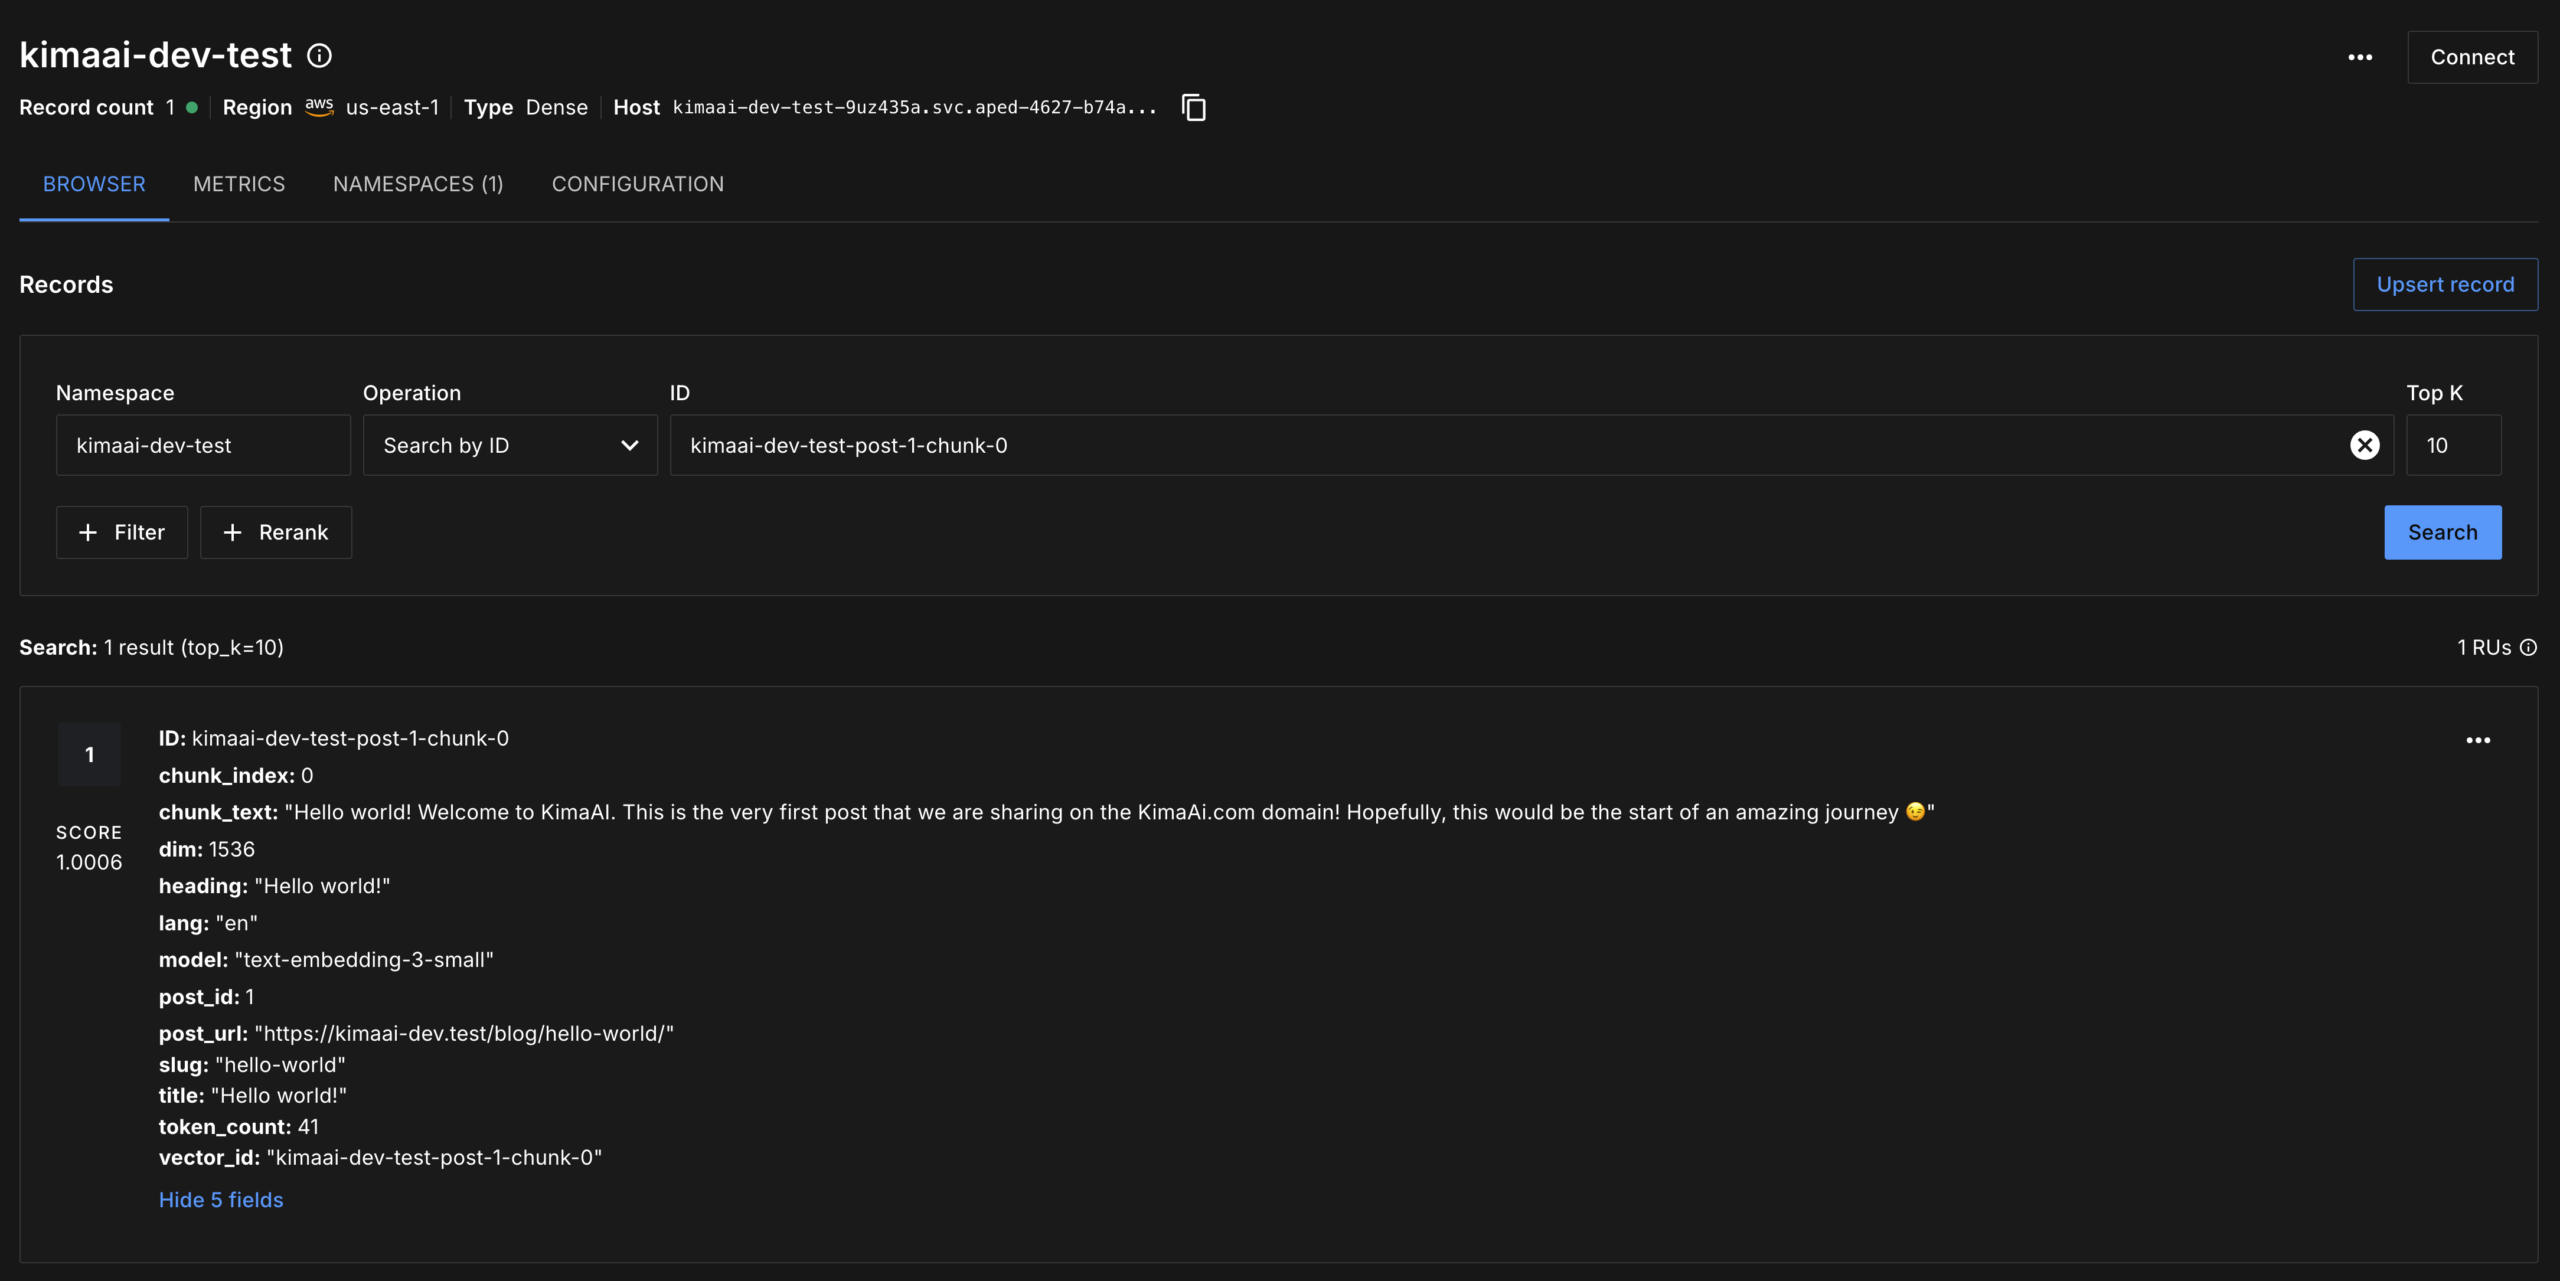
If you want to see the created embedding inside the Vector DB dashboard (in this case, Pinecone), log in to the dashboard and go to the respective index. As you can see in the screenshot below, there is only one record, and it includes all the necessary information, like ID, chunk_index, chunk_text, dim, etc.
Now, if you want to see the created vector for the respective post chunk, click the 3 dots on the right, then click Fetch.
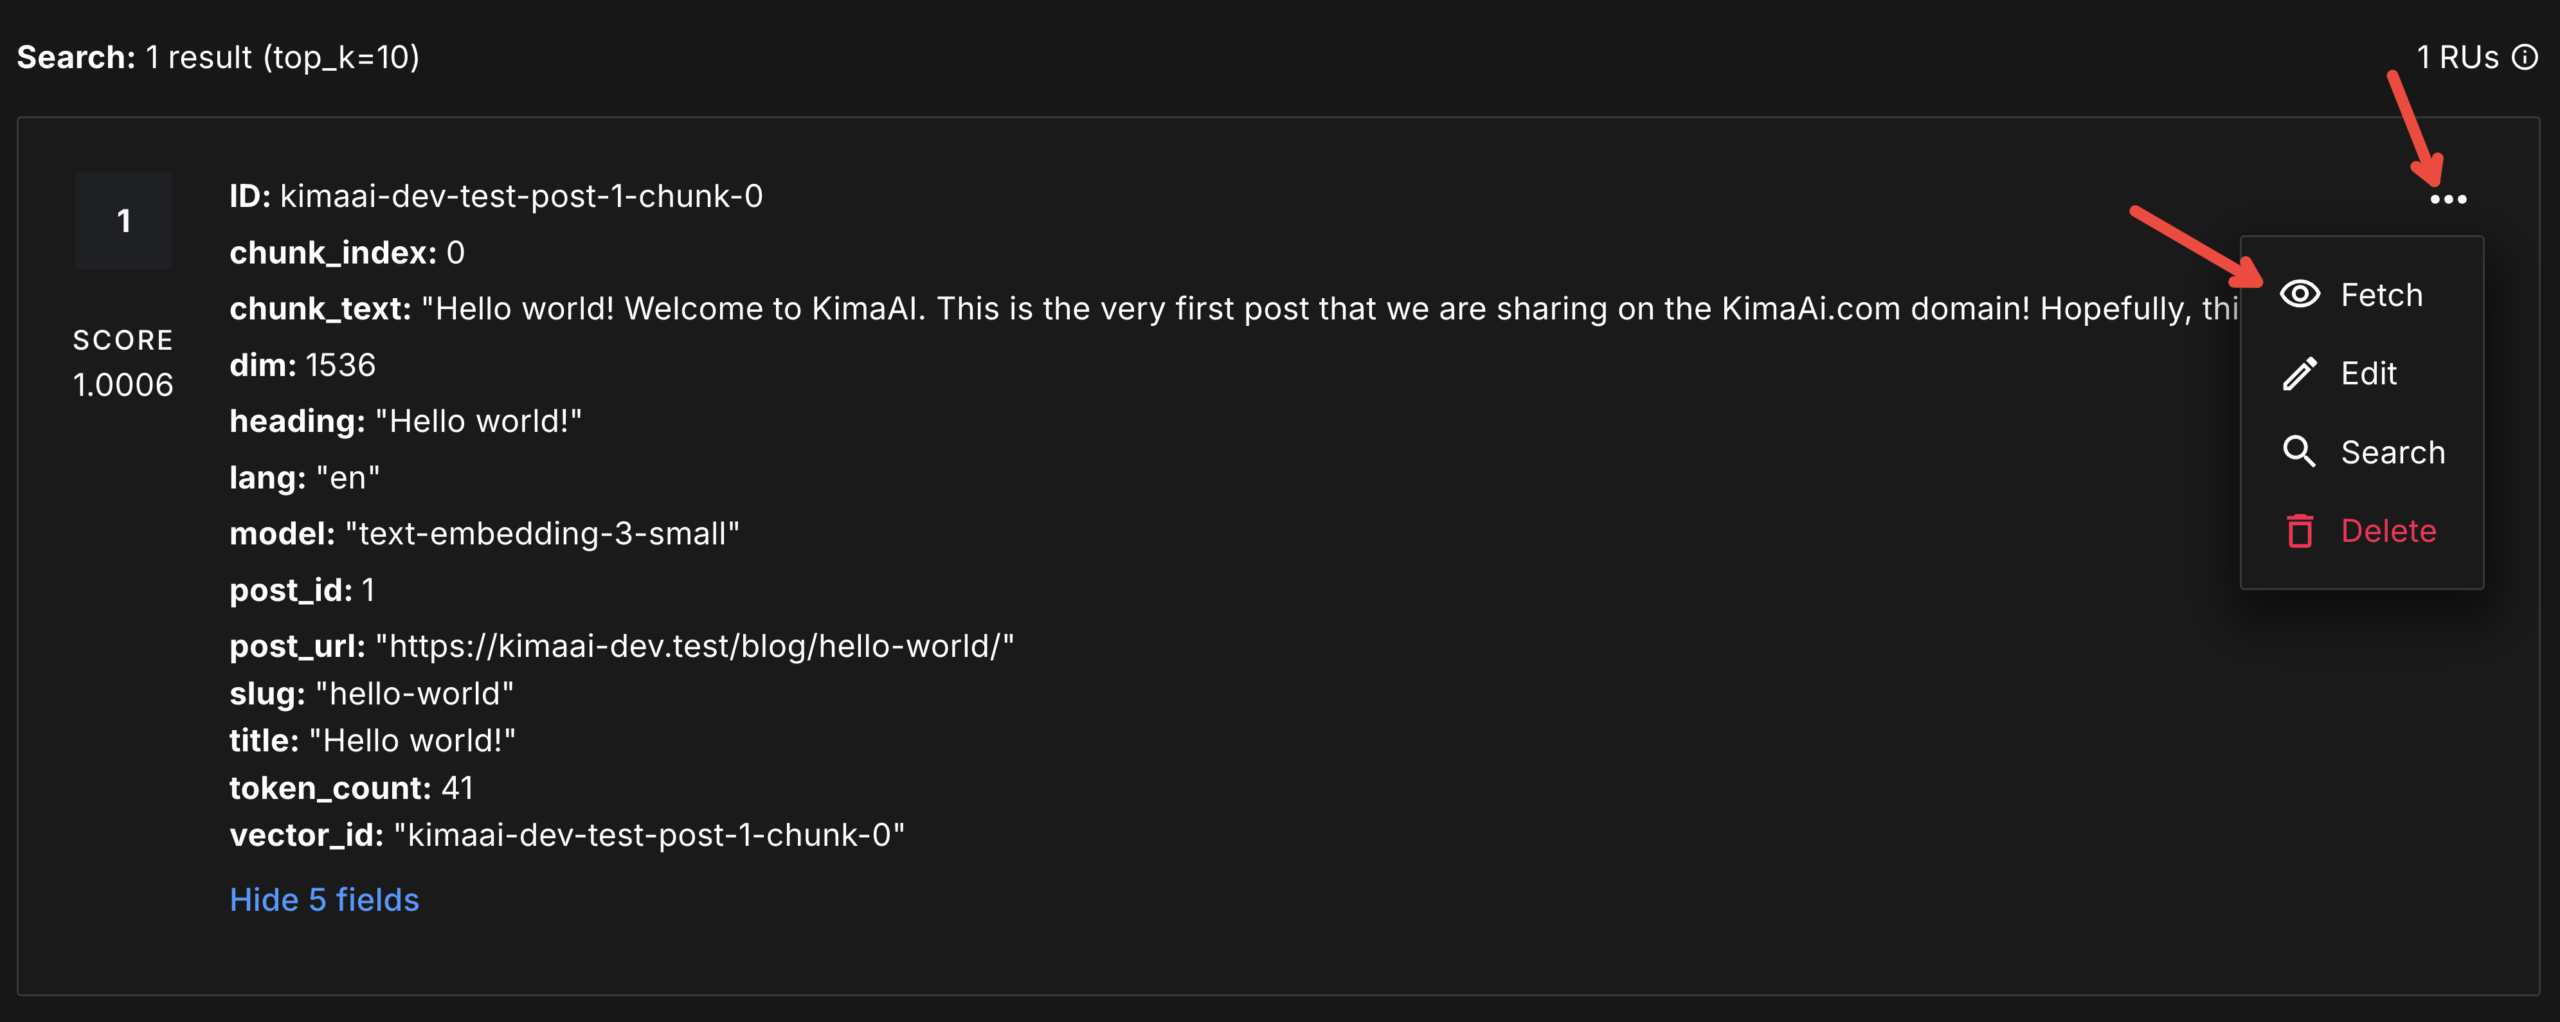
After doing so, you should see the following pop-up:
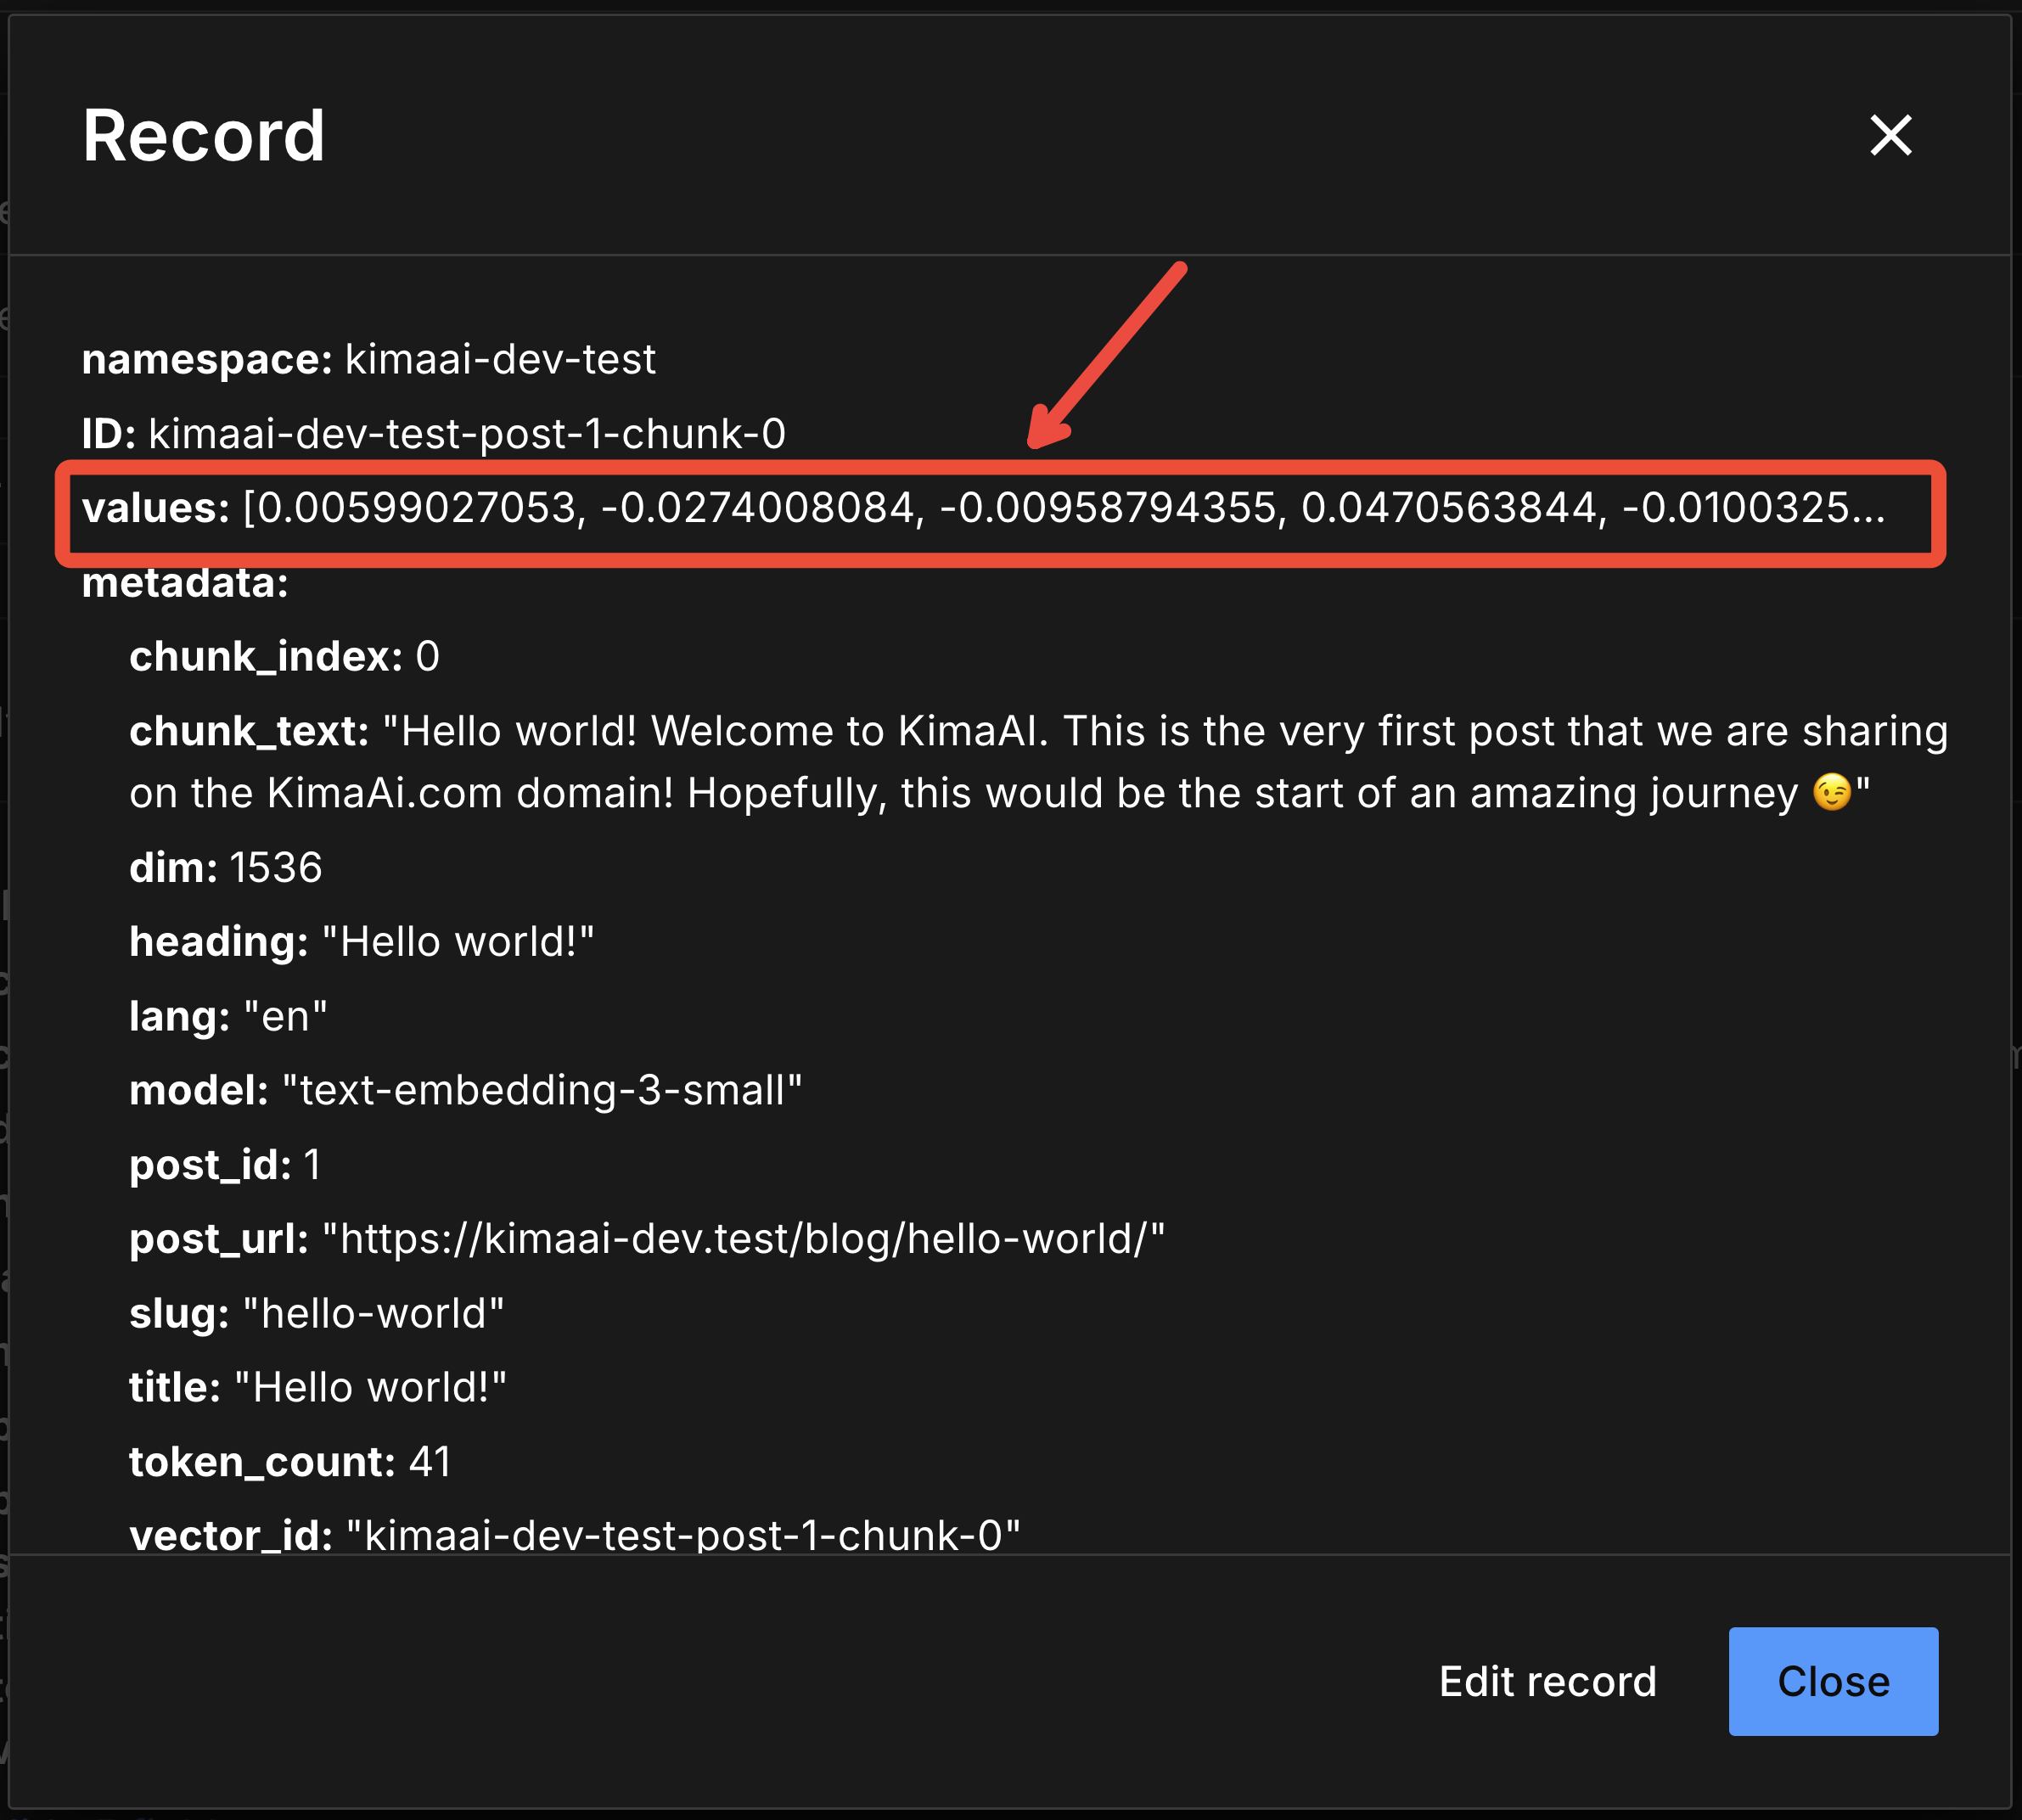
In the above screenshot, you can see the vector values, which are a bunch of weird numbers like 0.00599027053, -0.0274008084, -0.00958794355, … and, to us, they mean nothing! But believe me, they mean a lot for the AI! Don’t believe me? Let’s test it!
Query Panel
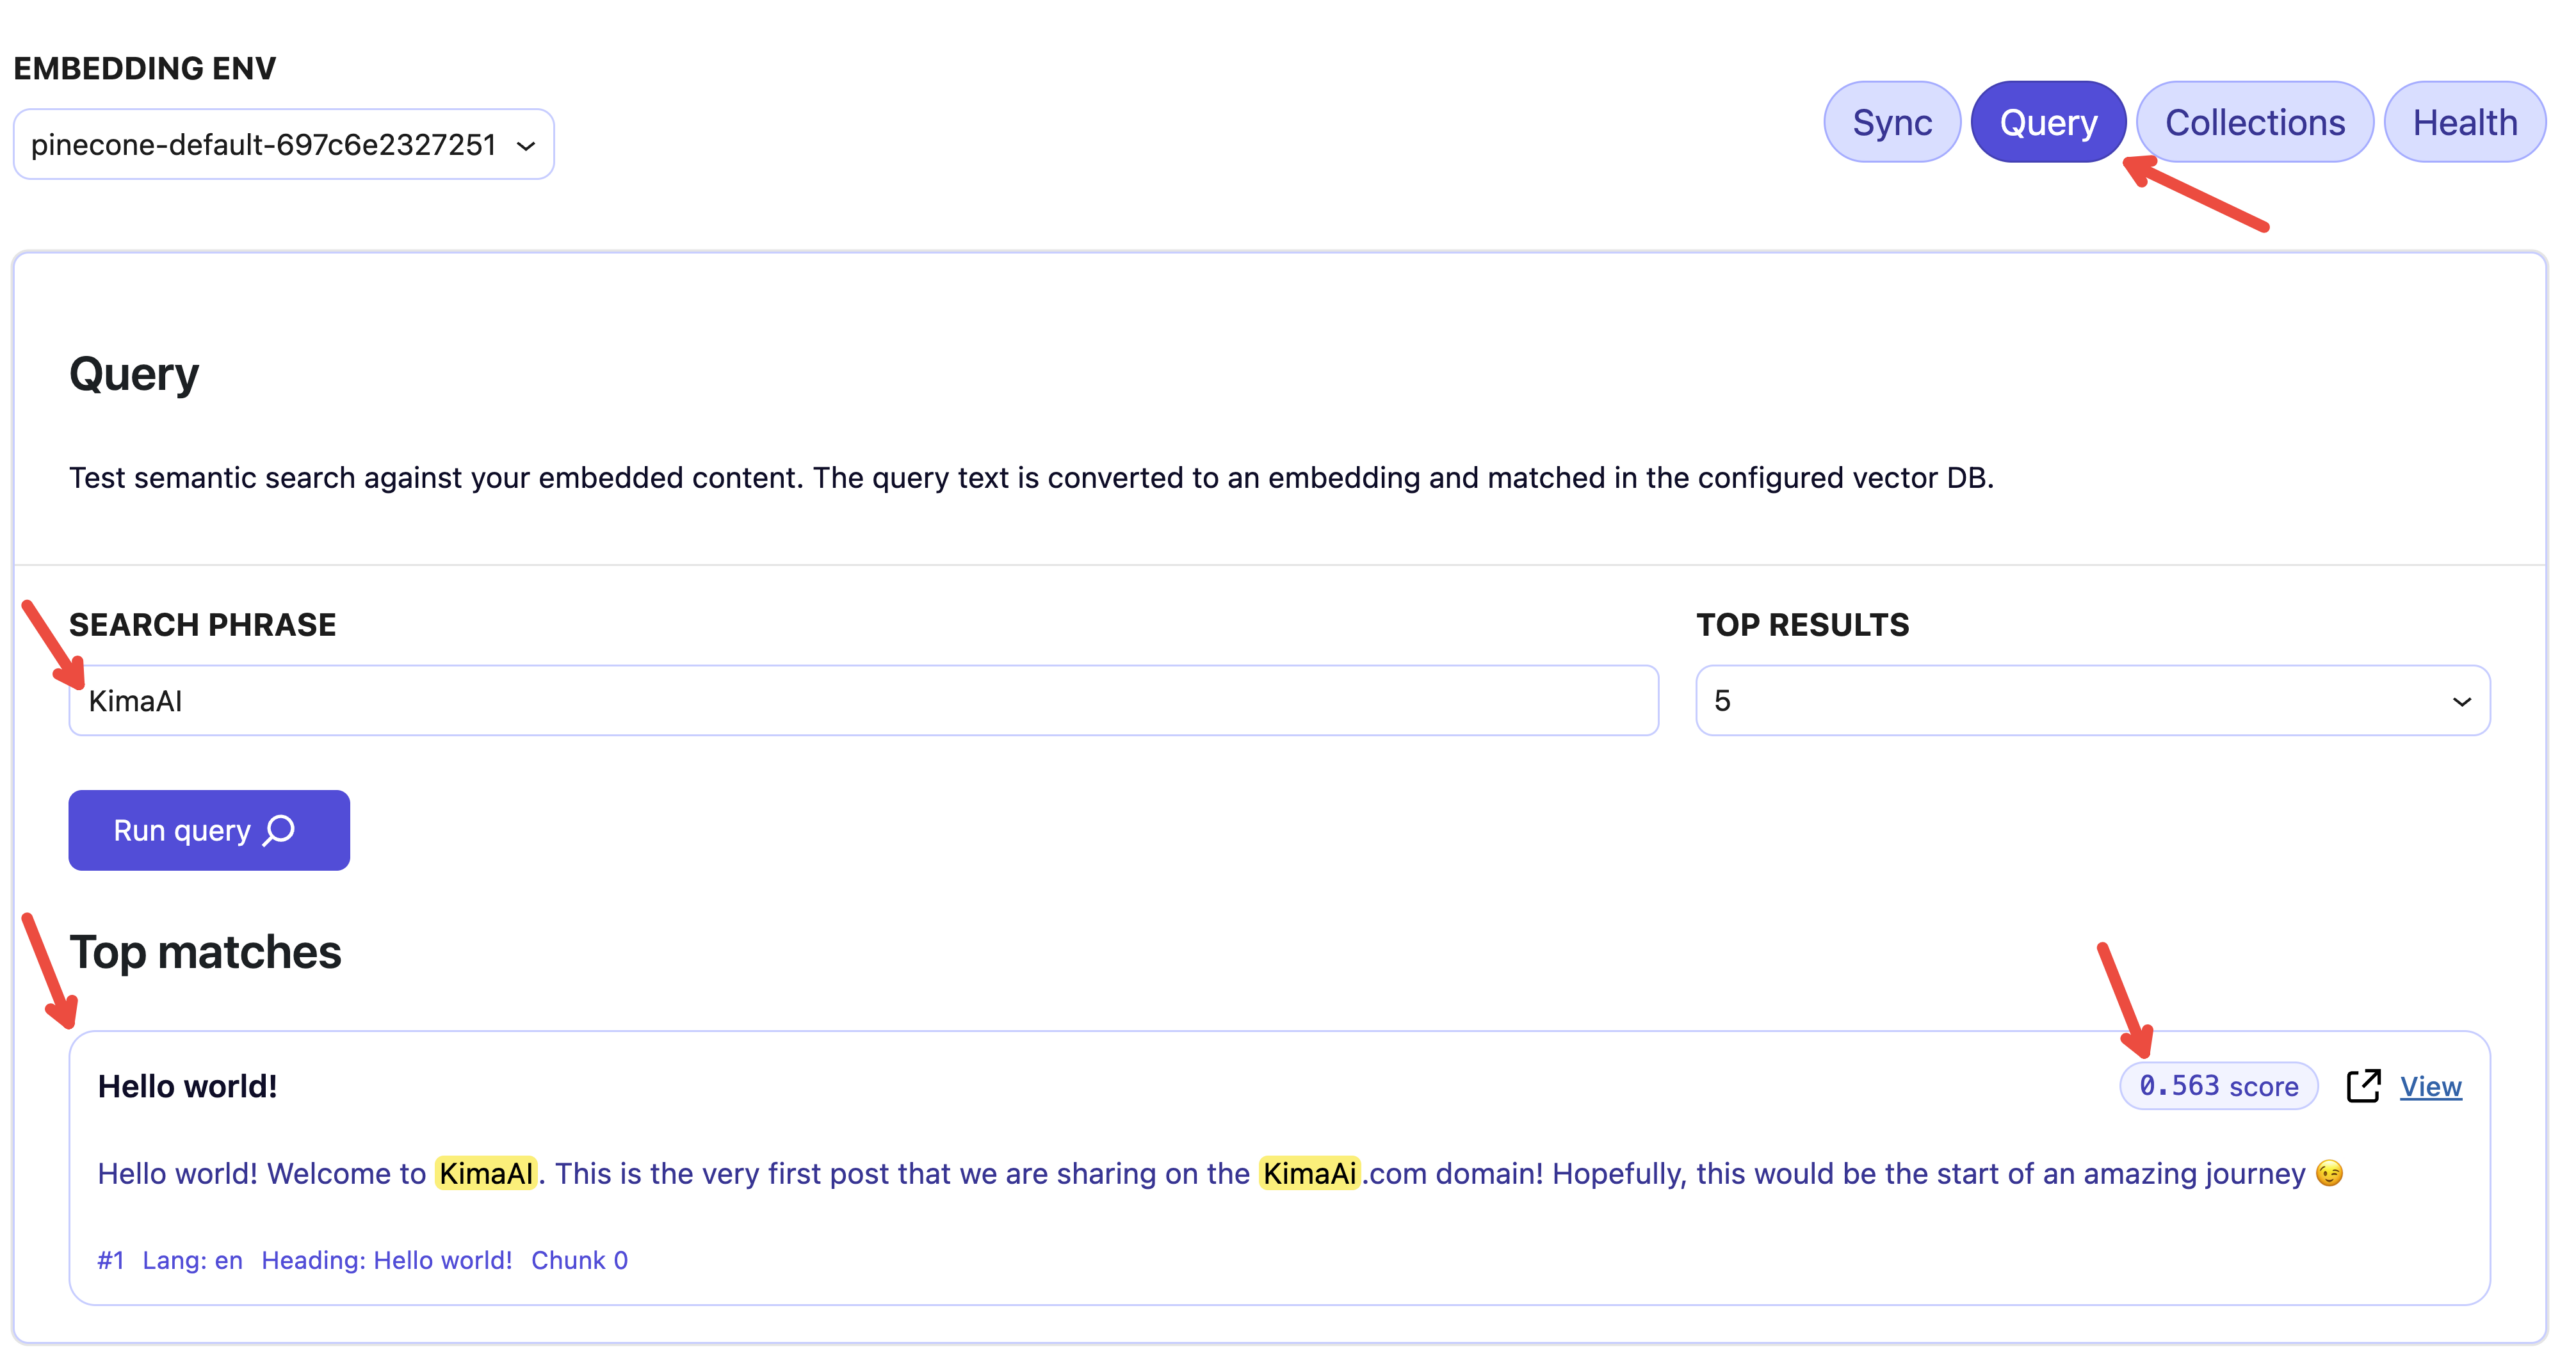
To test the embedding environment and the connected vector DB, click the Query tab.
- Embedding Env: Please choose the Embedding Env from the select option in the upper left.
- If you only have one, you don’t need to worry about this.
- Search phrase: Type a keyword that exists in the post that you just synced into the vector DB.
- In our case, I typed “KimaAI“
- Top results: Choose the number of results that you want to see.
- 5 is the default.
- Run query: Click on the Run query button and wait a bit.
- Check the results and Score: After a few seconds, you should see some related results showing up.
- You will also see the match score, which shows the similarity between your search phrase’s embedding and the stored chunk’s embedding in the vector DB. In general, higher = more relevant / more similar (and lower = less similar).


