After you activate the plugin, the first thing you will see is the KimaAI setup wizard. We implemented this wizard to help you set up the chatbot as easily and as fast as possible!
There are a few ways to see the setup wizard page (If you closed it after the installation), but the simple way is to navigate to this URL on your website → https://example.com/wp-admin/admin.php?page=kimaai-wizard
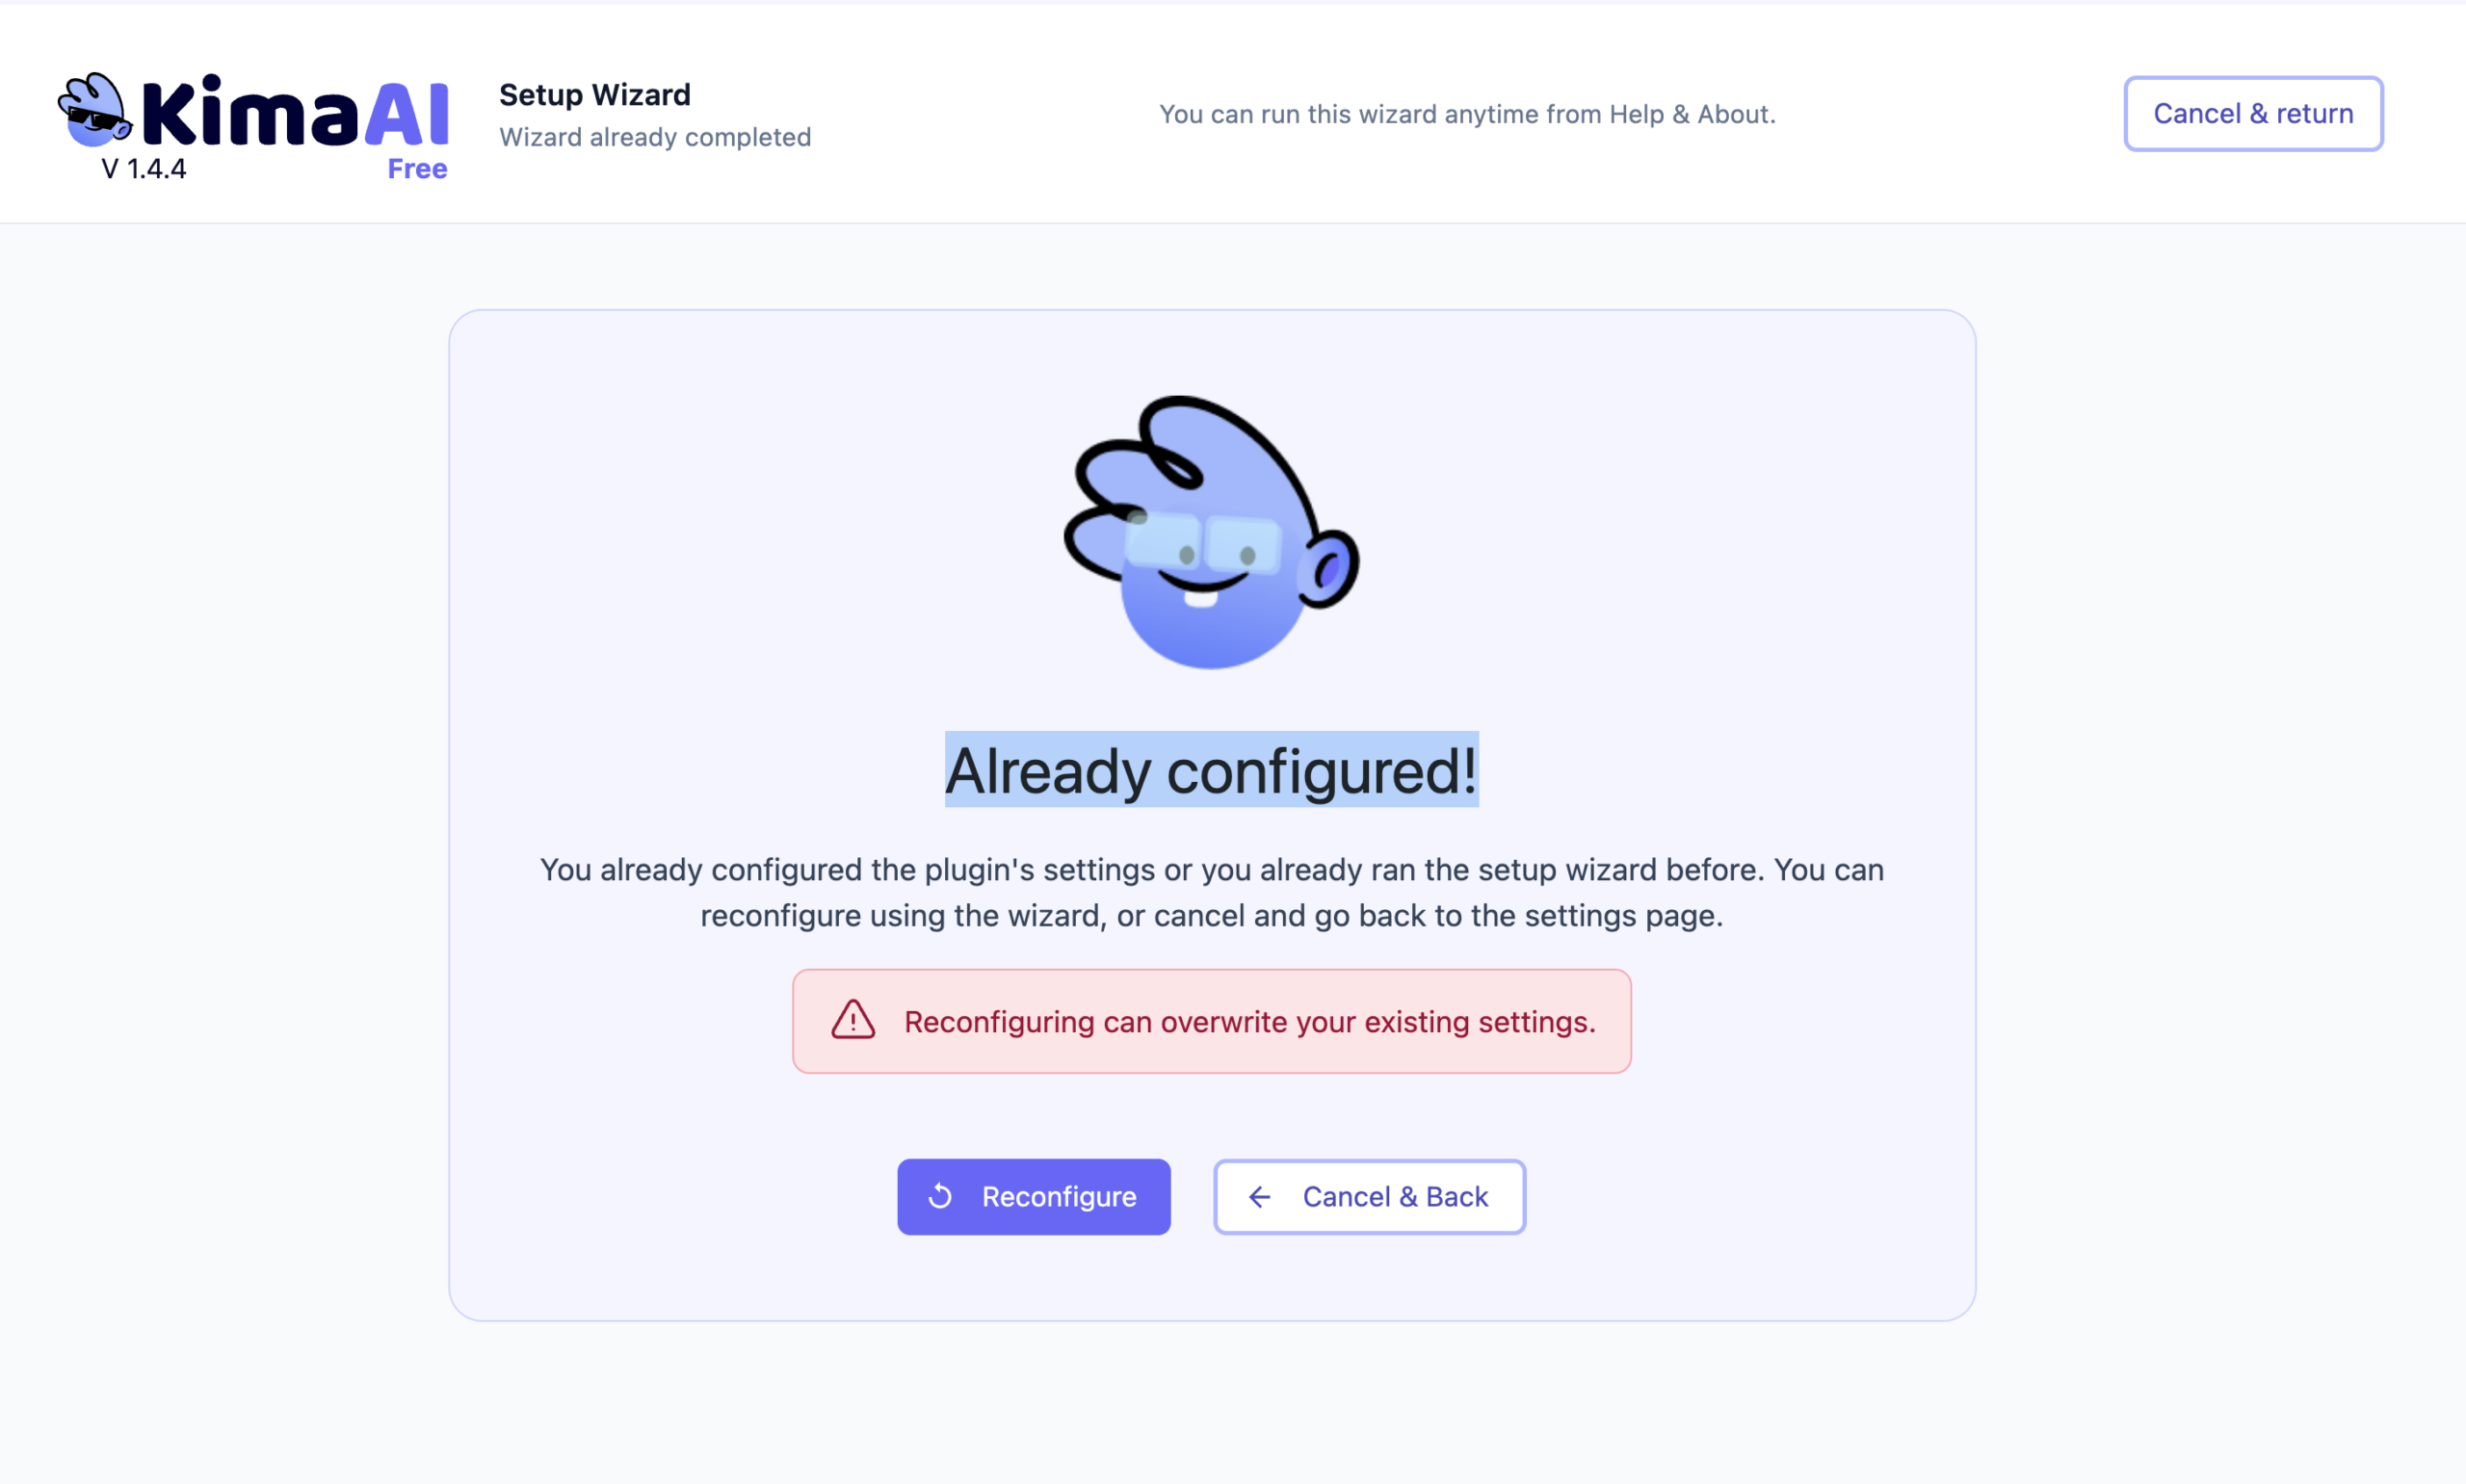
Already configured!
Now, if for any reason you see the following page in the setup wizard, it means that you have already configured the necessary settings before, and by following the setup wizard, you might override the previous configuration. As far as you know what you are doing, everything will be fine!
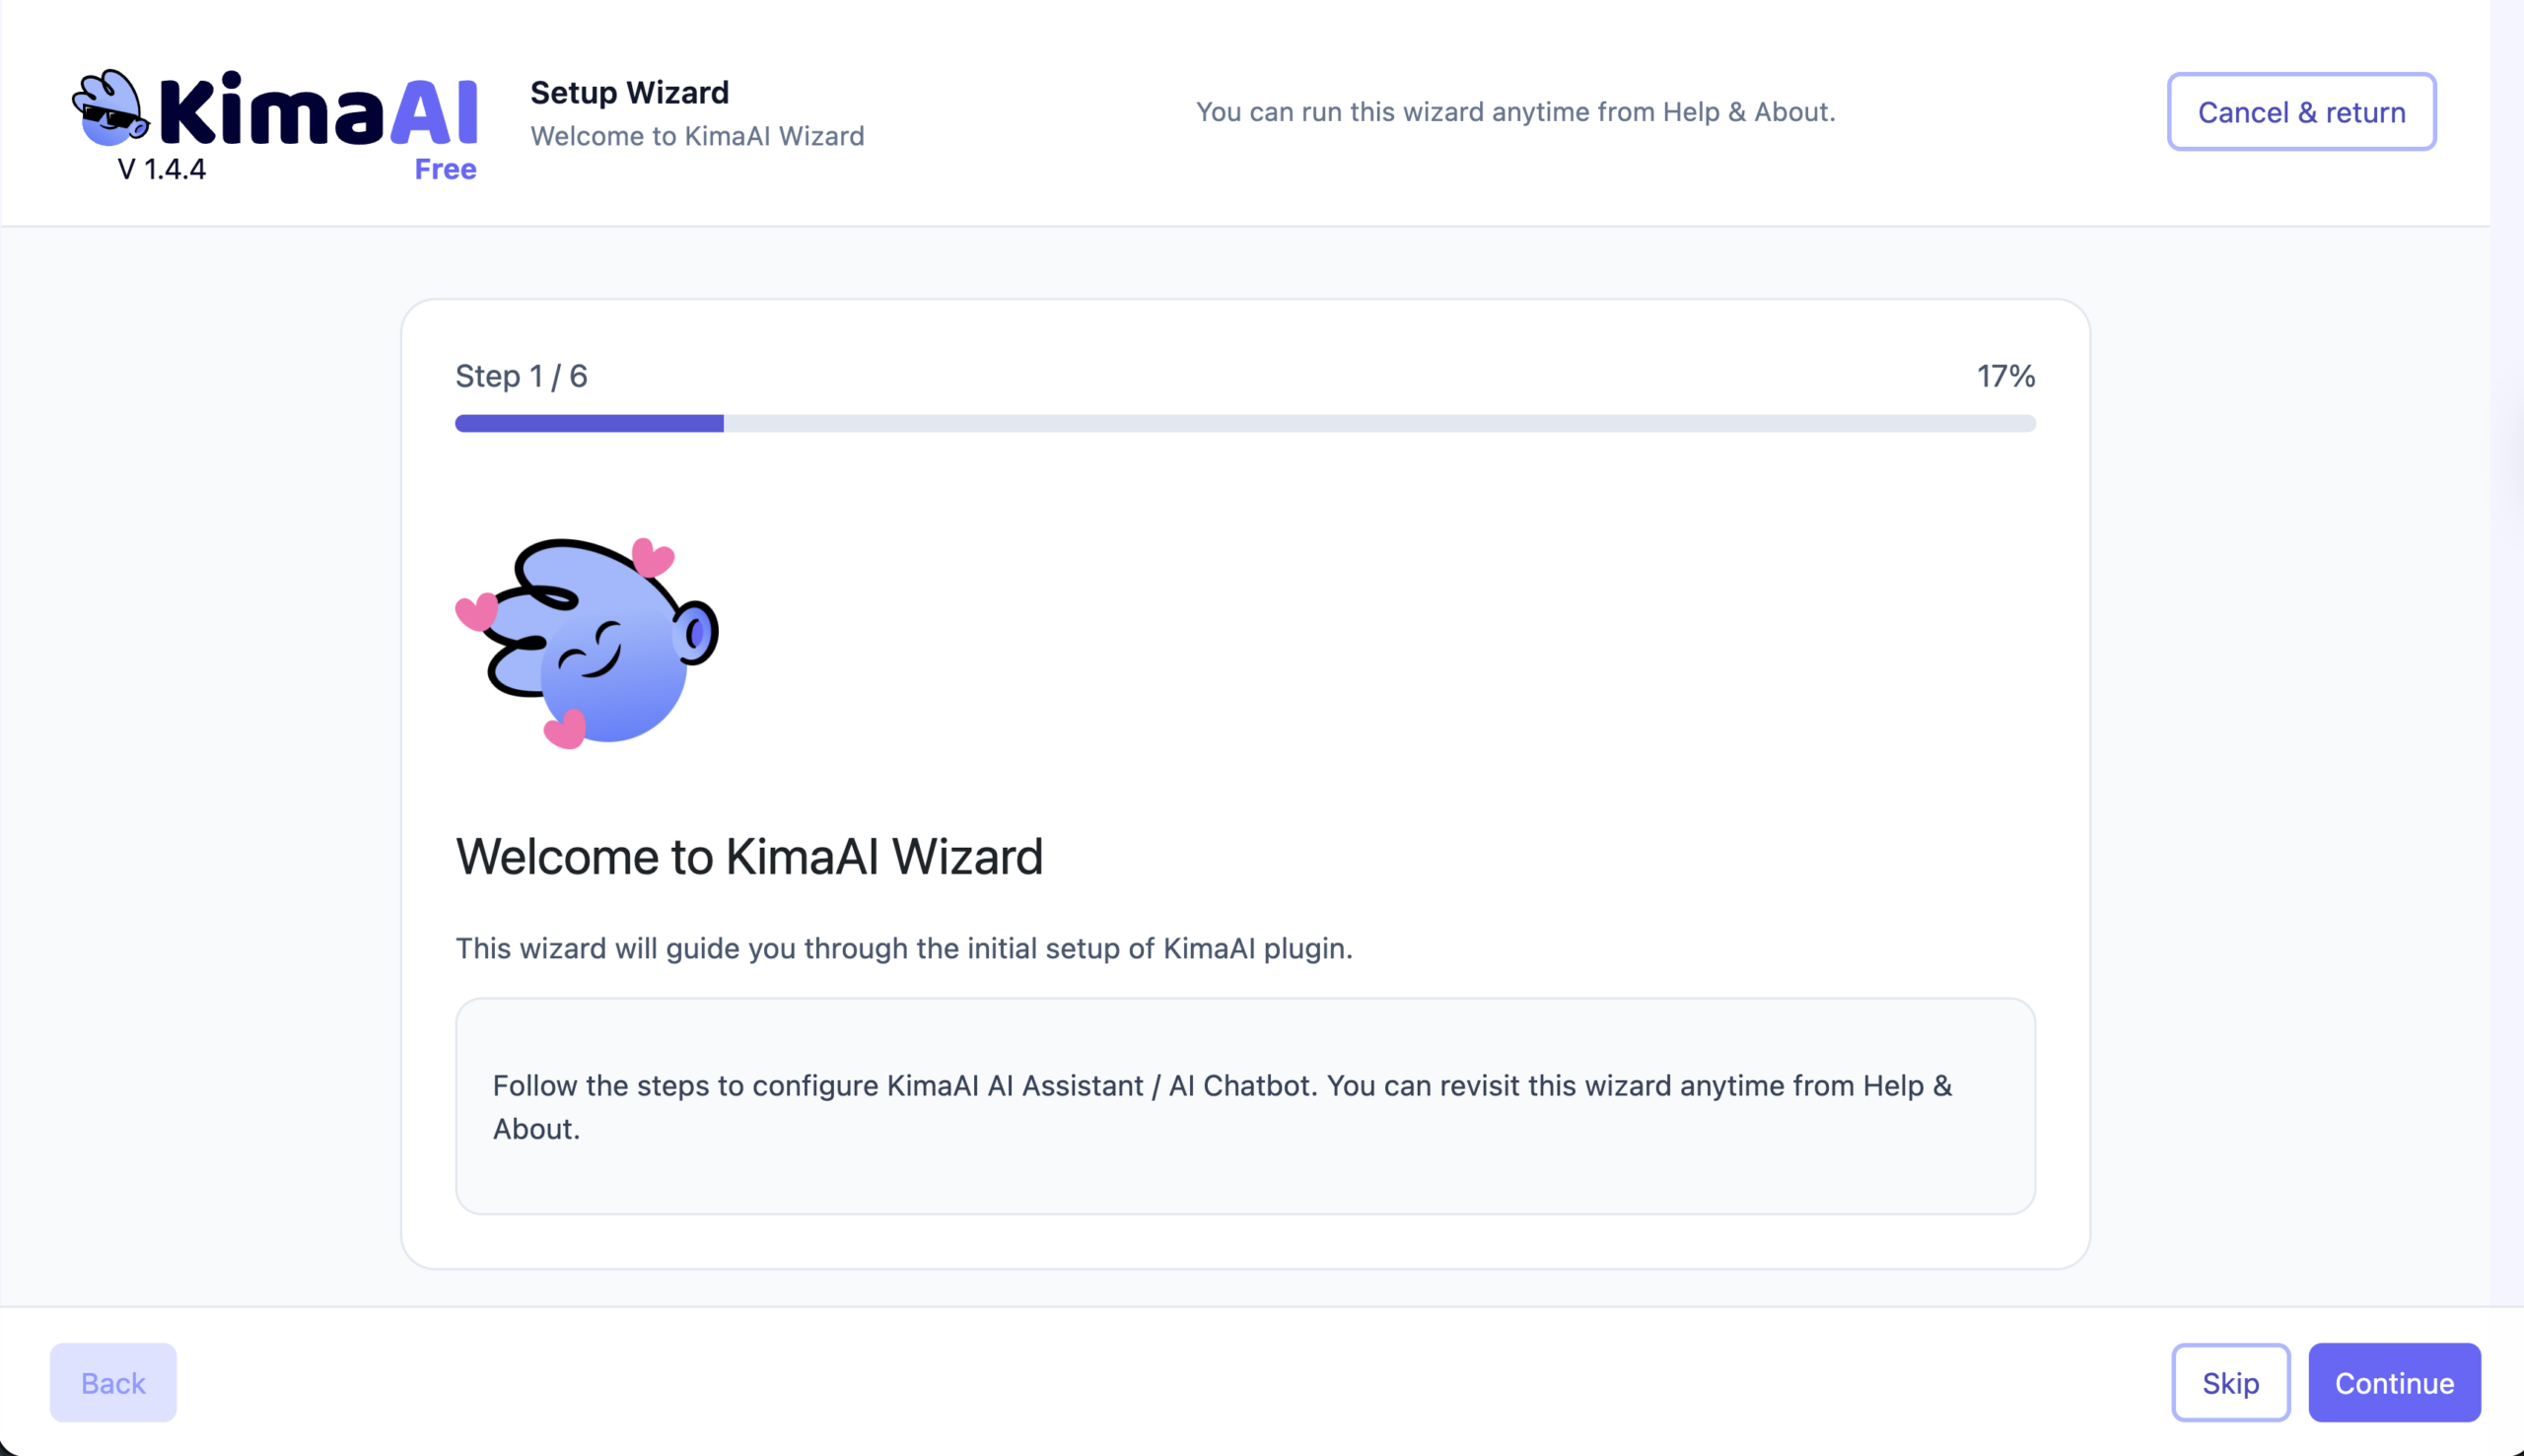
Step 1
In the first step, as you can see in the following screenshot, we welcome you to the setup wizard, now you have 2 options:
- Continue → If you click on continue, we are on our way to finish the setup.
- Cancel & return → If you click on this one, then you will get back to the KimaAI settings dashboard.
Step 2
Now, in step 2, you can configure the first AI Provider, which we recommend choosing OpenAI, because all the plugin’s features will work perfectly fine.
OpenAI API Key
For this step, we need to have the OpenAI API Key. To get your OpenAI API key, follow → Set up Your OpenAI Account and API Key, After you got your API Key, get back here! We’re not going anywhere!
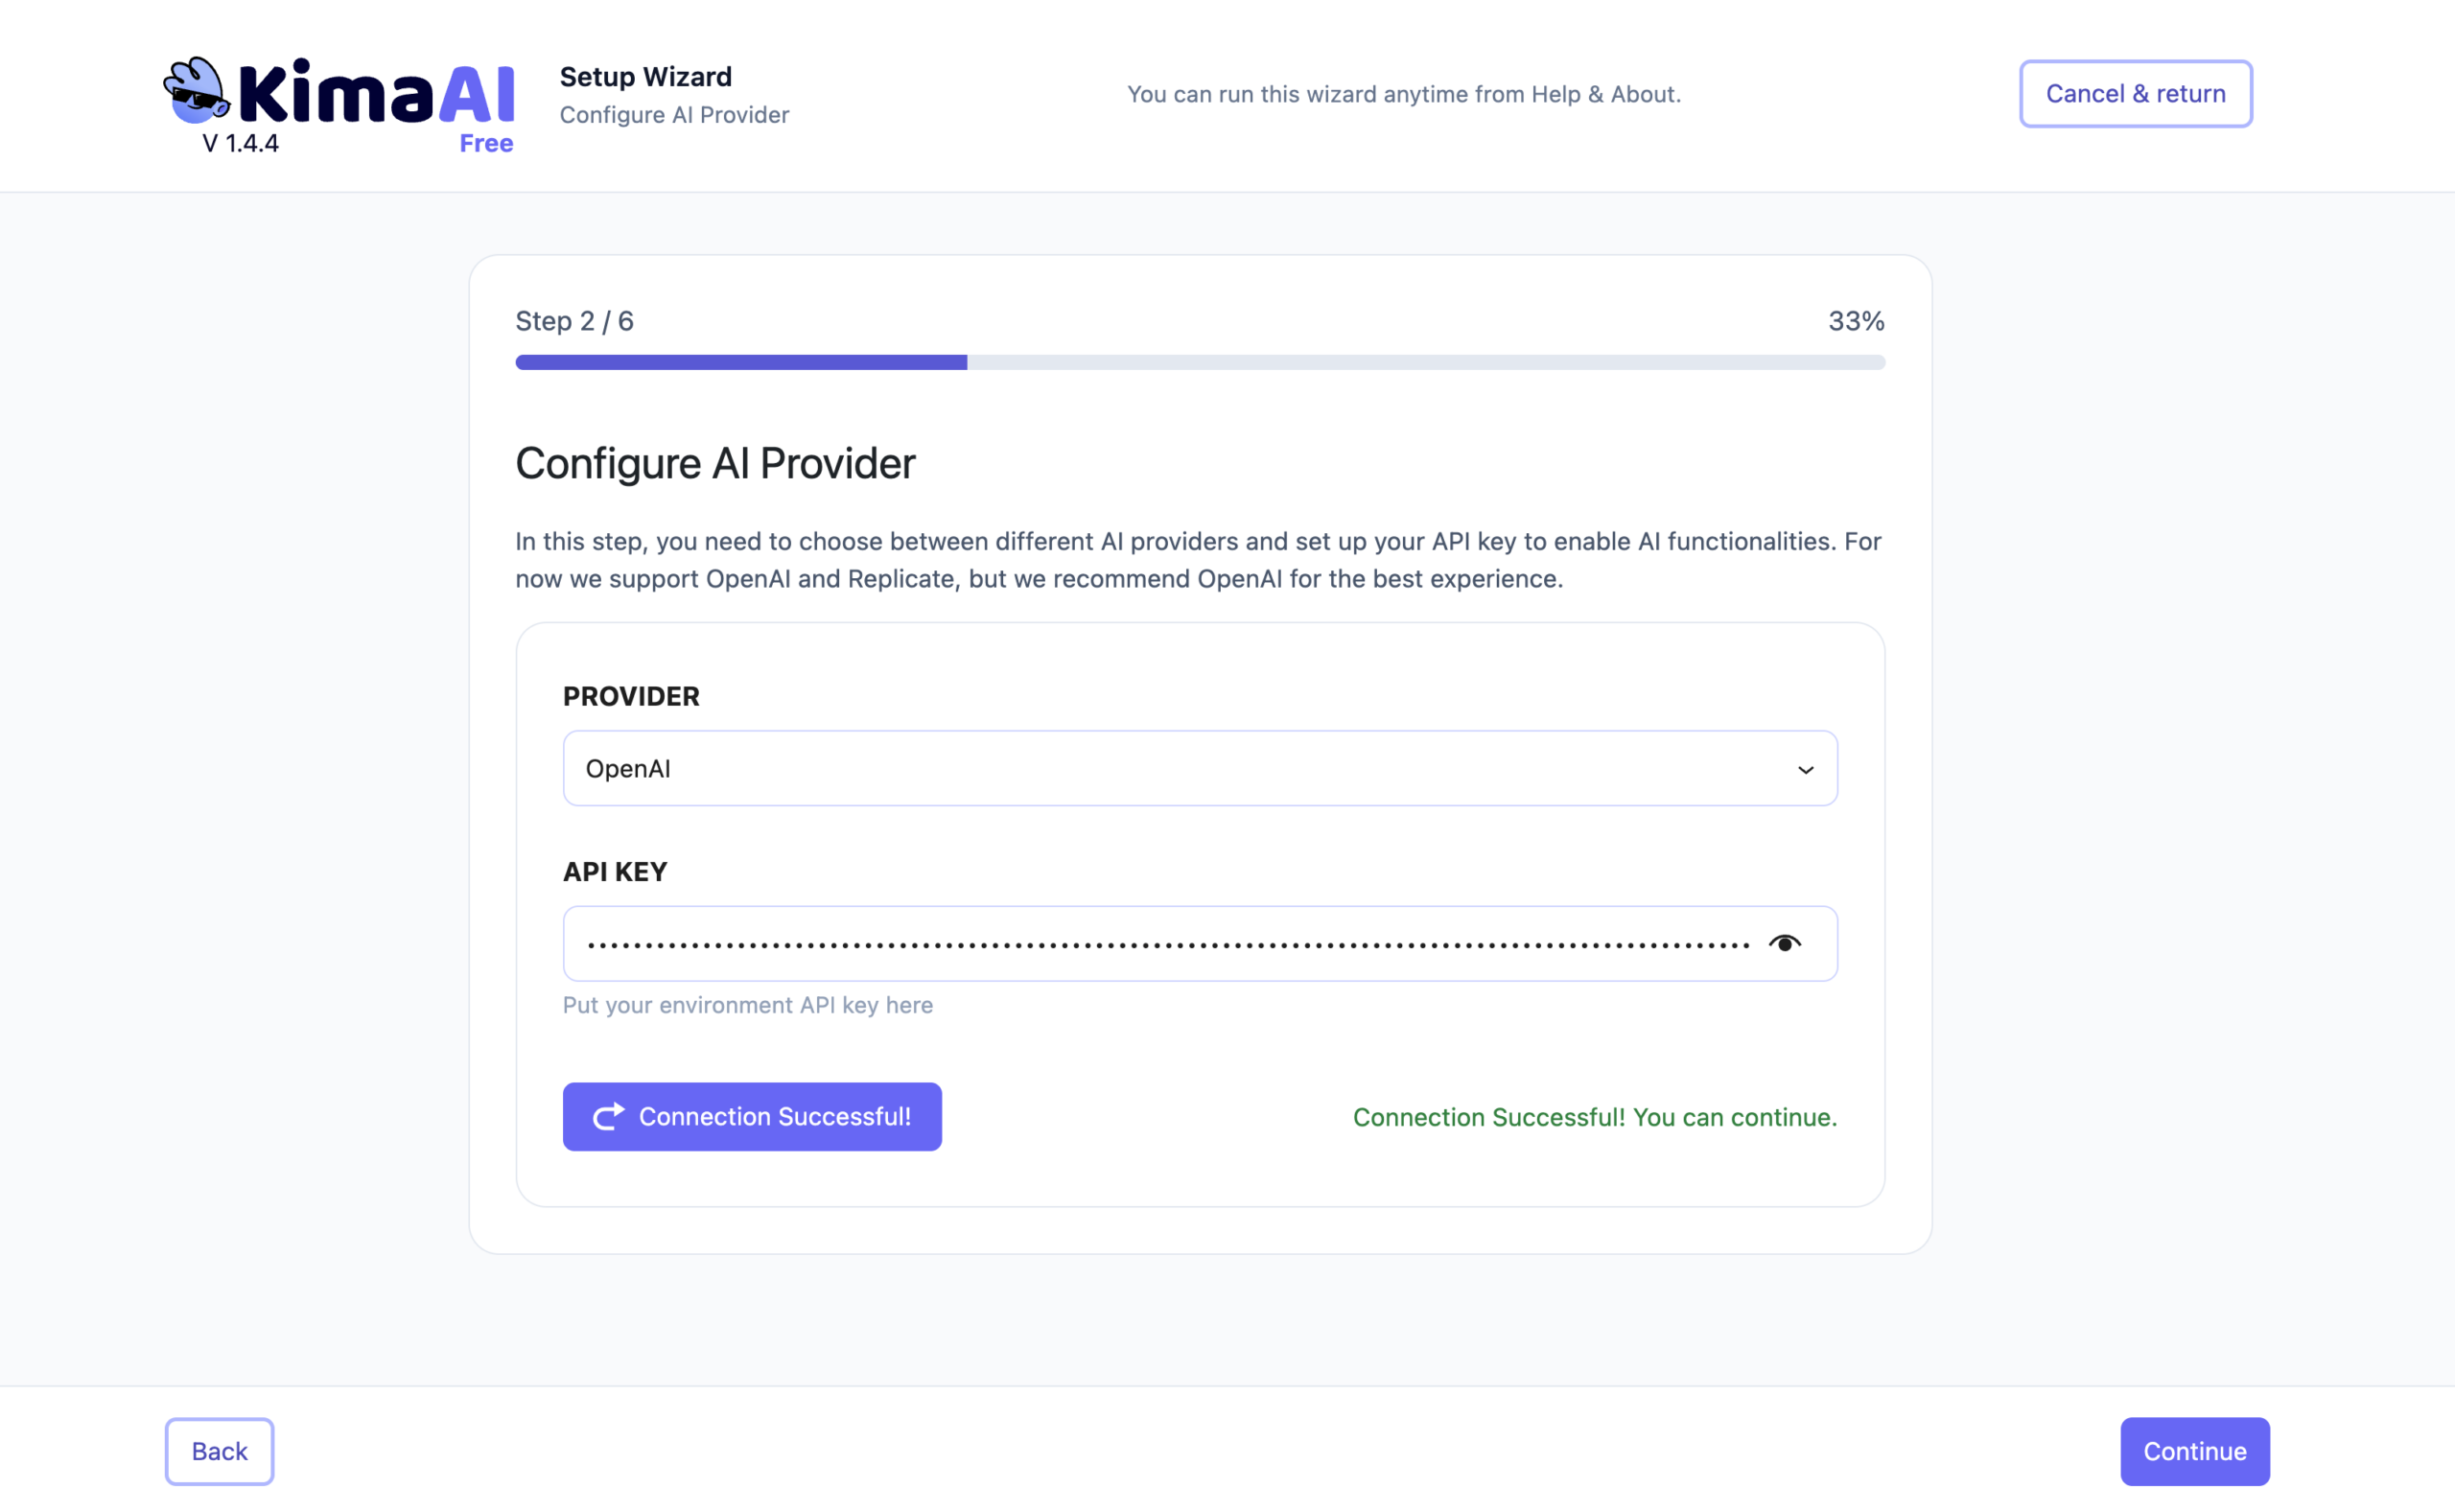
Ok, now that you have your OpenAI API key, we can continue!
- From the “Provider” dropdown chose OpenAI,
- Then paste your API key inside the “API KEY” field
- Click on the “Test Connection” button.
After that, if your API Key is working, you should see the “Connection Successful! You can continue.” message. Then click on the continue button.
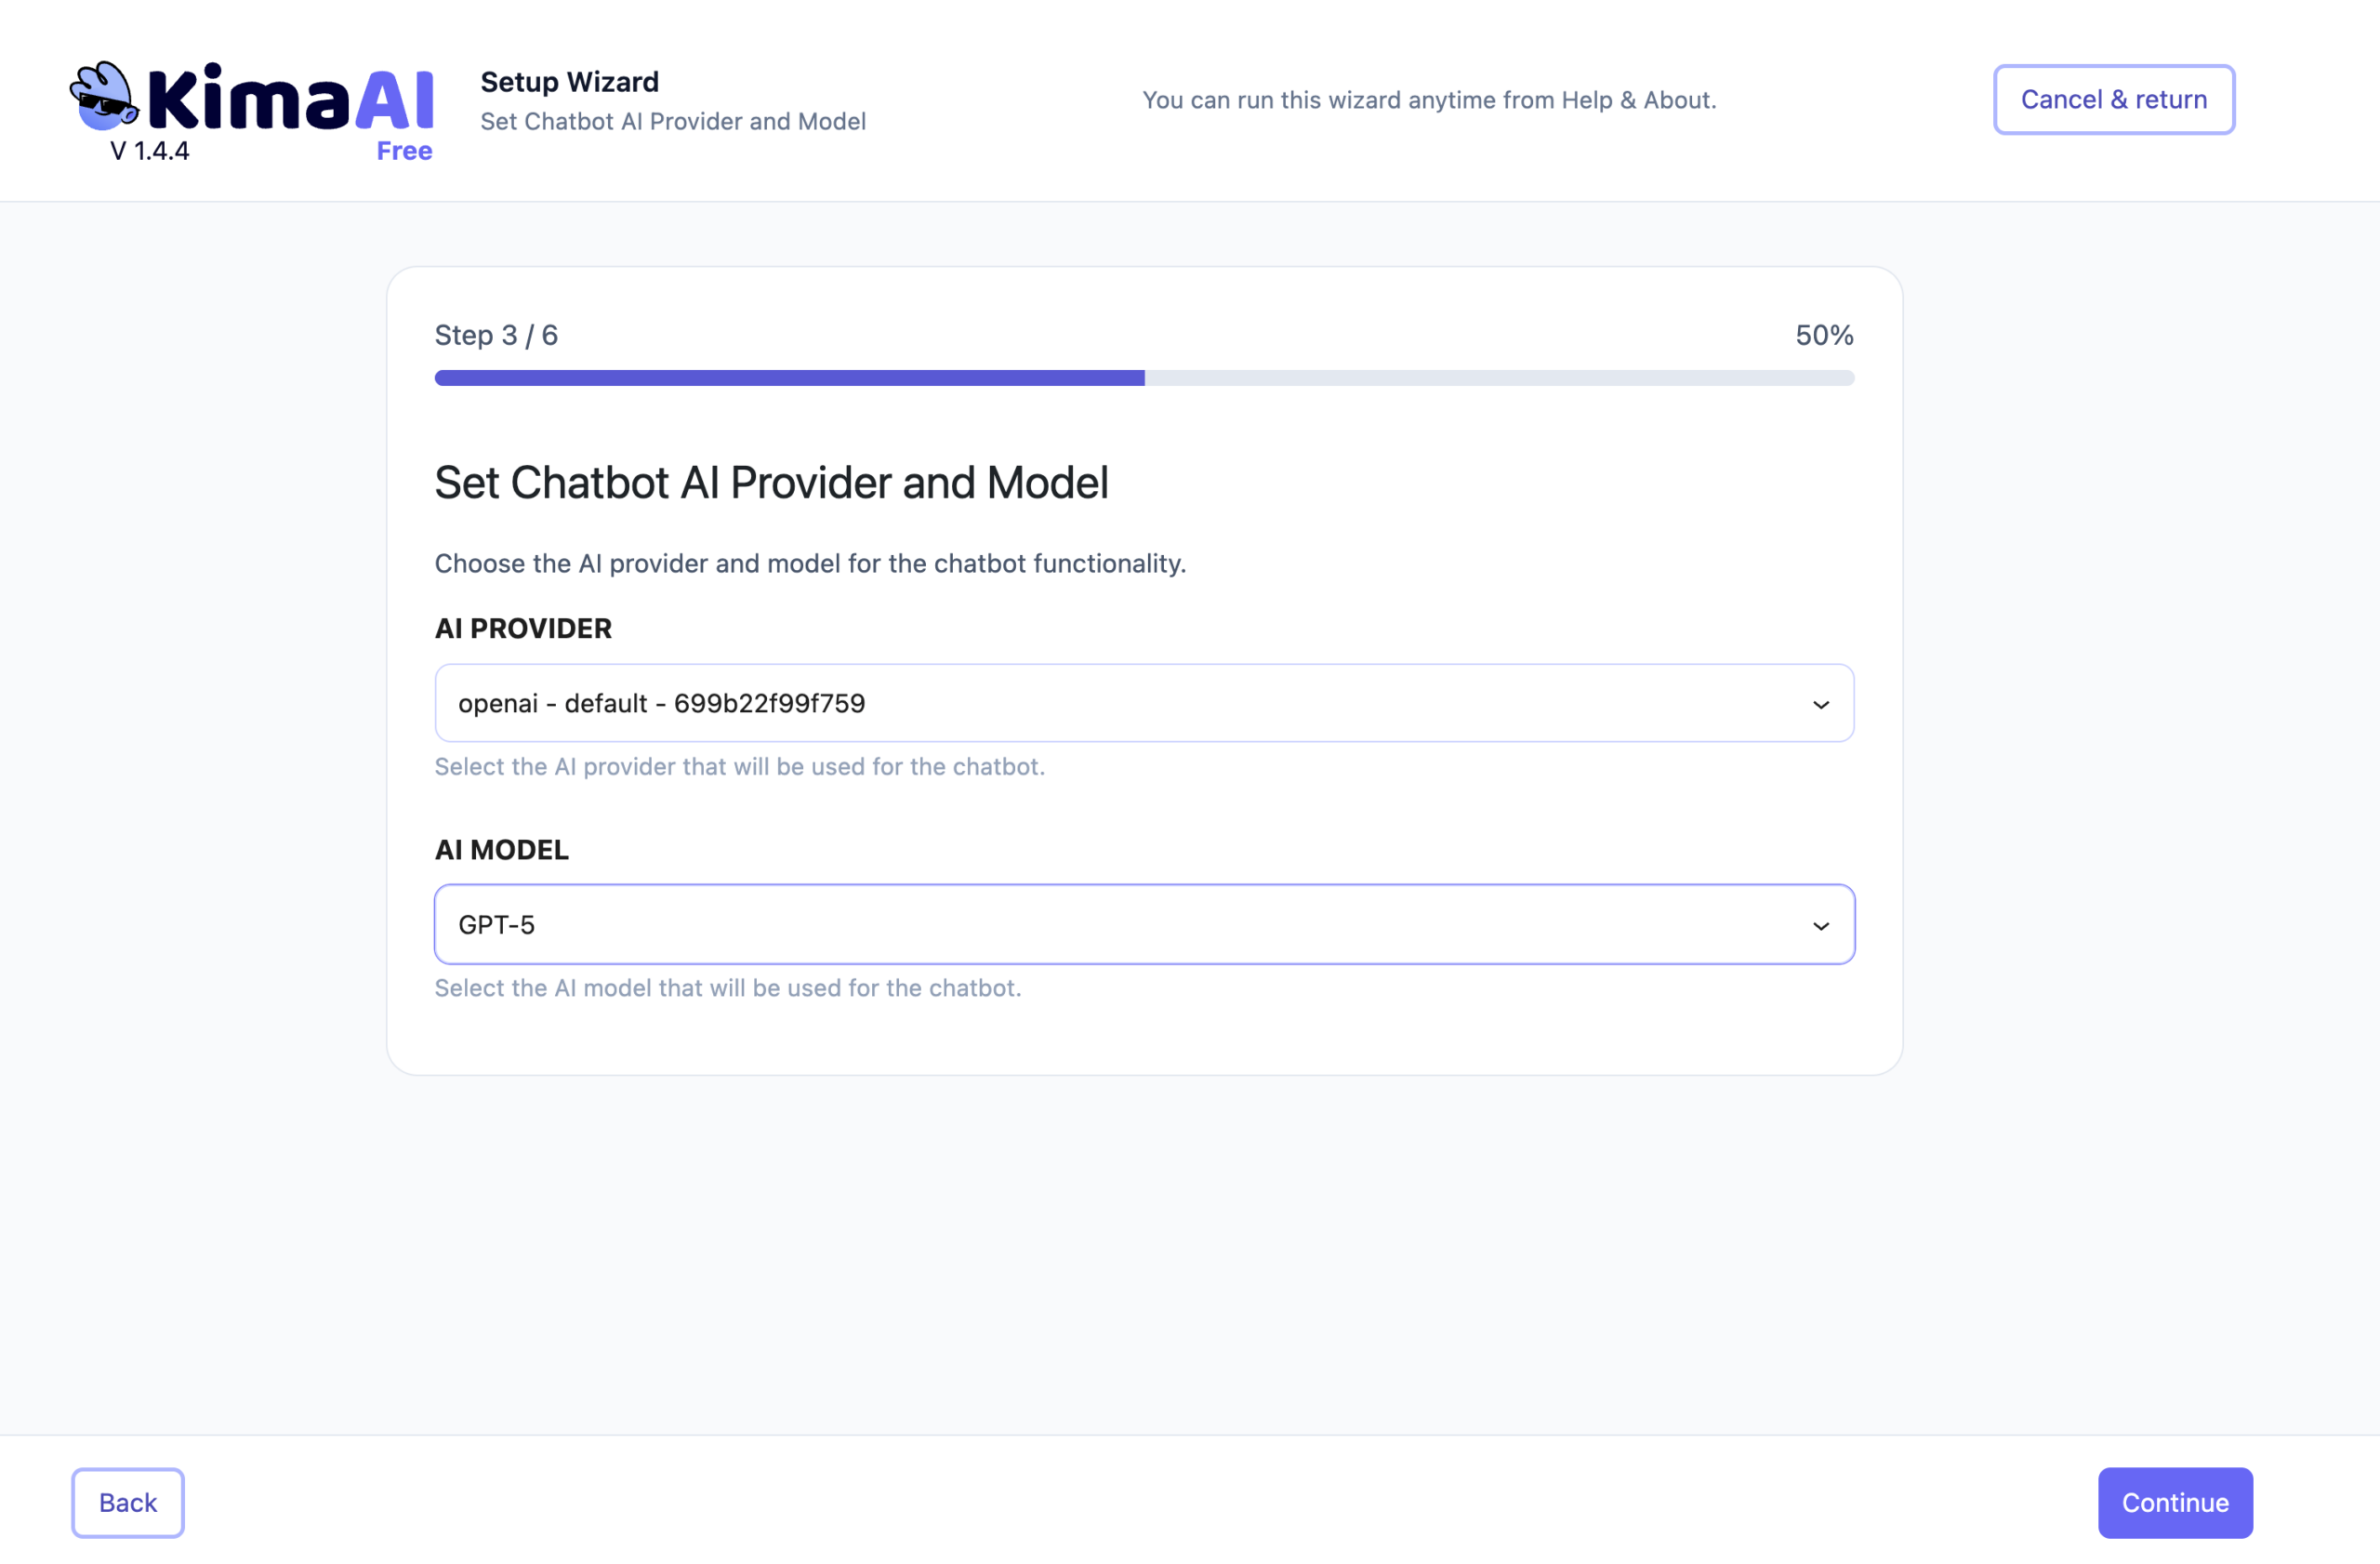
Step 3
In step 3, you can configure the chatbot AI provider and model, so select them here.
Step 4
If you can believe it. That was it! Now you have your AI Chatbot working!

Of course, we need to configure the other part of the AI Chatbot to work specifically for our website, but we can do that later! For now, let’s just have some fun!
So I want to read a joke! I put this message in the chatbot and hit the send button → Give me a really good joke that you recently learned! And you can see the AI response in the following 😬
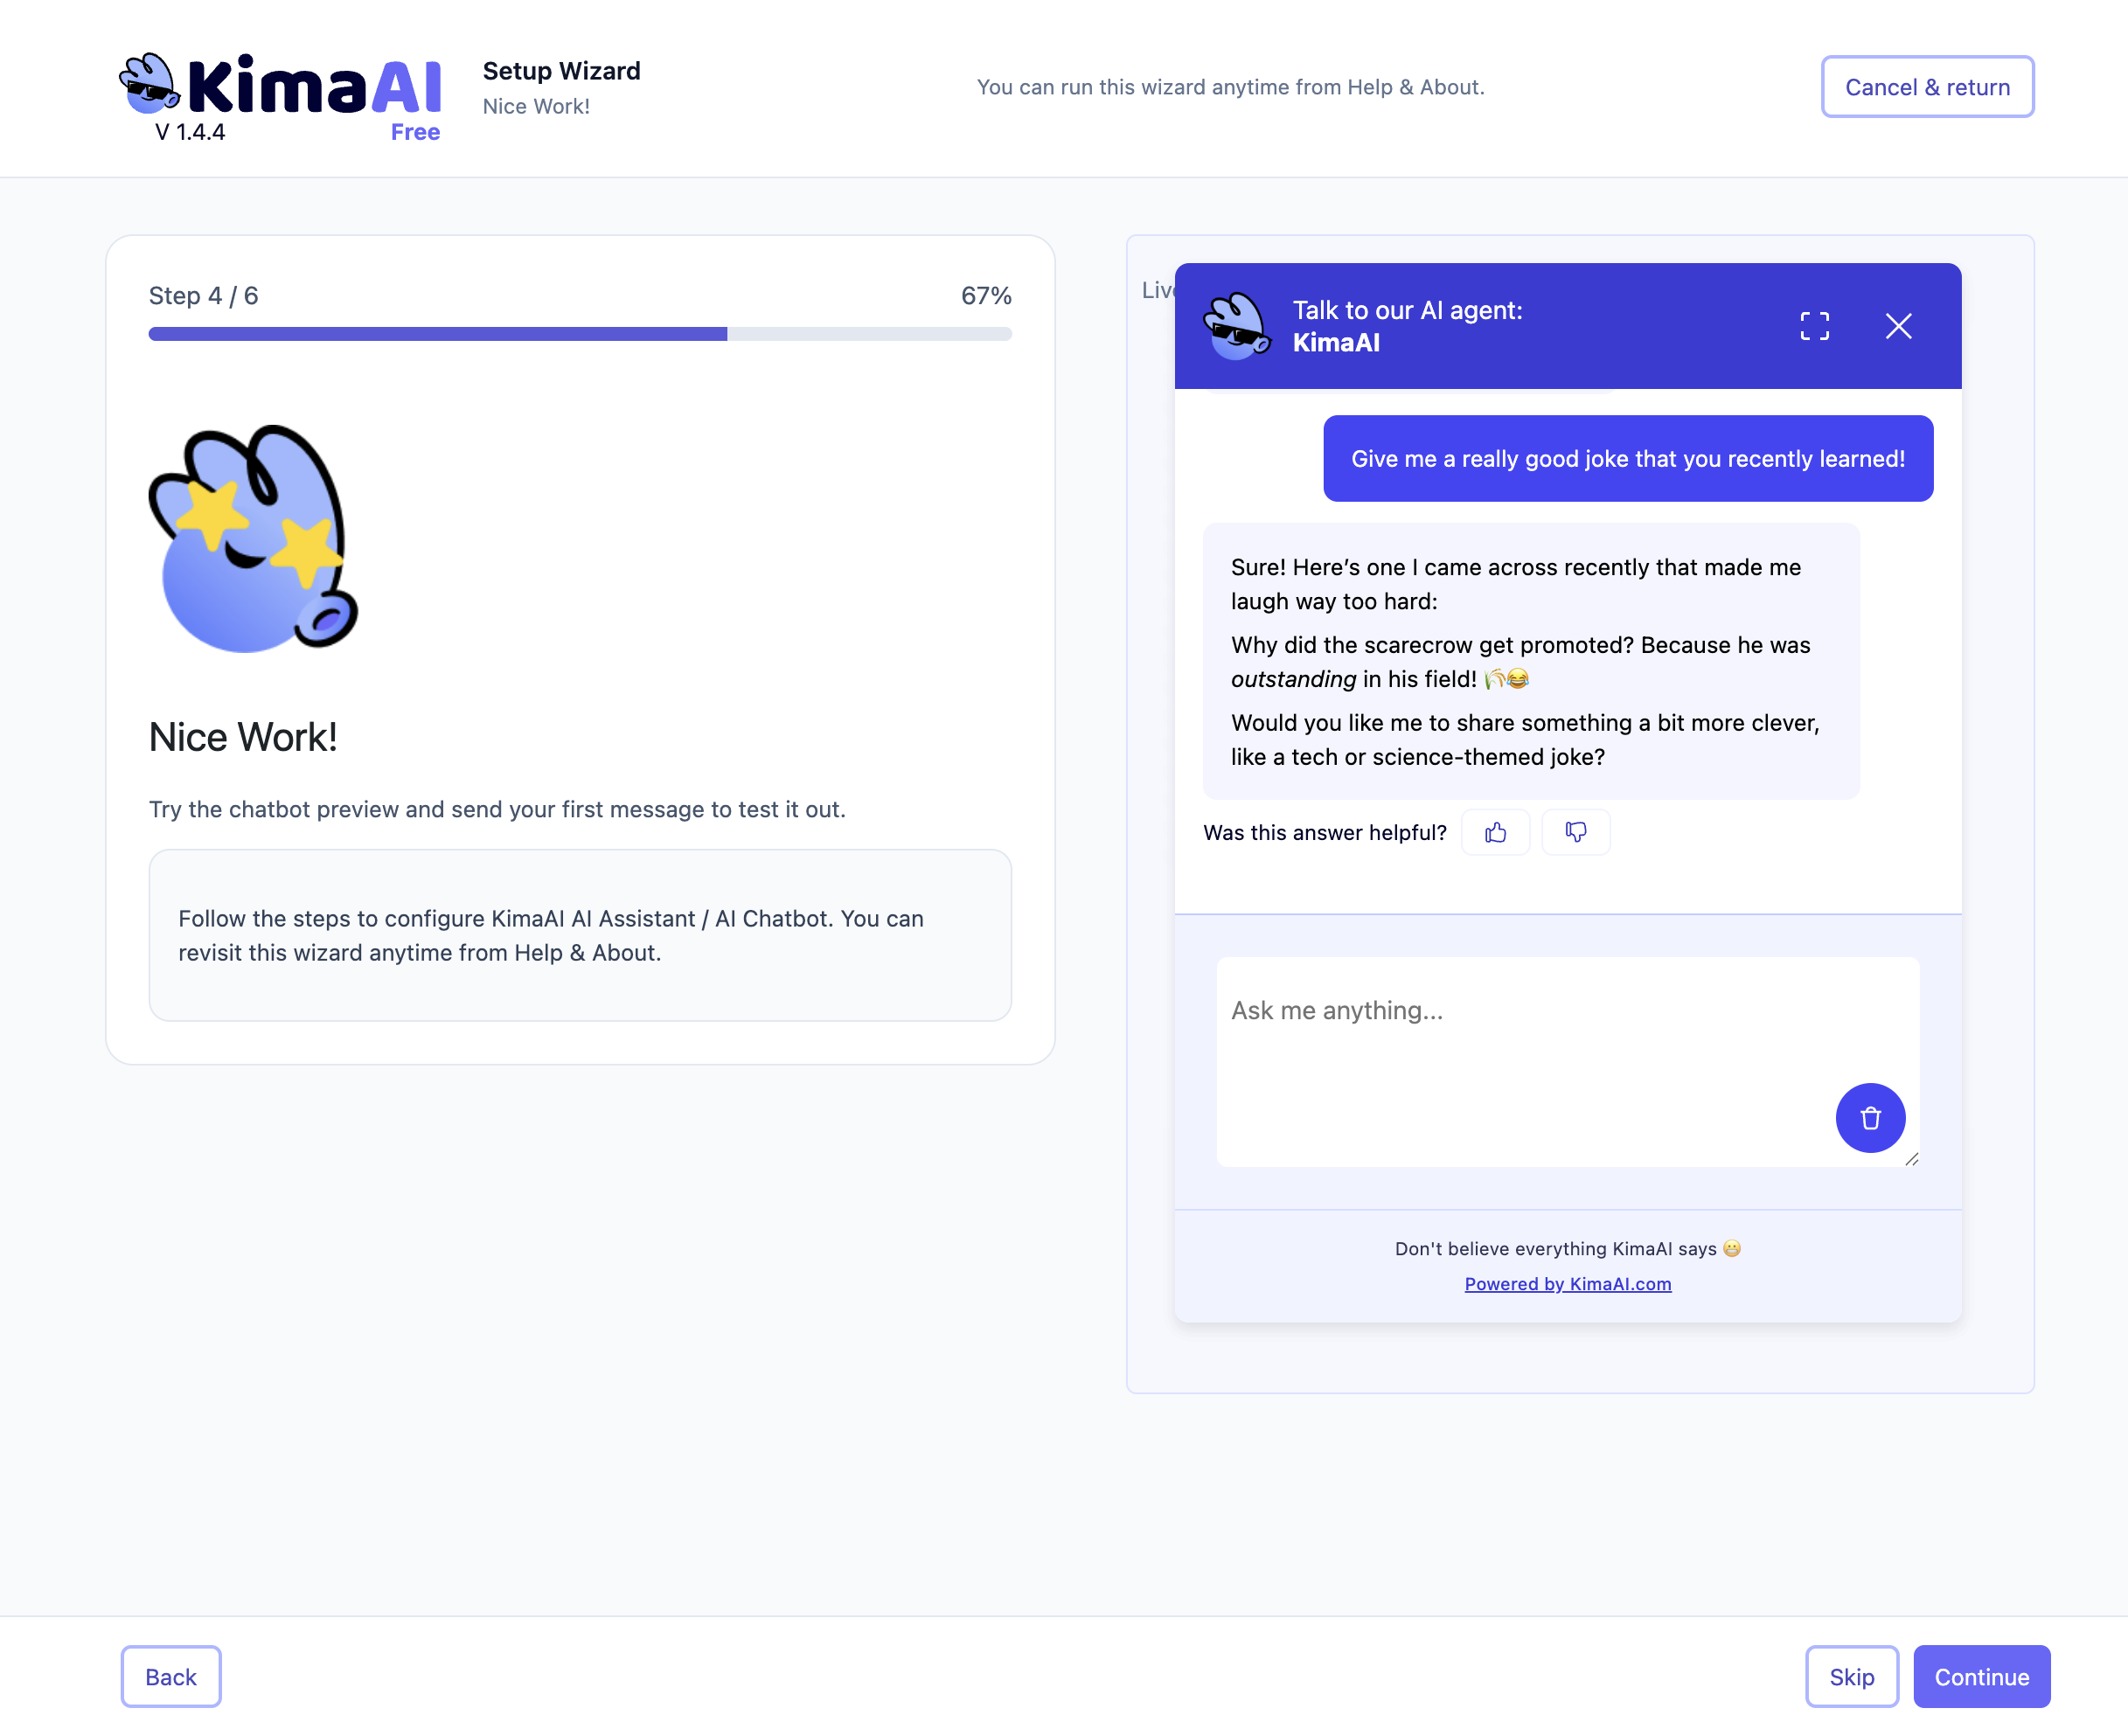
Of Course, this is just some fun for us! We will configure the chatbot later on to only answer questions about our business! Not to tell jokes! Unless you are a comedian and you make money by telling awkward jokes like mine 😬
Step 5
Now, jokes aside, on step 5, you can configure the chatbot’s appearance, you can change the chatbot icon, and the colors.
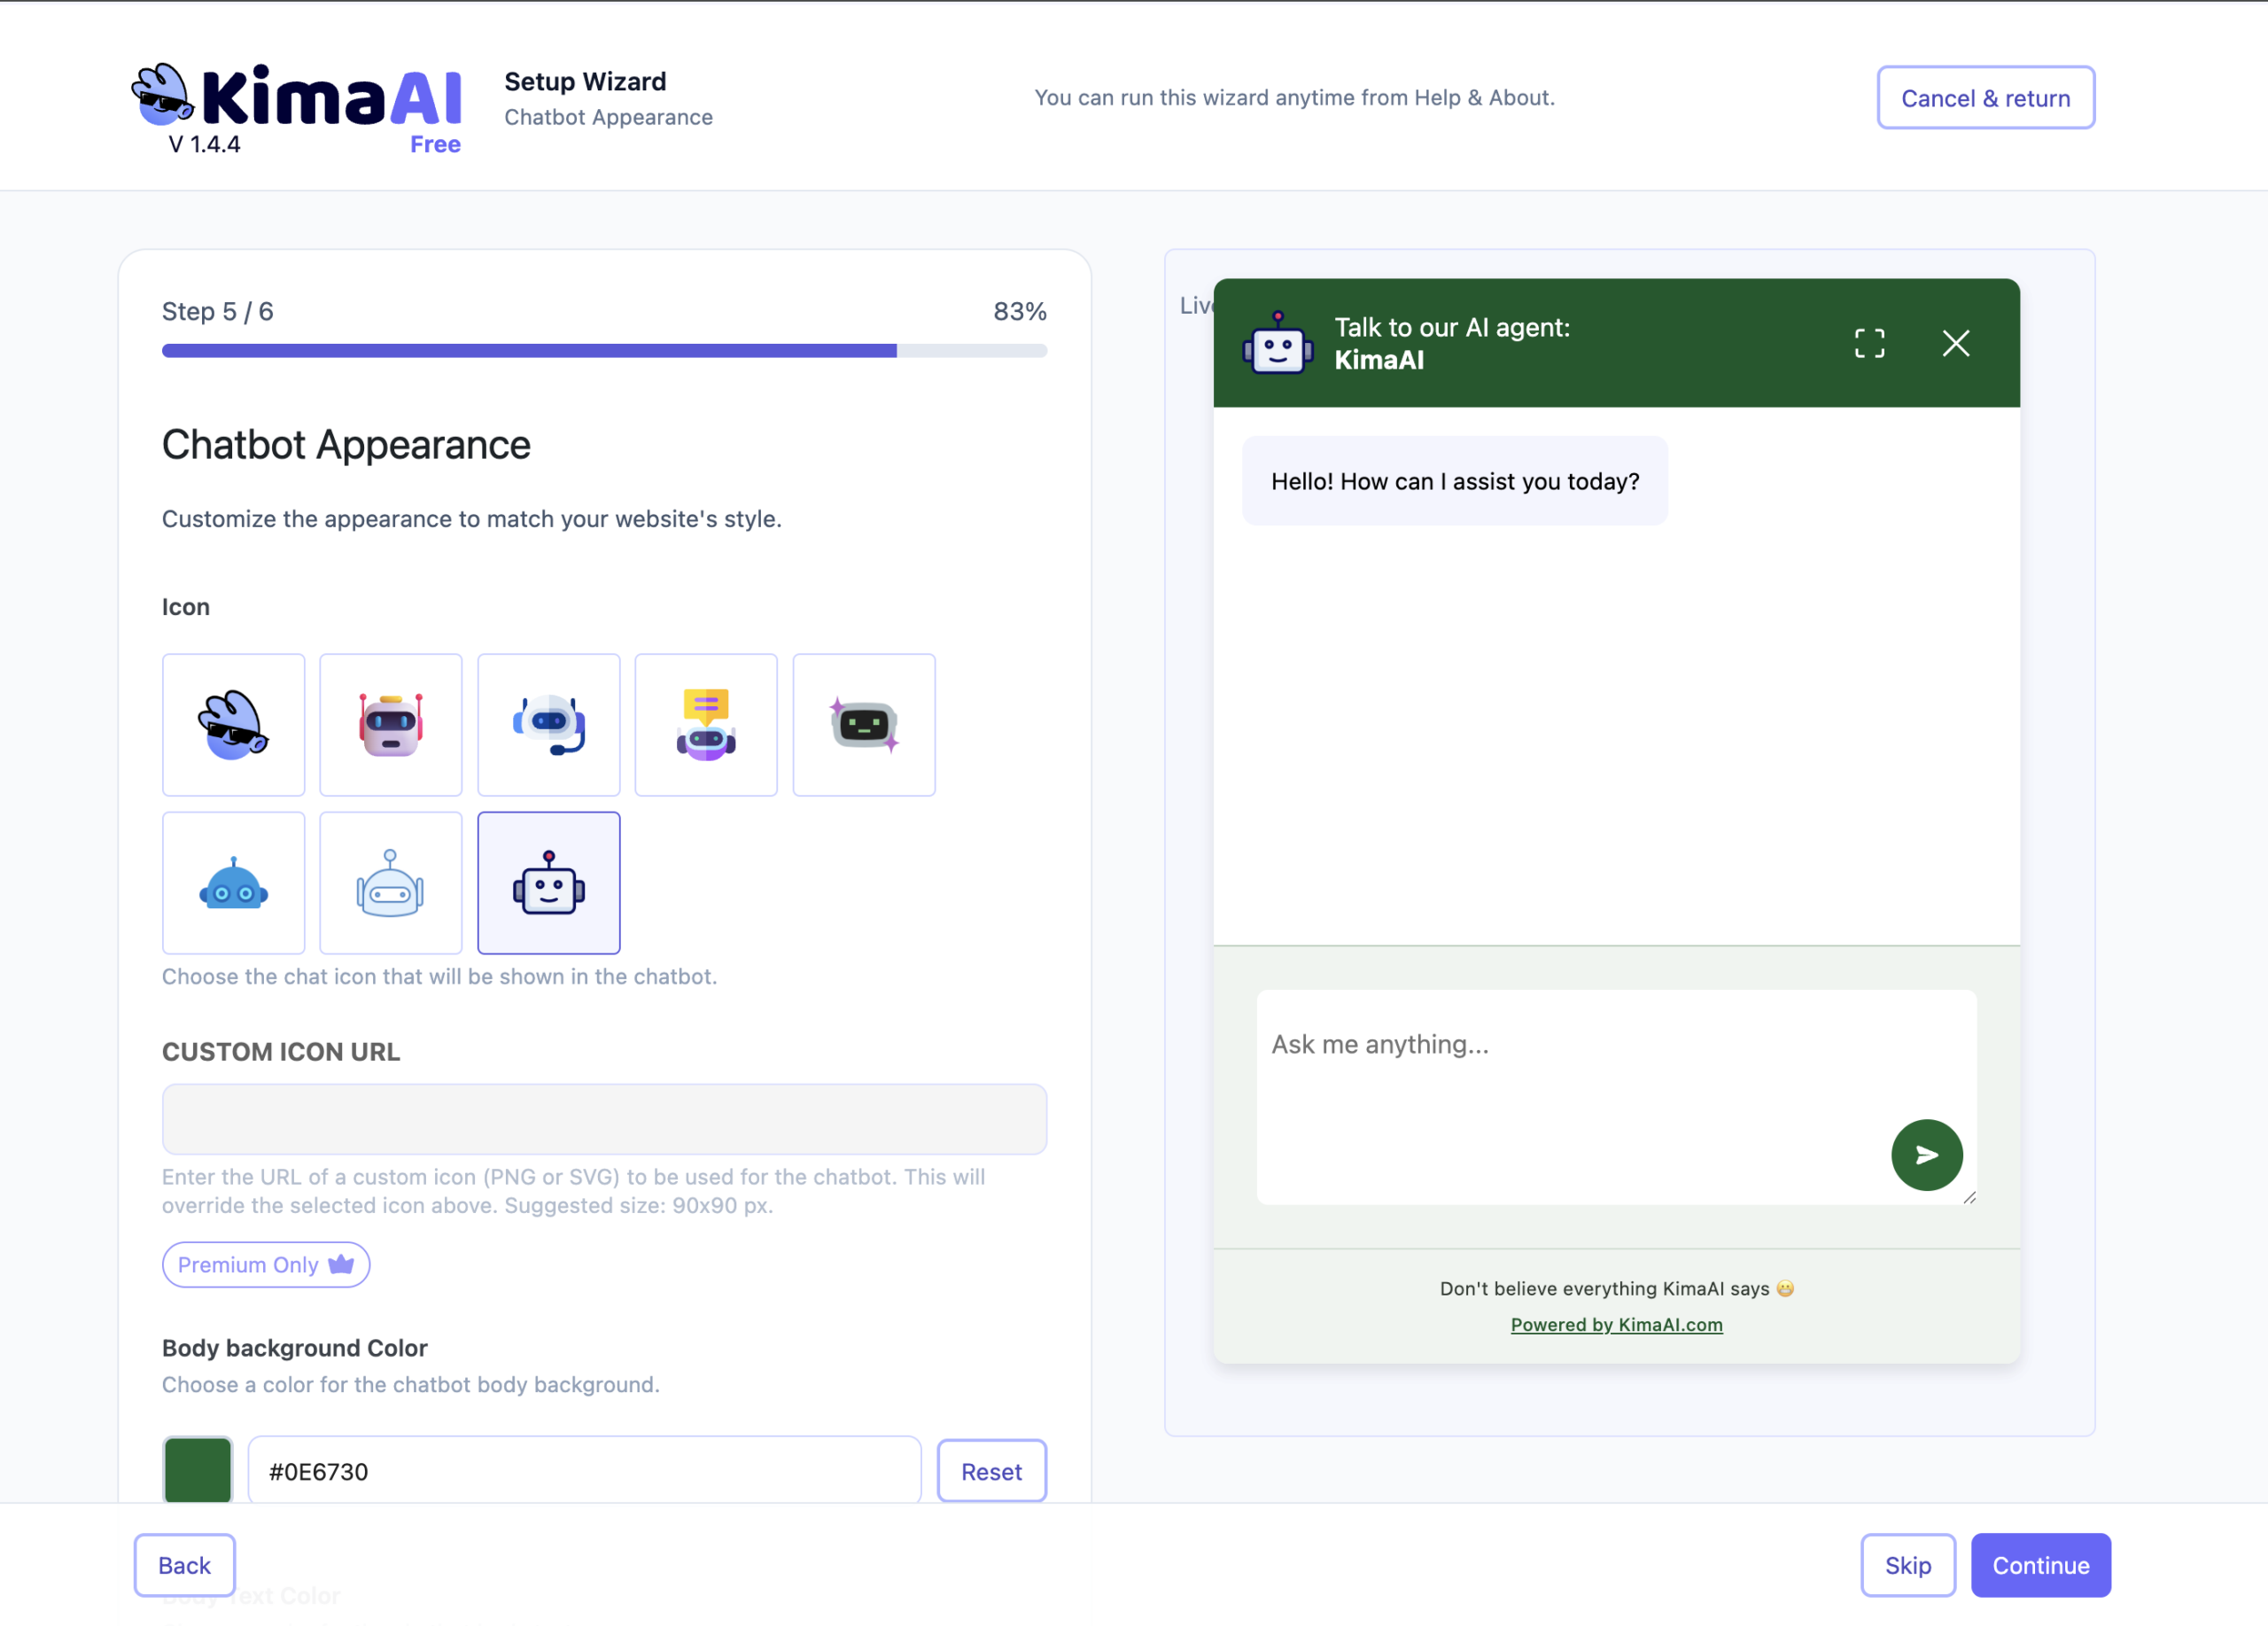
Don't forget this is just a simple set of settings for a fast setup and configuration; you can change and configure more settings in the KimaAI plugin dashboard. We will get to that.
Step 6
Congratulations! 🎉 You have completed the KimaAI setup wizard.
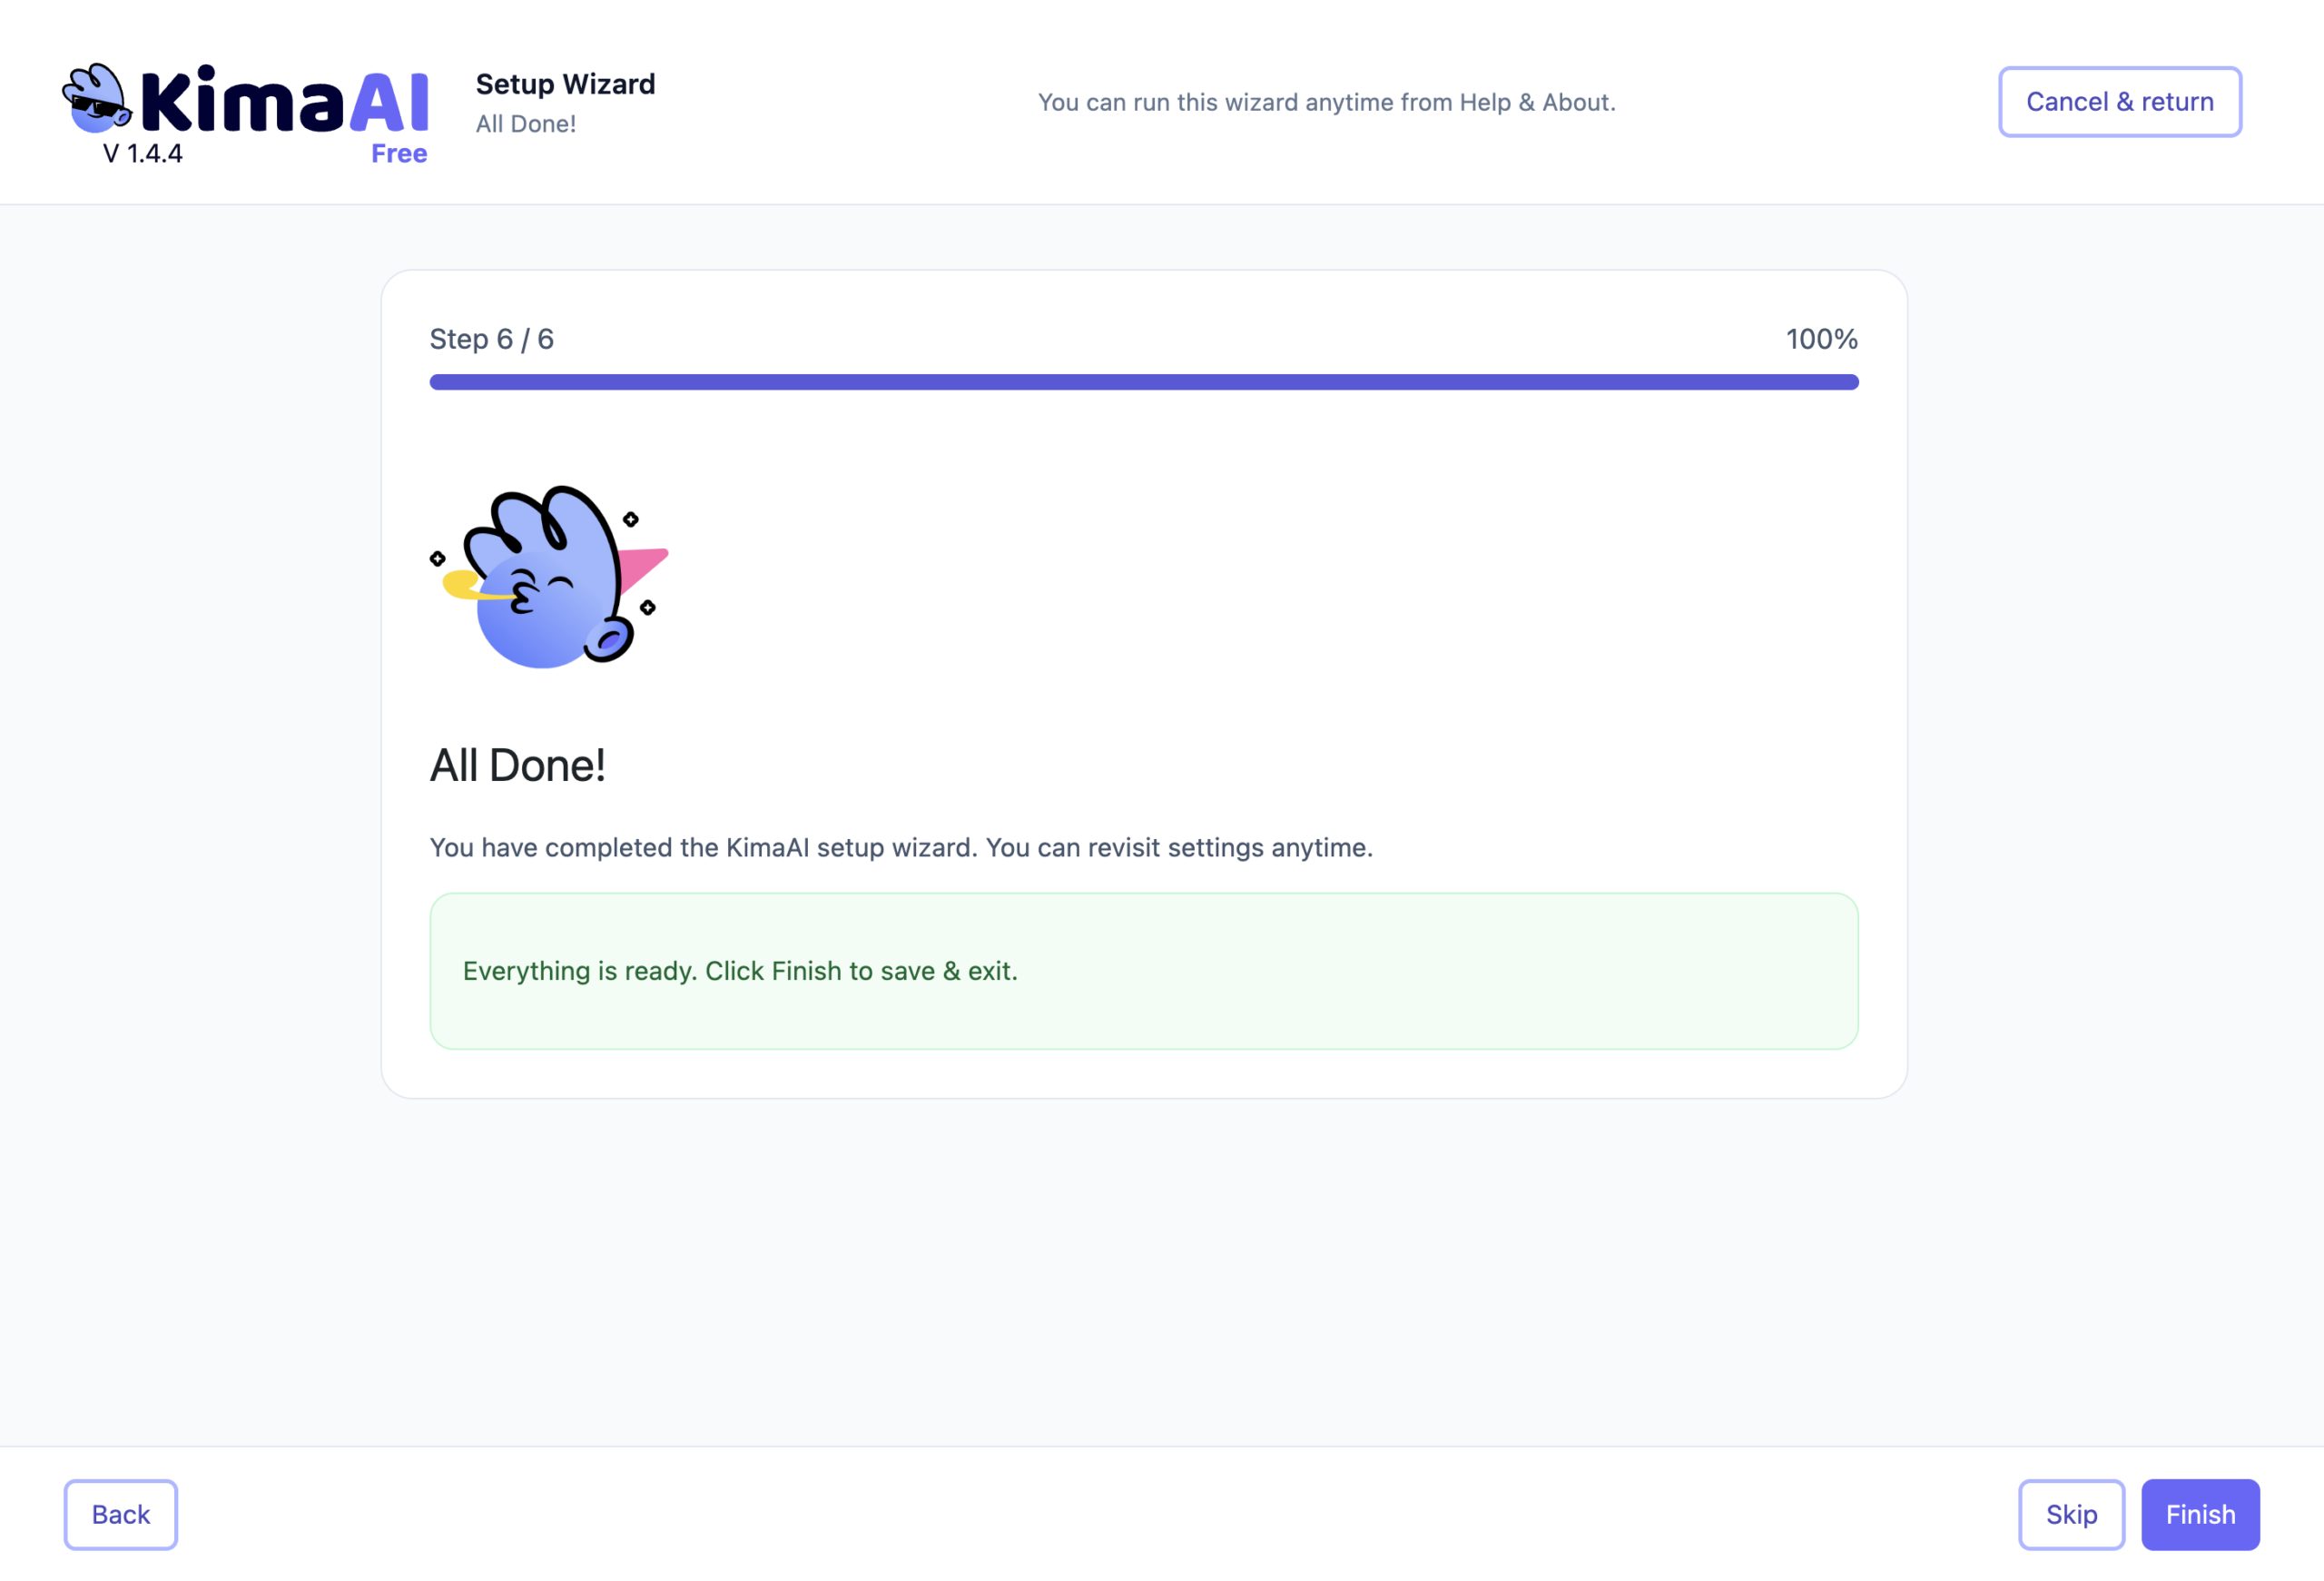
Now you can click on the “Finish” button and get back to the KimaAI dashboard.
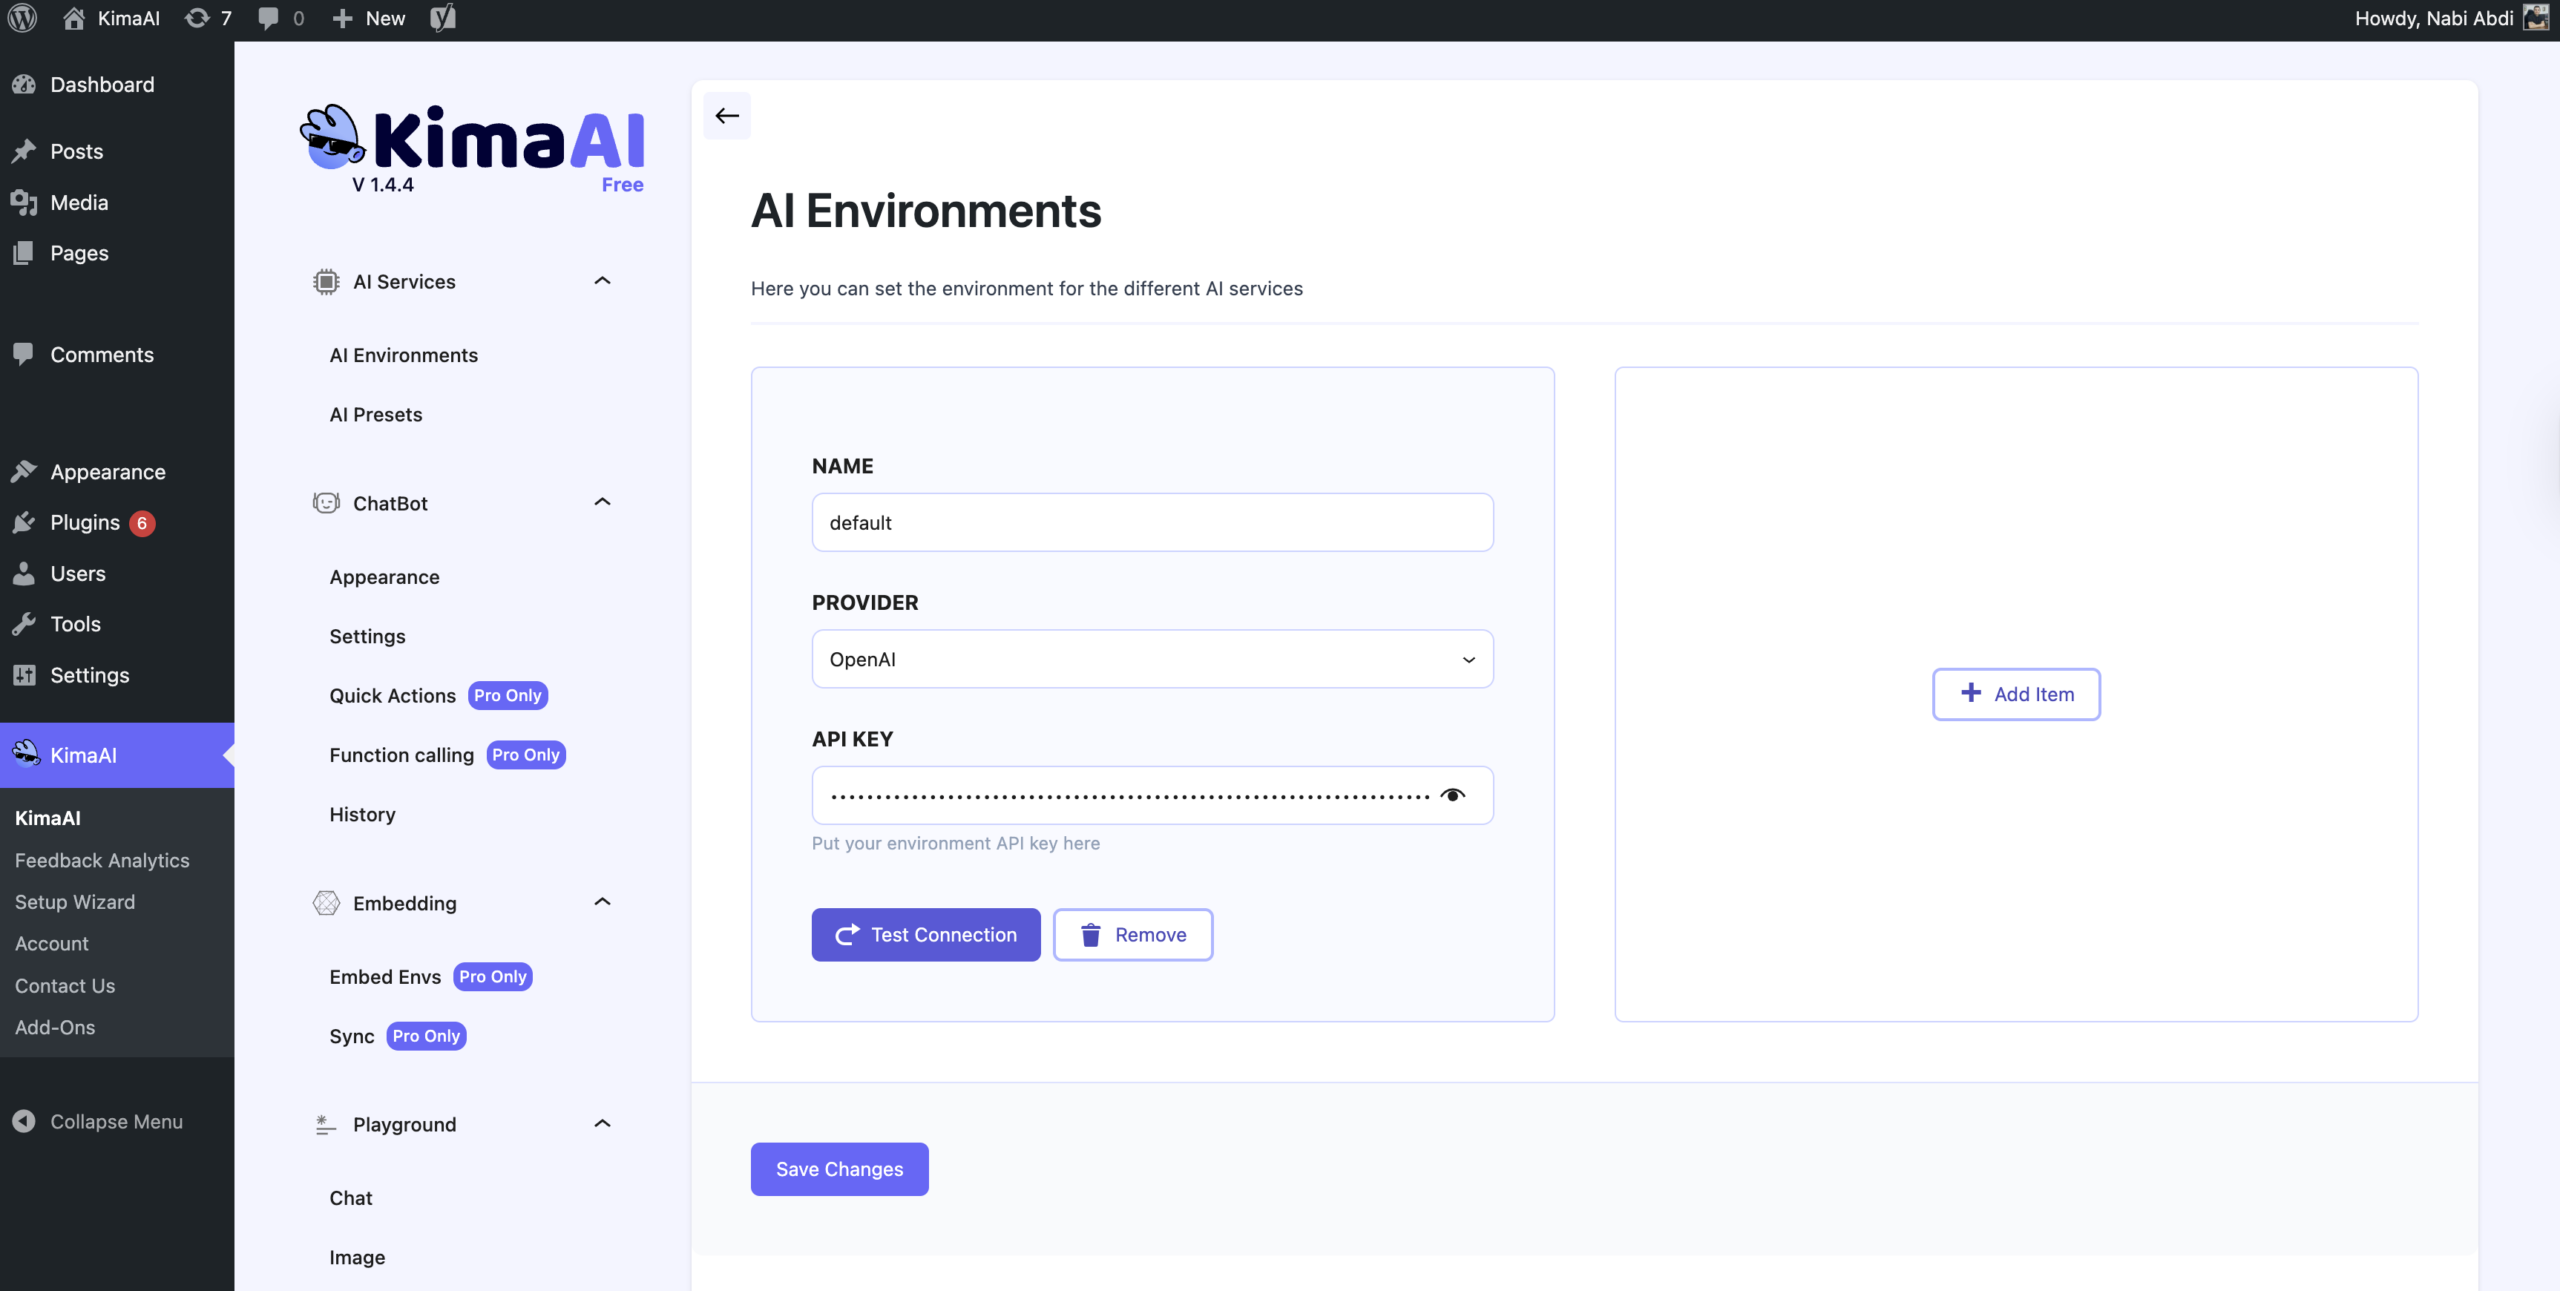
Now, as you can see in the following screenshot, you can change the settings you set up in the setup wizard on the KimaAI settings page. You can also customize and configure all the necessary settings on the page to make the AI Chatbot / AI Assistant fully work for your website.