Another vector database and vector search service that KimaAI supports is Qdrant. With a vector database and search service, you can create an AI knowledge base.
Create Qdrant account
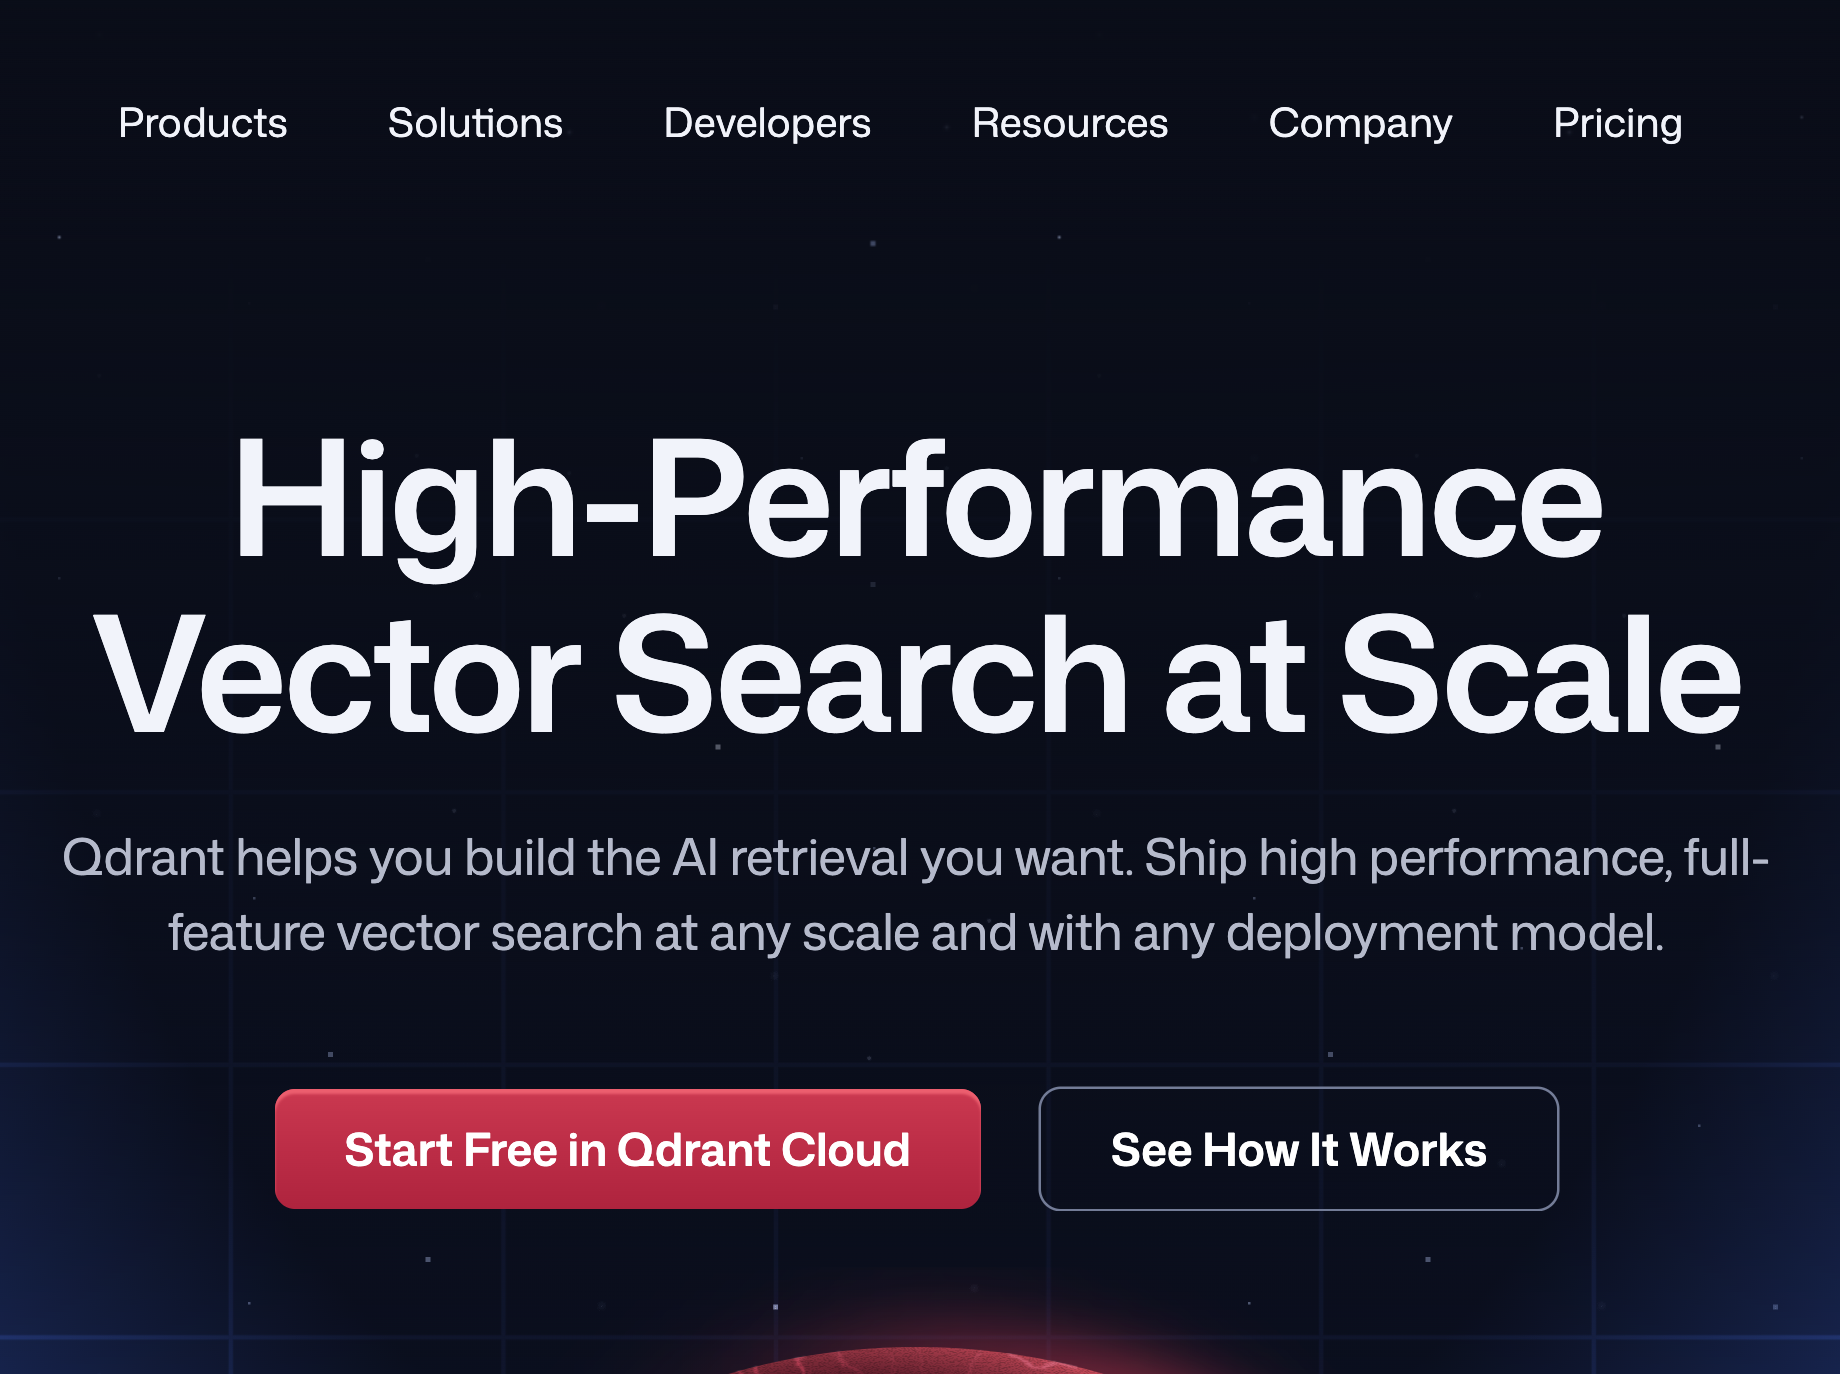
To get started, we need an account on Qdrant Cloud. Navigate to → https://qdrant.tech
Register inside Qdrant
Click on “Start Free in Qdrant Cloud” or the “Get Started” button; either way, you will be redirected to the registration page.
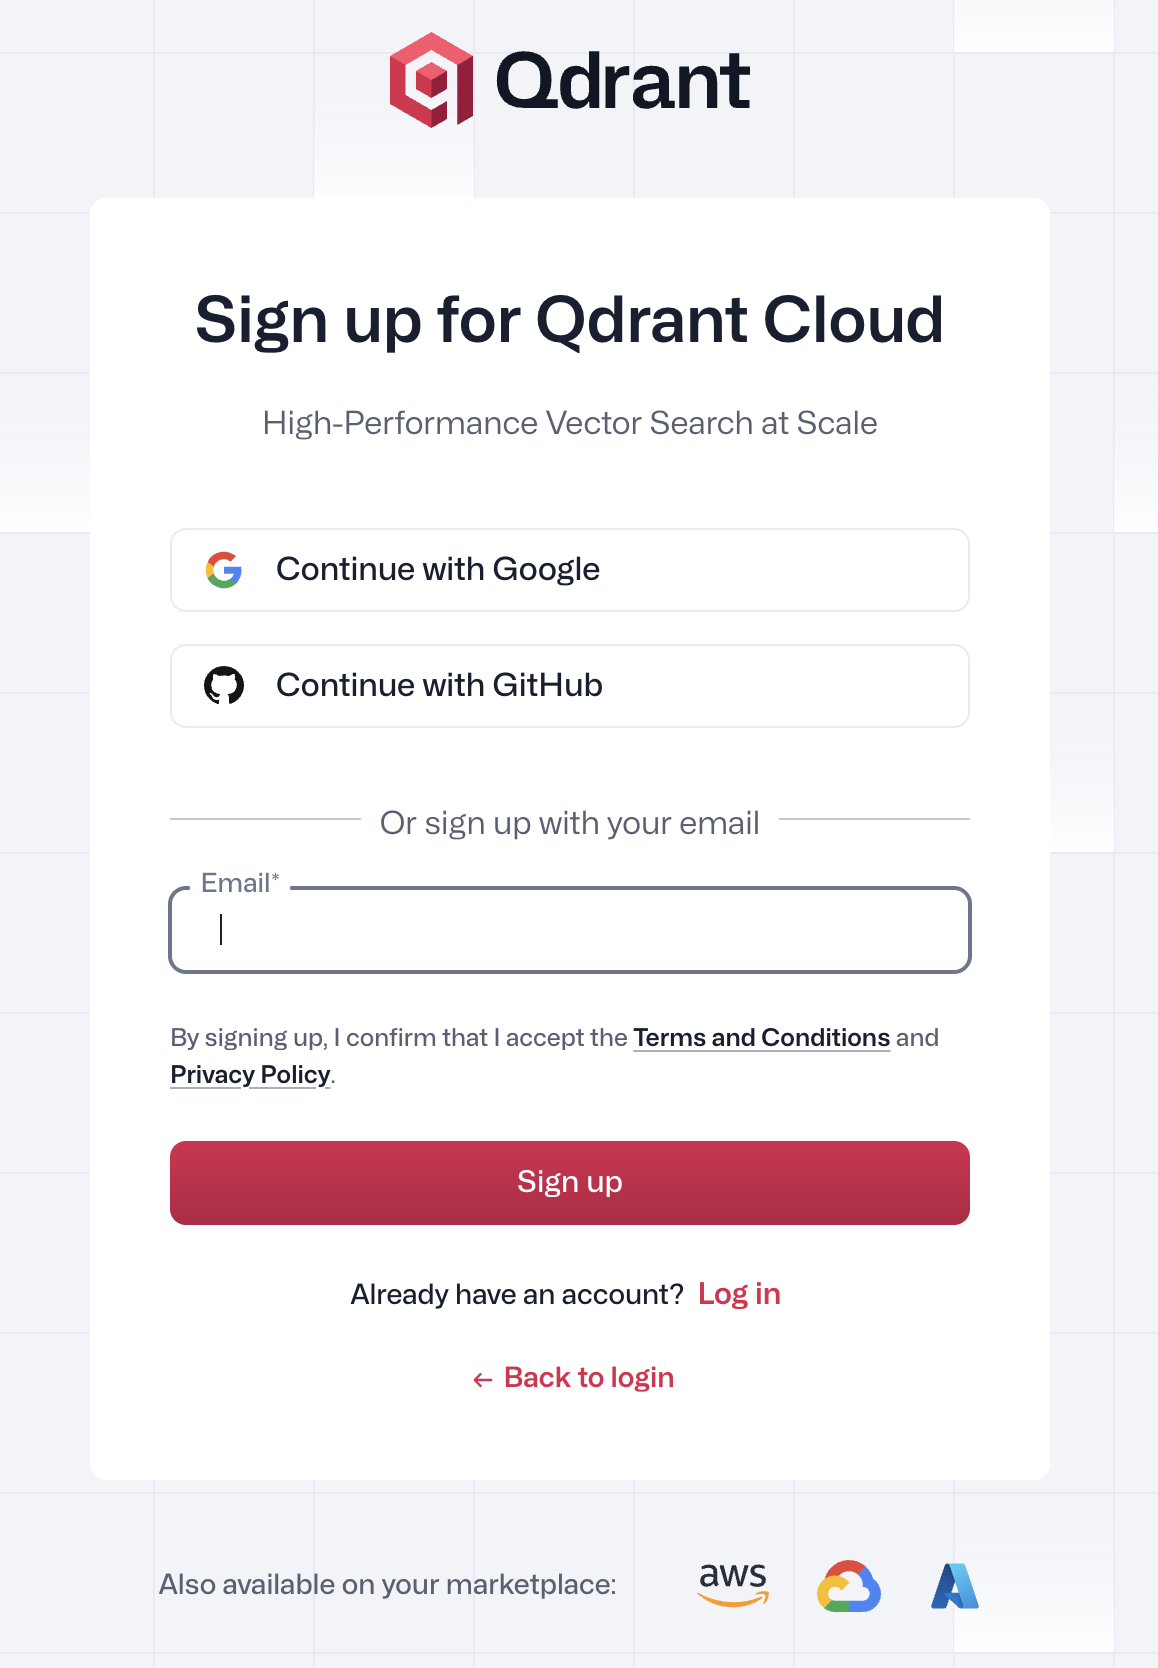
You can create an account with your Google/GitHub account, or just add your email, and set a password, then confirm your email and you will have a Qdrant account.
Create Cluster inside Qdrant
After the account creation, it’s time to create a Qdrant cluster. To do so, navigate to Clusters from the dashboard menu.
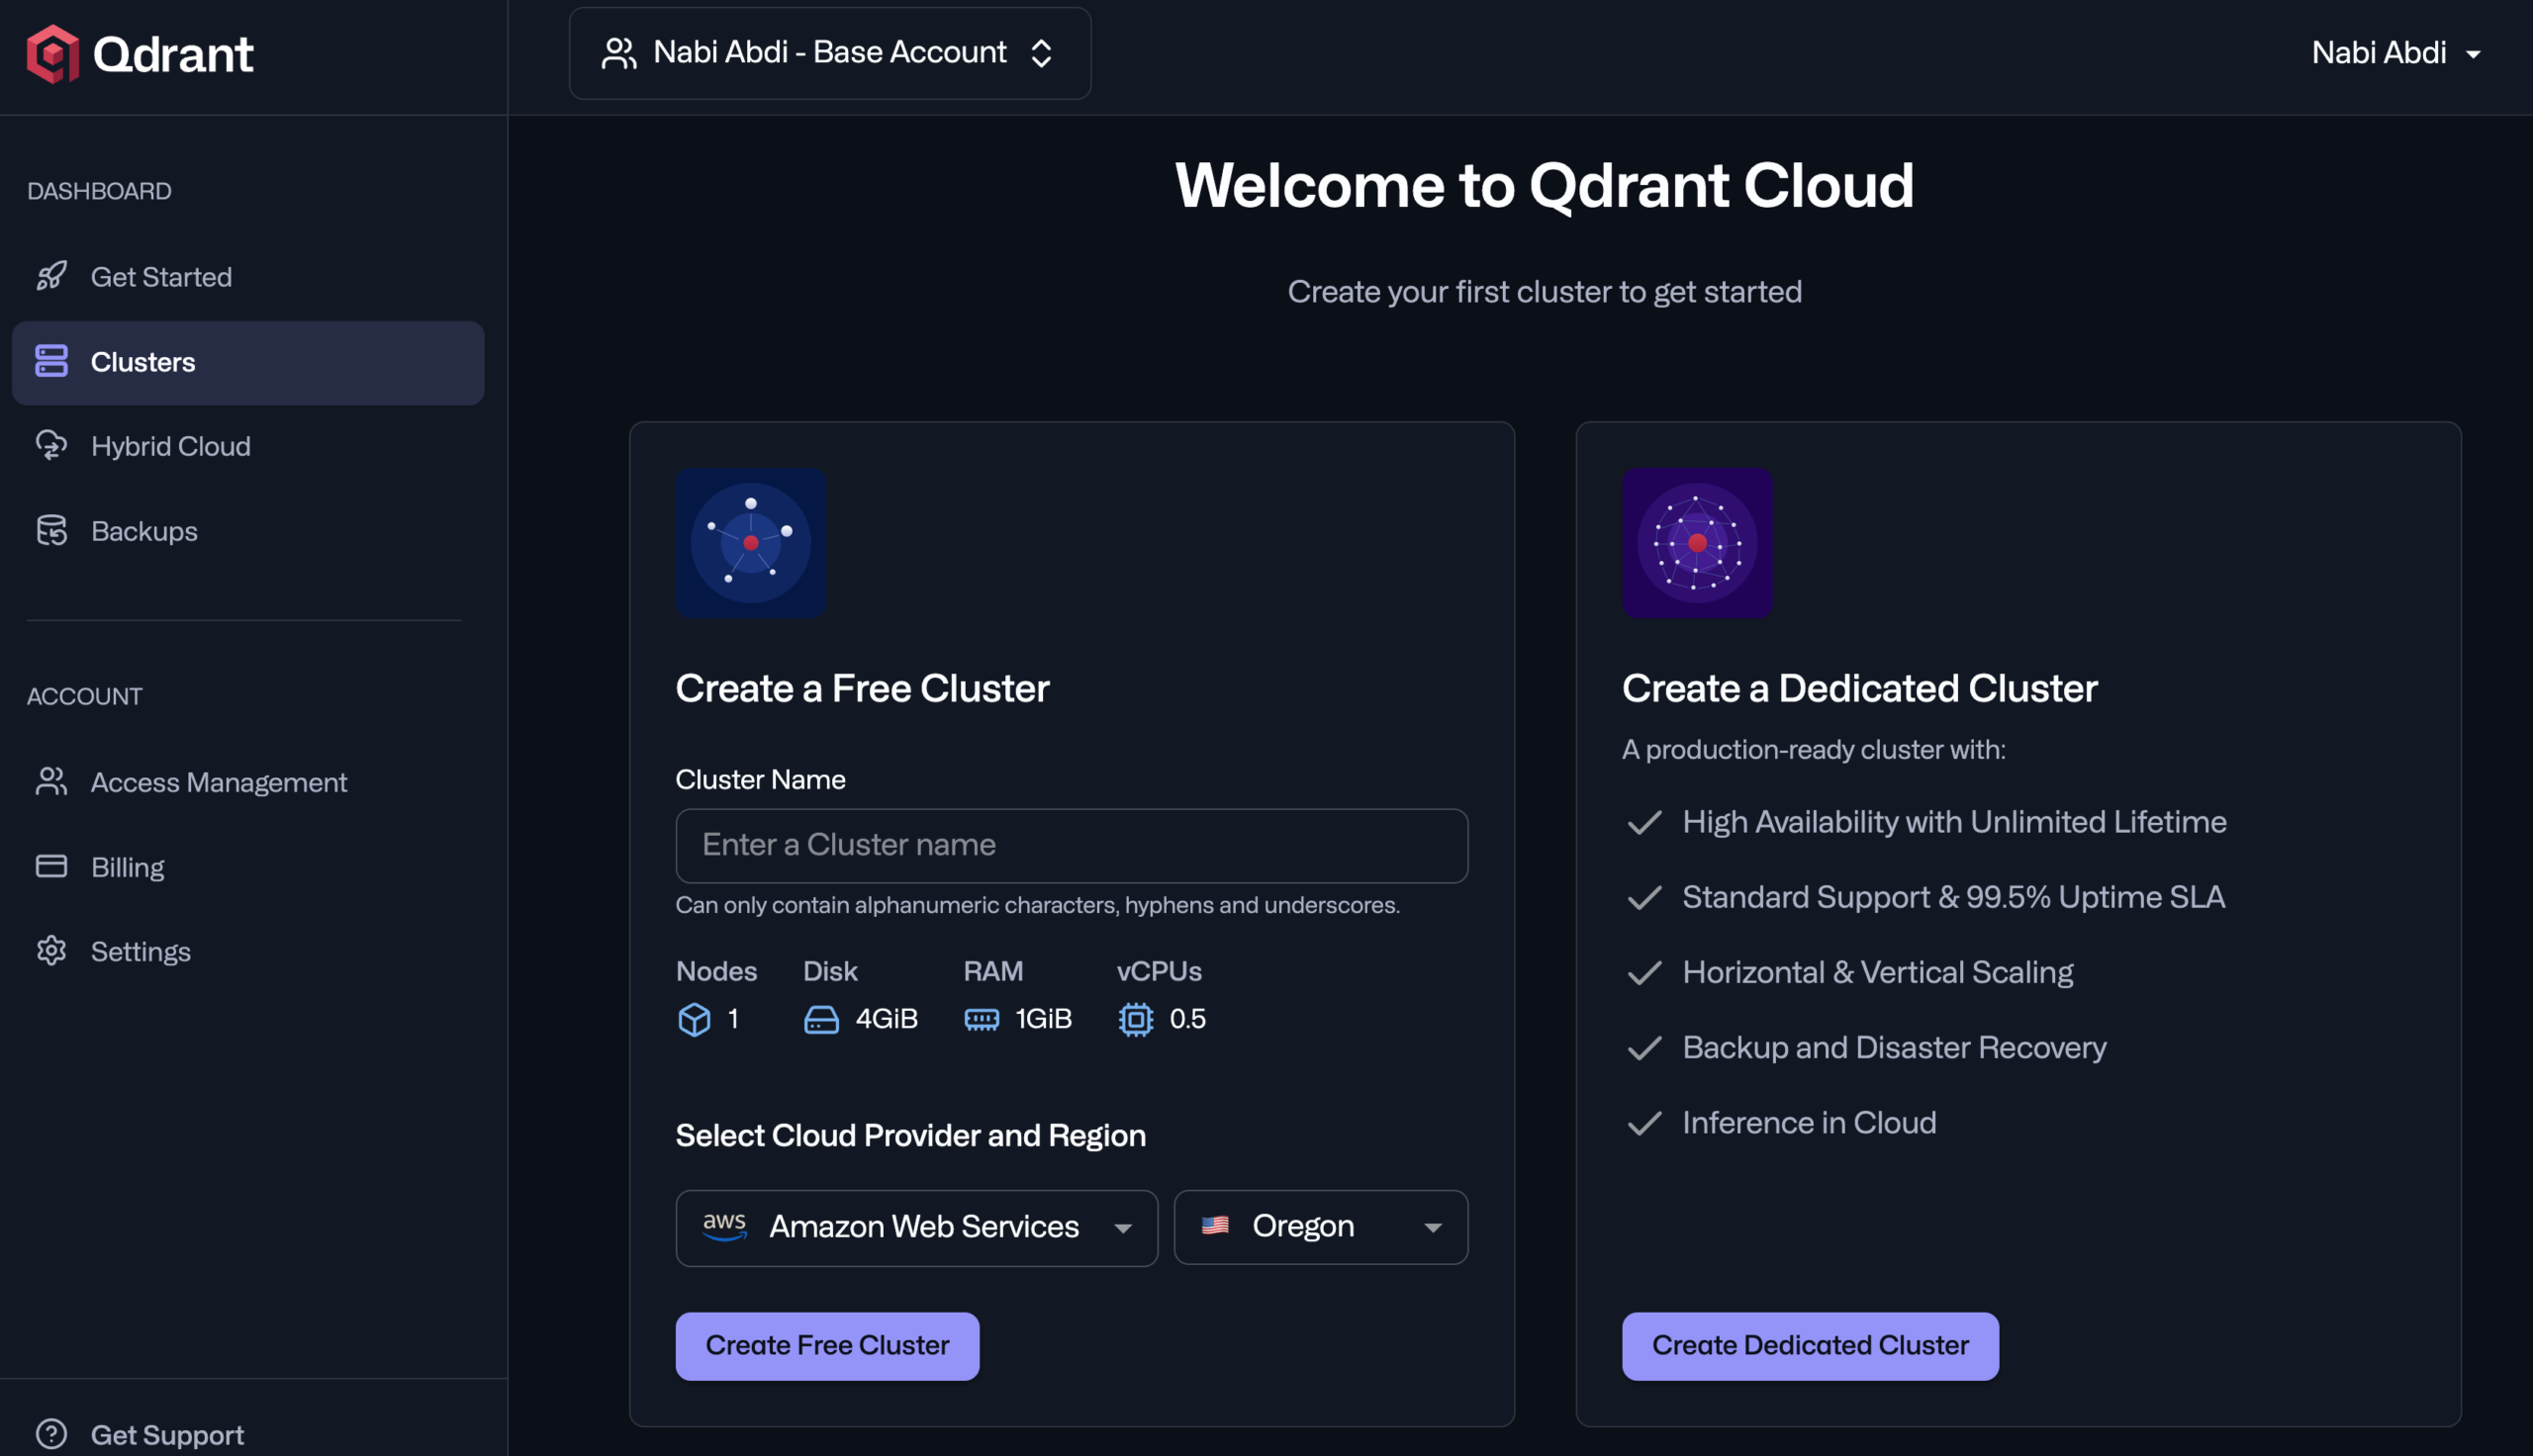
Now, as you can see in the above screenshot, we can create a free cluster.
- Cluster name: For the name, it’s better to use your domain website, for example, our website domain is kimaai.com, so we go with →
kimaai-comcluster name. - Cloud Provider and Region: Based on your website location, choose the cloud provider and region.
You can enter the cluster name and then click on the “Create Free Cluster” button.
Qdrant API Key and Cluster Endpoint
Immediately after that, you will see a pop-up that contains the cluster API key and the Cluster Endpoint.
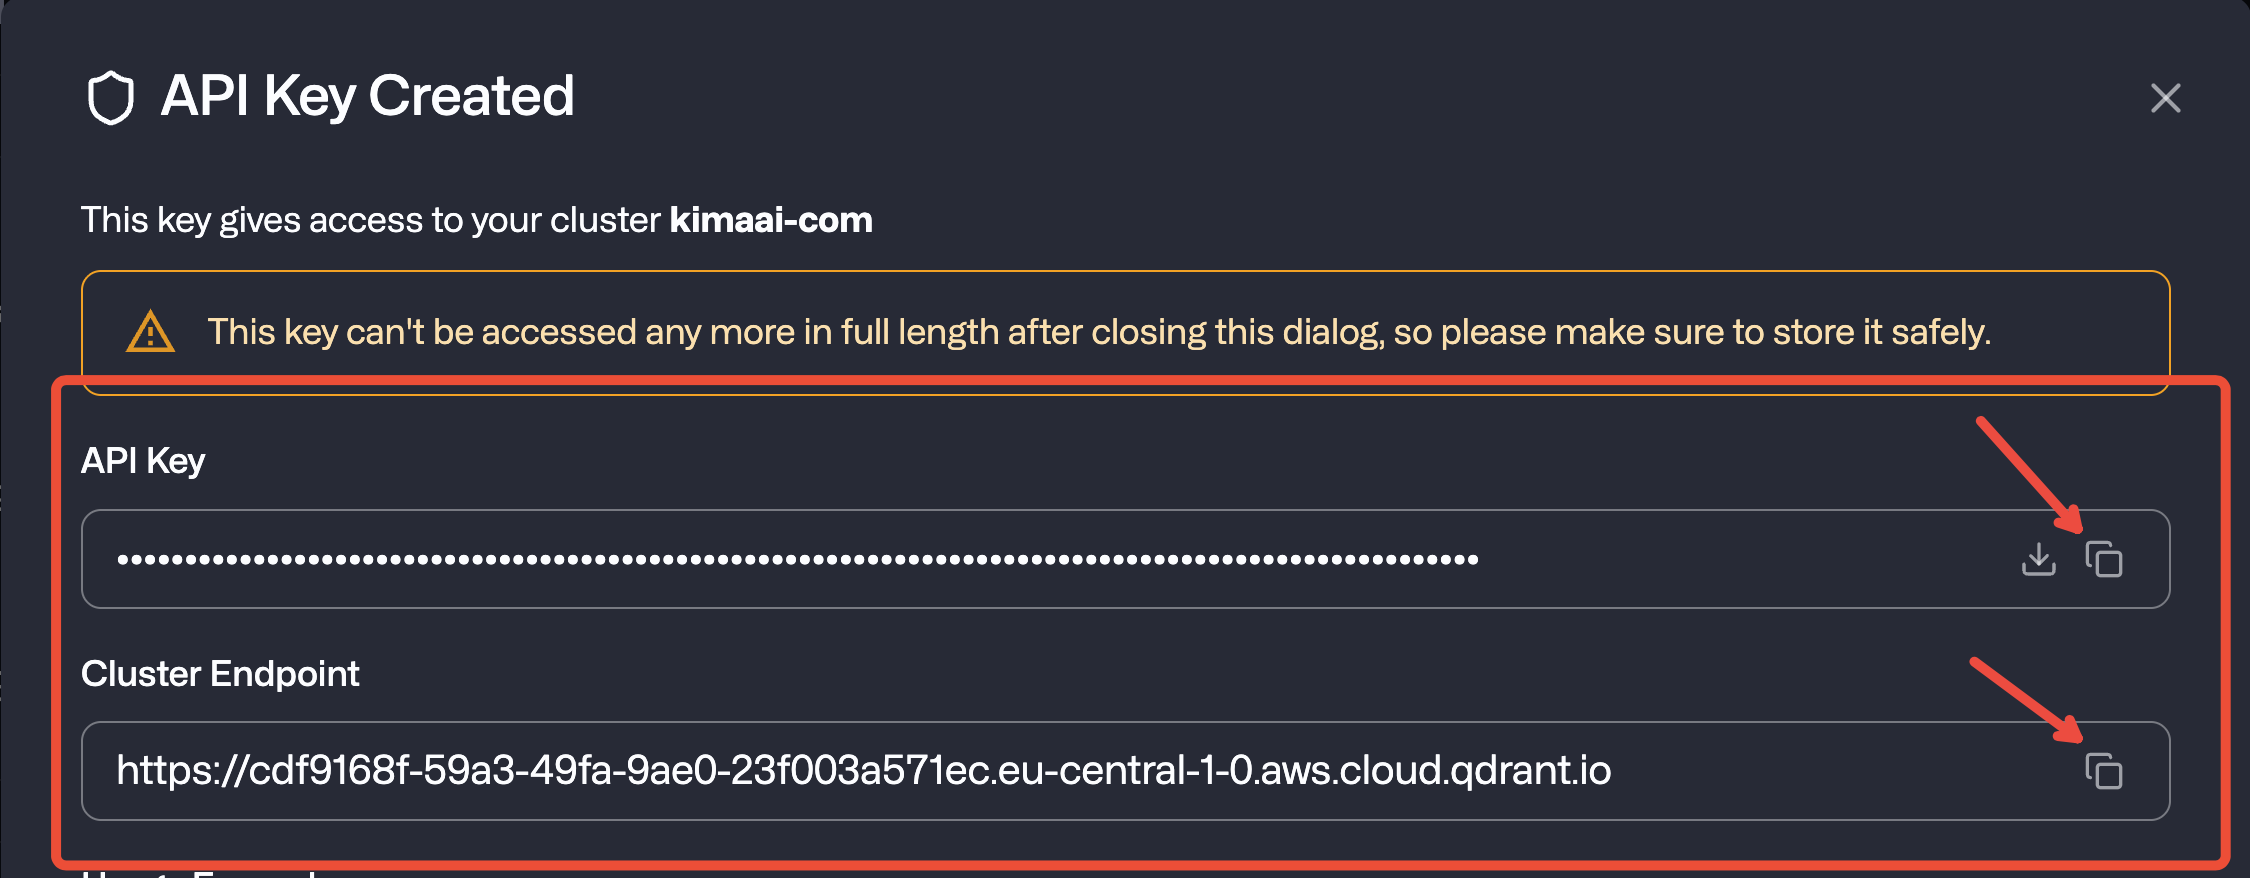
Copy the API key and Cluster Endpoint, because we will need them for the next steps.
In any case, if you want to manage the cluster’s API keys, we will check this in the next steps.
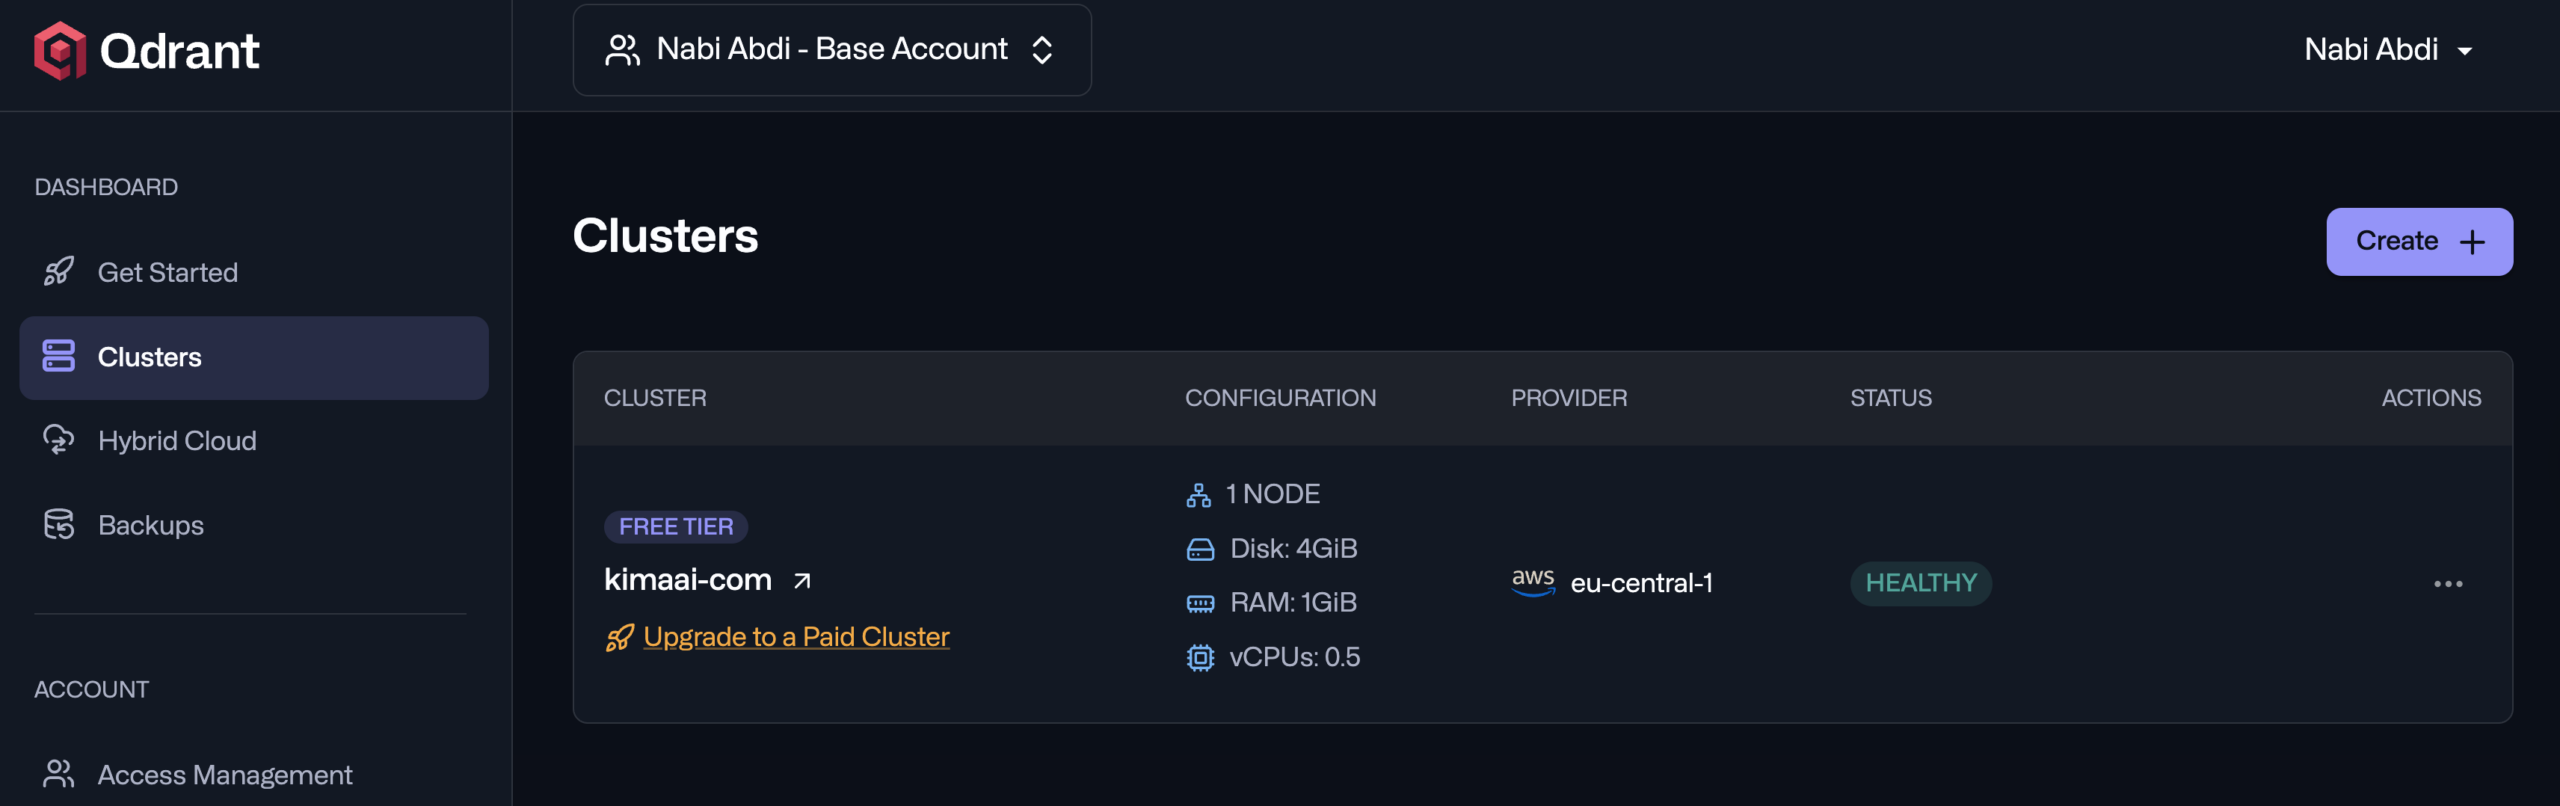
Check the recent cluster we created
Navigate to → Qdrant dashboard → Clusters to see the clusters list like the following:
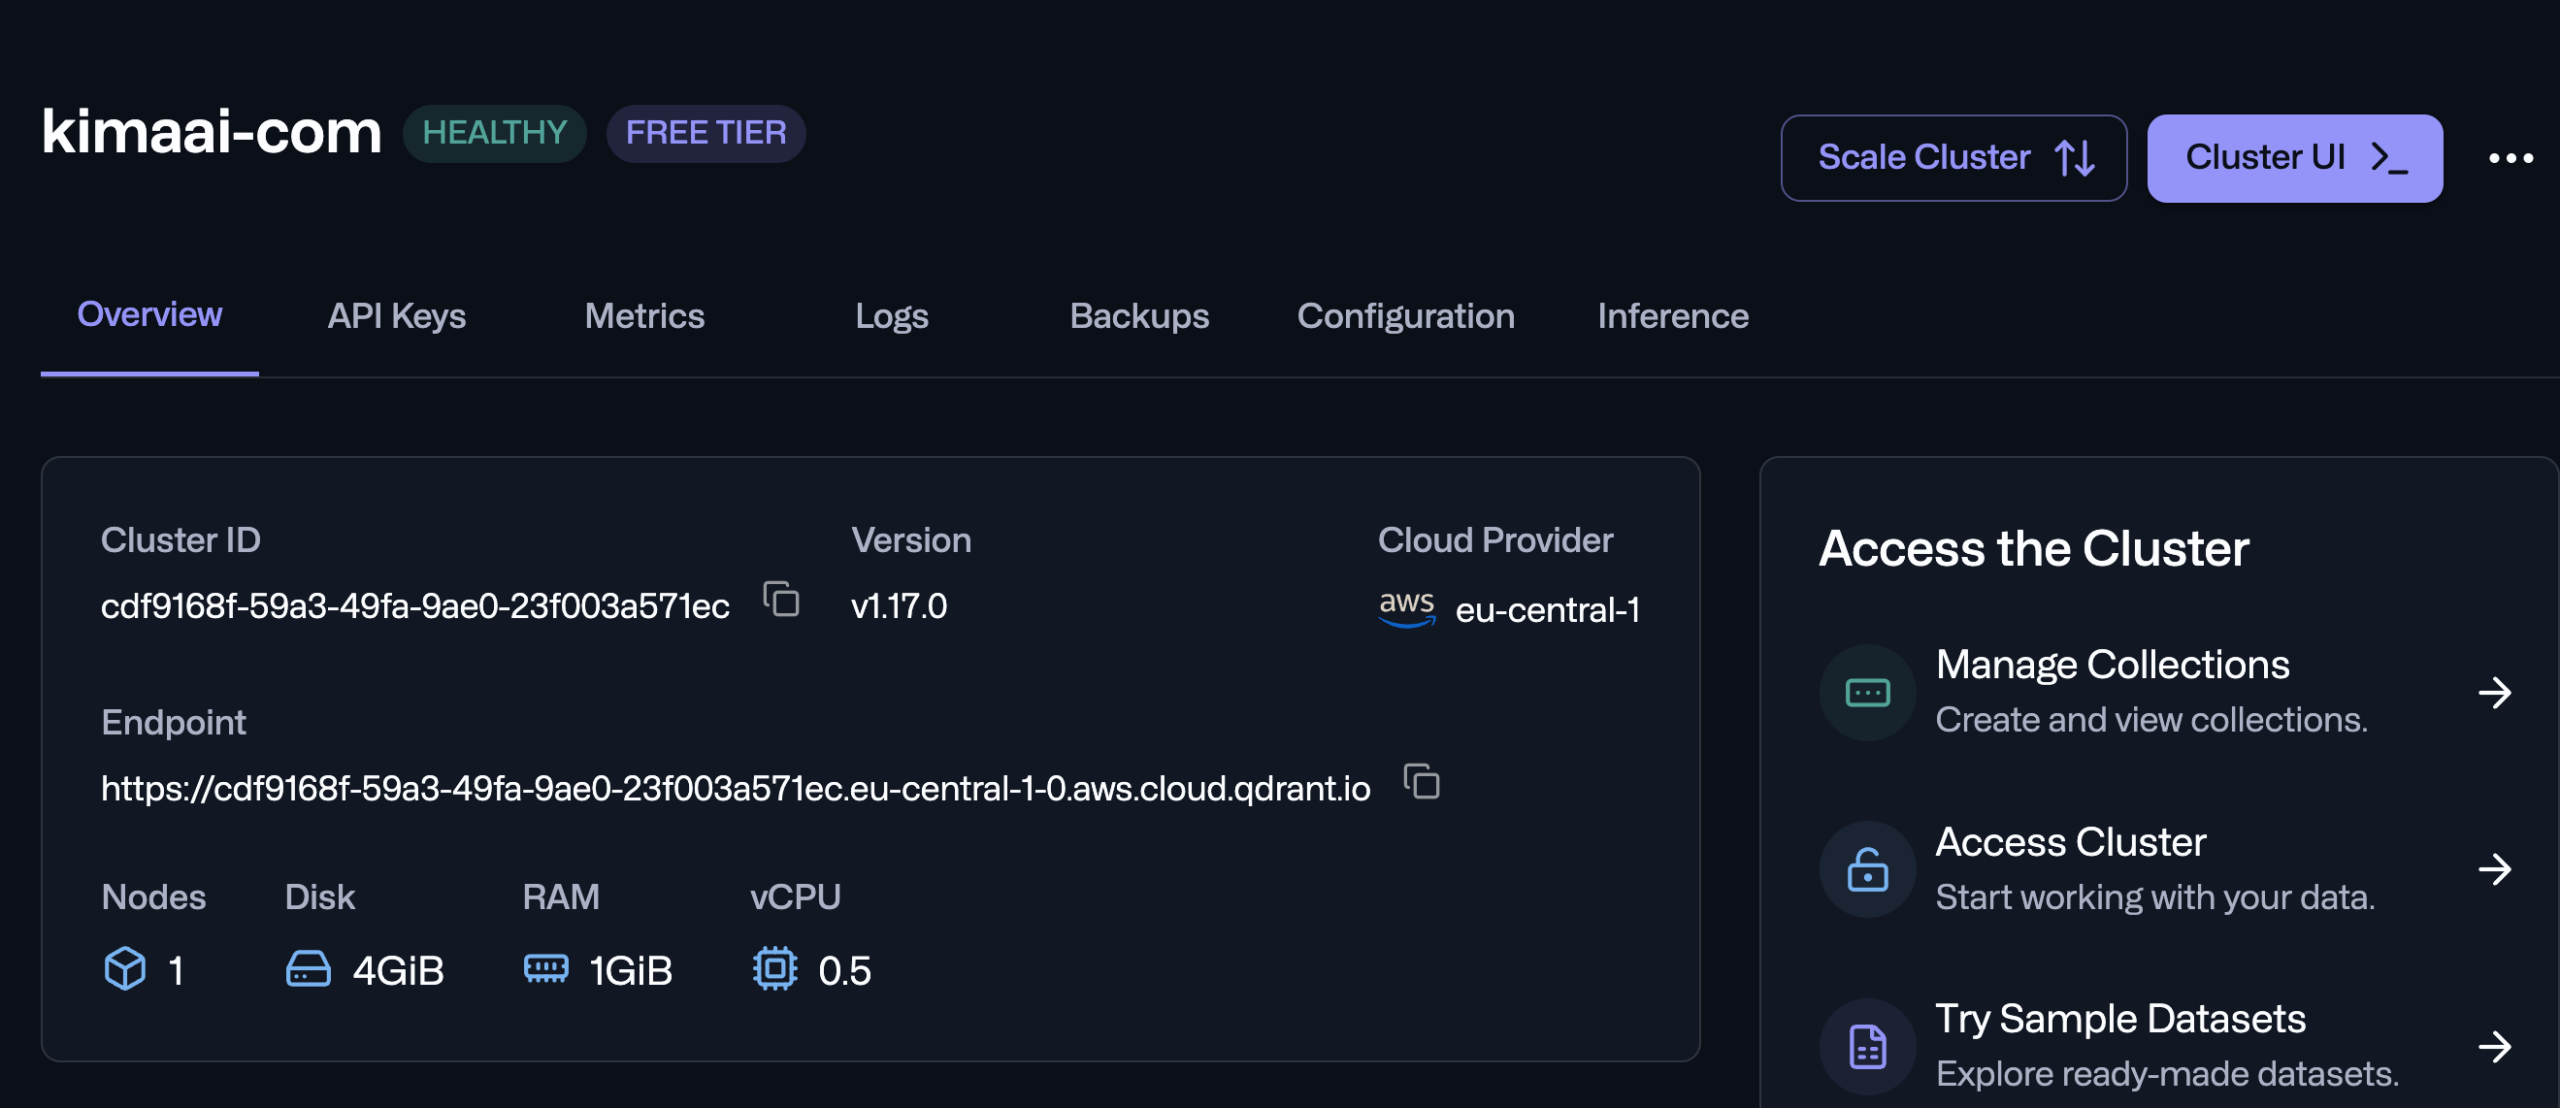
If you click on the cluster that we just created, you will be redirected to the cluster’s detail page like the following:
Cluster’s API key
In the API Keys tab, you can see and manage the cluster’s API keys like the following:
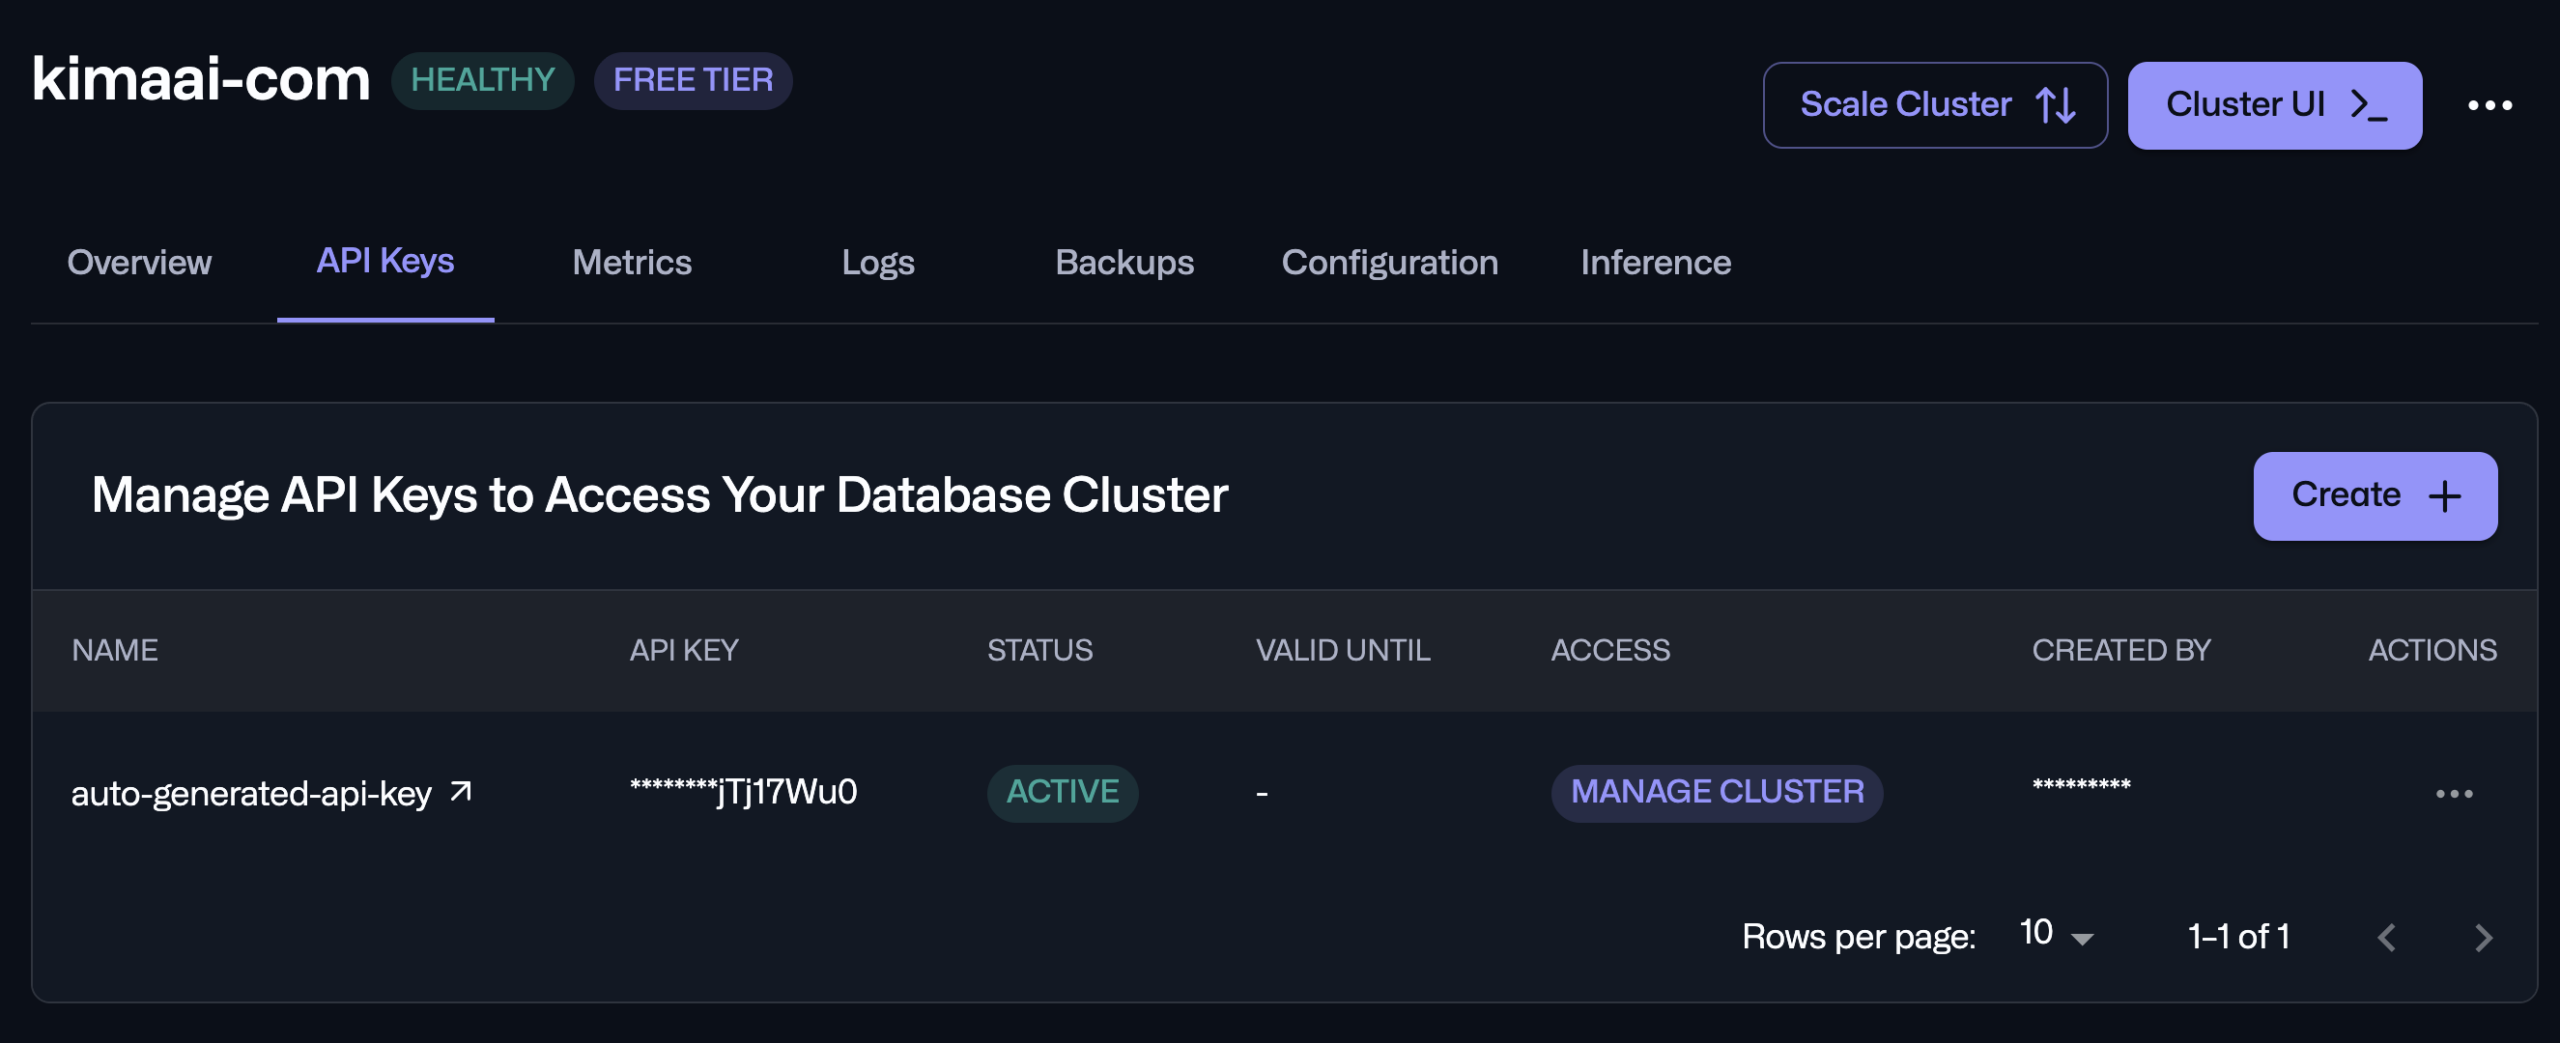
In this page, you can remove the current API keys and create new ones.
Manage Collections
For managing the collections, get back to the overview tab and click on the Manage Collection from the right-hand sidebar, then you should see a page like the following:


